
SCCM Post-Installation Configuration
This document covers post-installation setup and configuration to make SCCM fully functional. It follows my previous project where I performed end-to-end SCCM server deployment: Access Here
I have divided the configuration tasks in 6 manageable parts:
- Install and Configure Site System Roles
- Configure Boundaries and Boundary groups
- Configure Discovery
- Configure Client Push
- Deploy Custom Client Settings (Lab Optimization)
- Validation Tests
Infrastructure Components
| Virtual Component | Description | IP Address |
|---|---|---|
| Address space | Address space used in this lab | 172.16.171.0/24 |
| FA-DC01 | Domain Controller | 172.16.171.5 |
| FA-SCCM | SCCM Site Server + SQL Server | 172.16.171.10 |
| FA-Client01 | Windows 11 Client | 172.16.171.15 |
1. Install and Configure Site System Roles
Configure Report Server
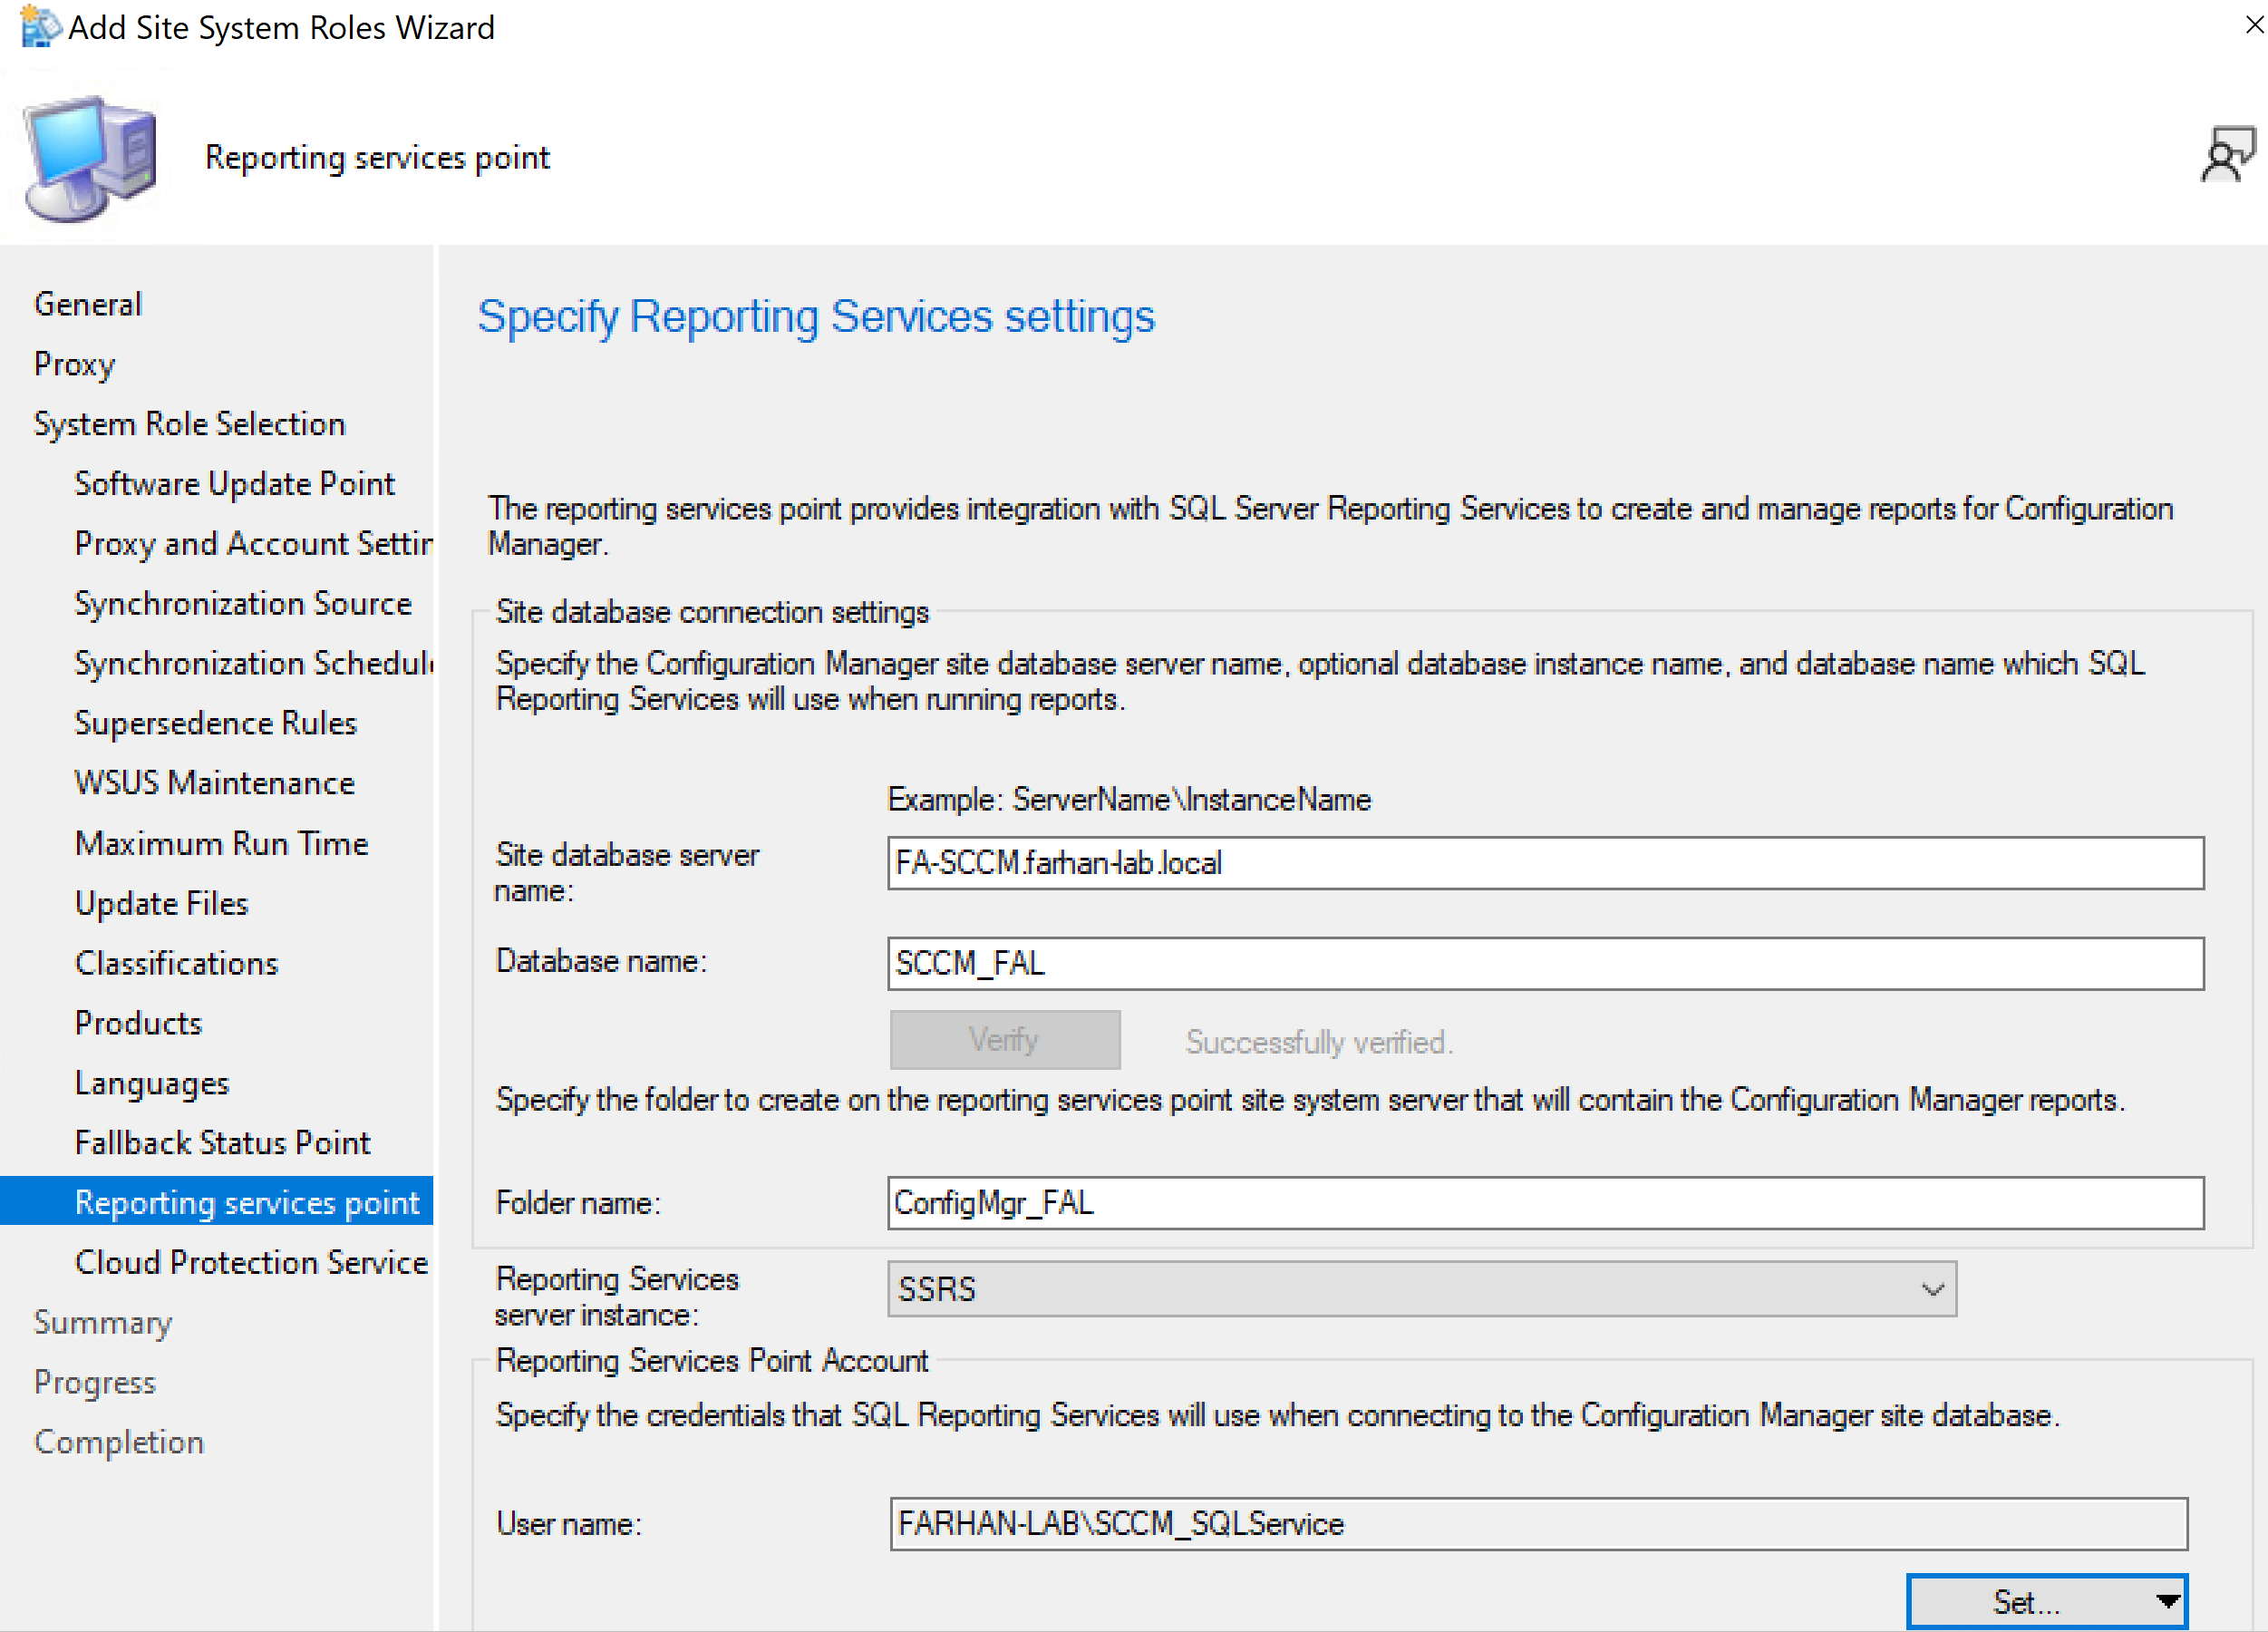
I configured the Reporting Services Point for this lab; reporting services point integrates with SQL report server to deploy configuration manager reports.
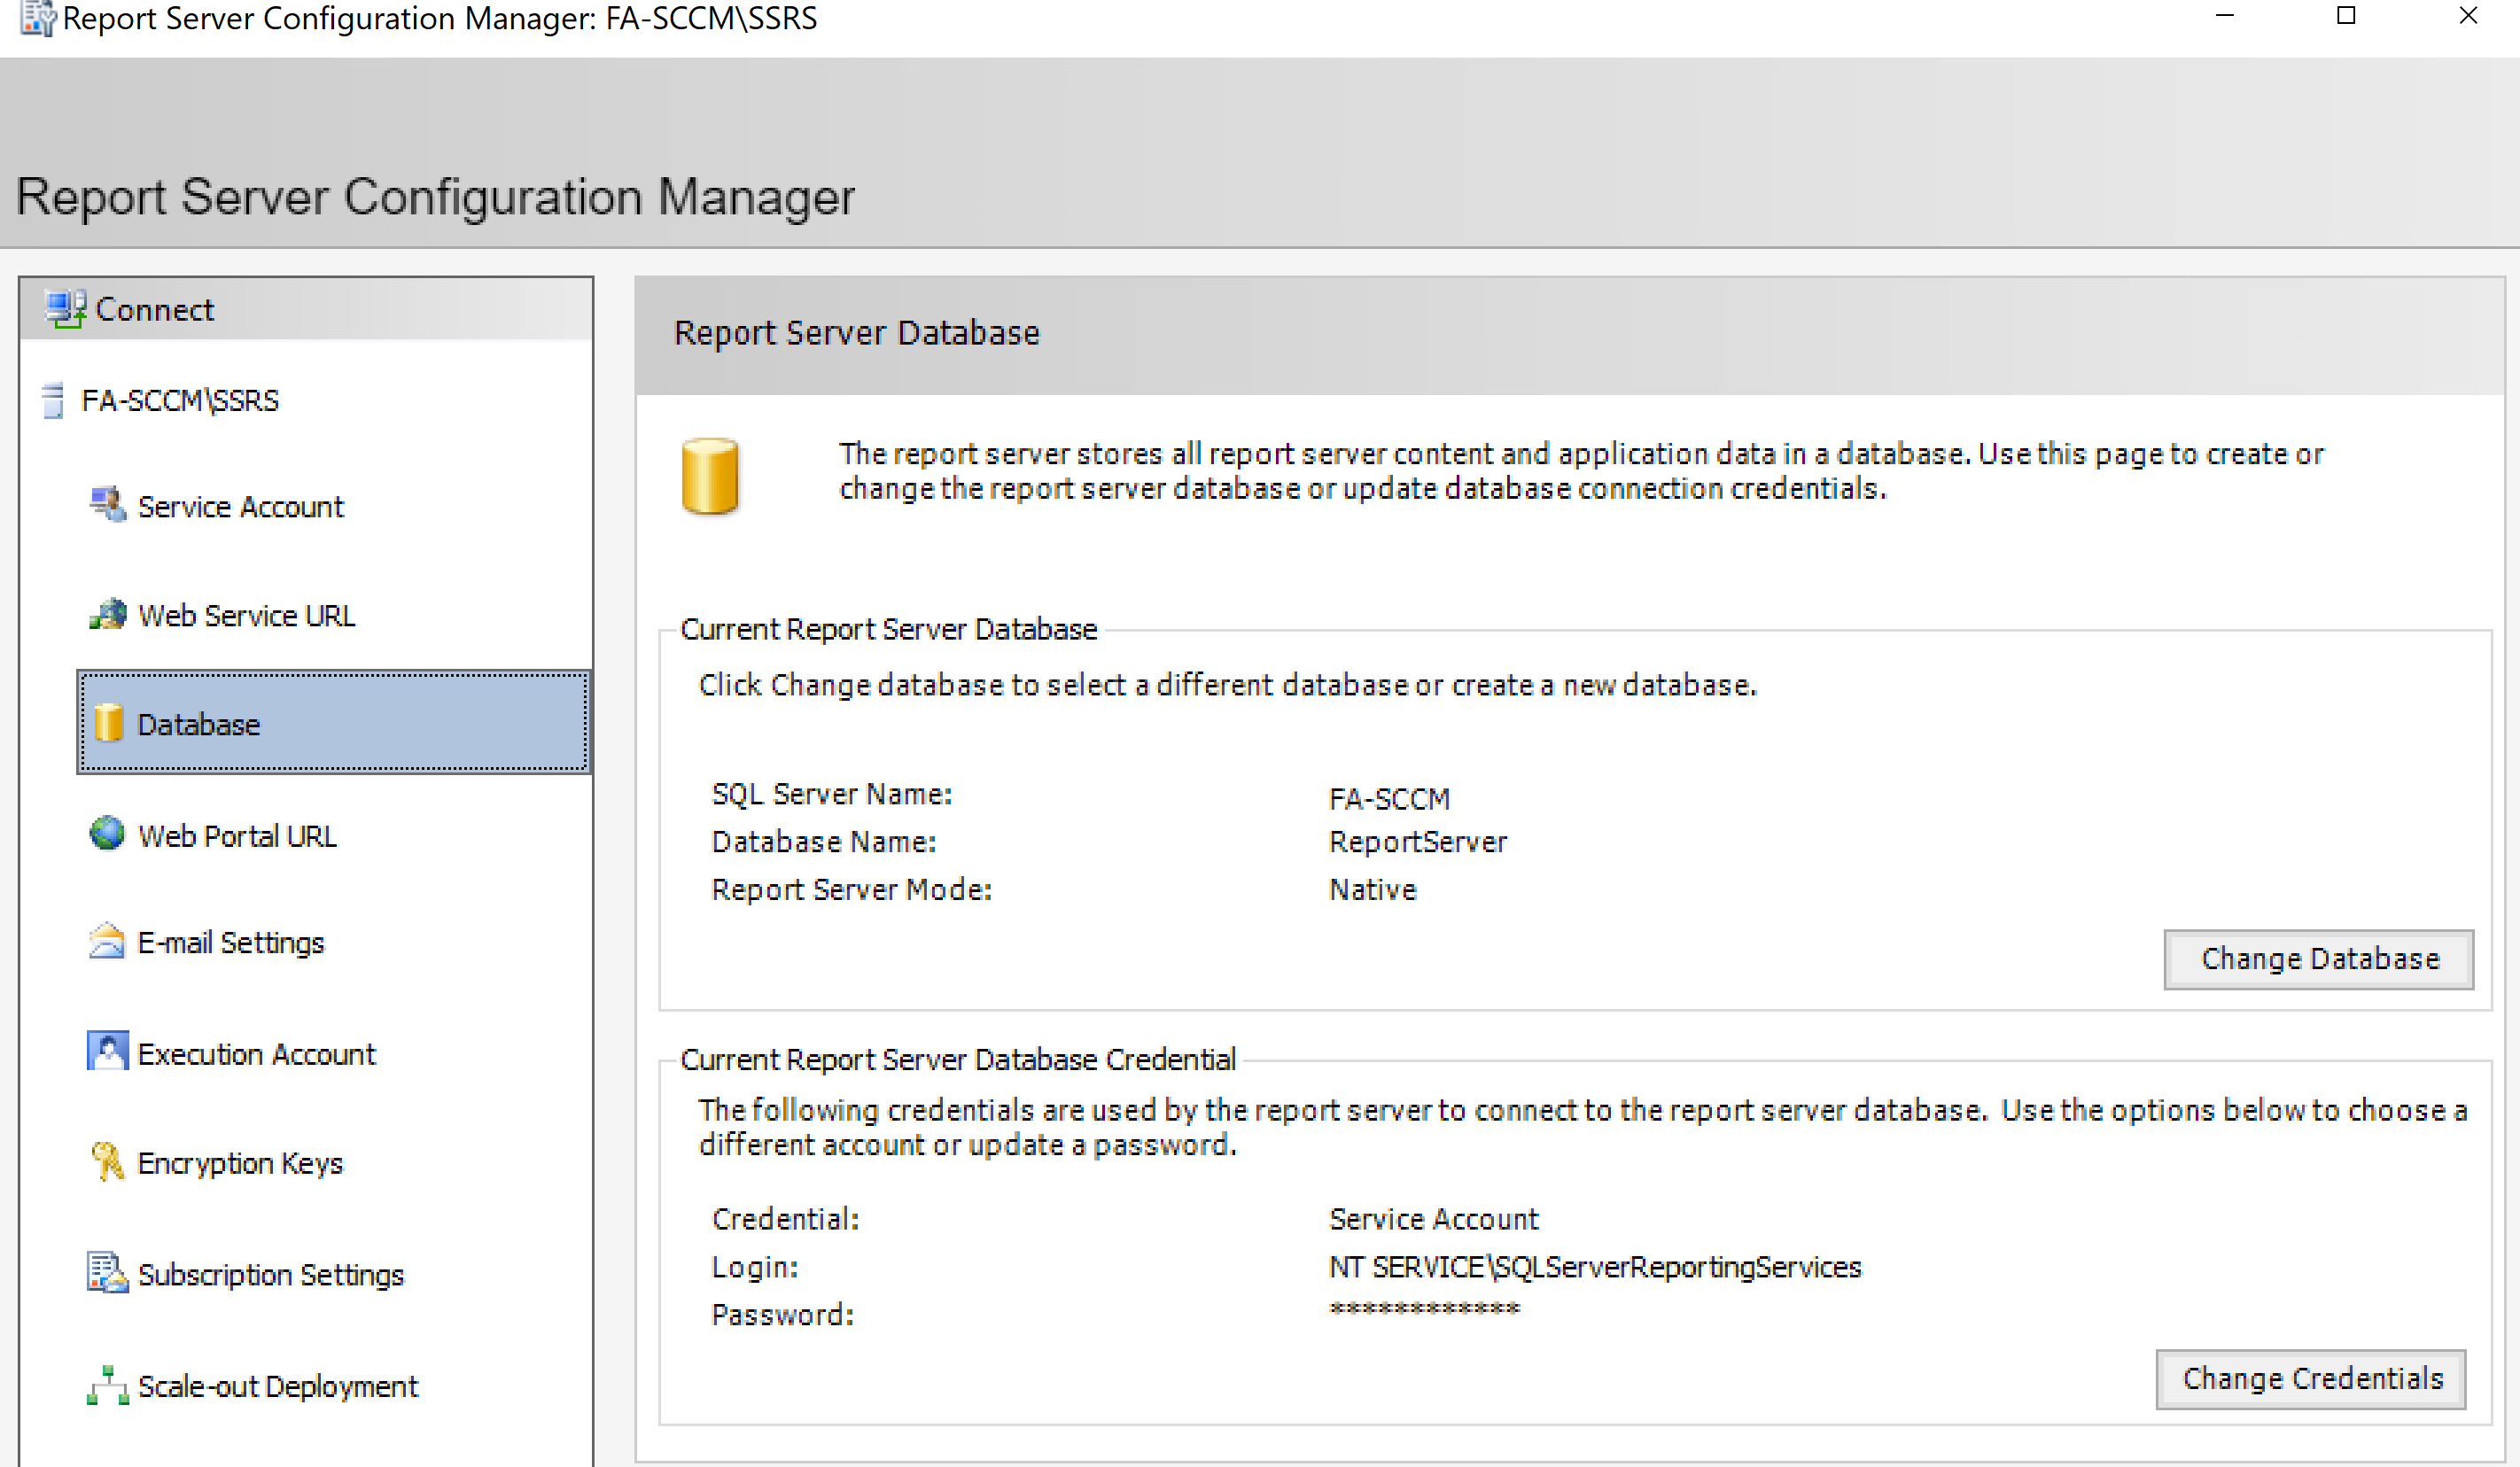
Configured SQL Report Server first.
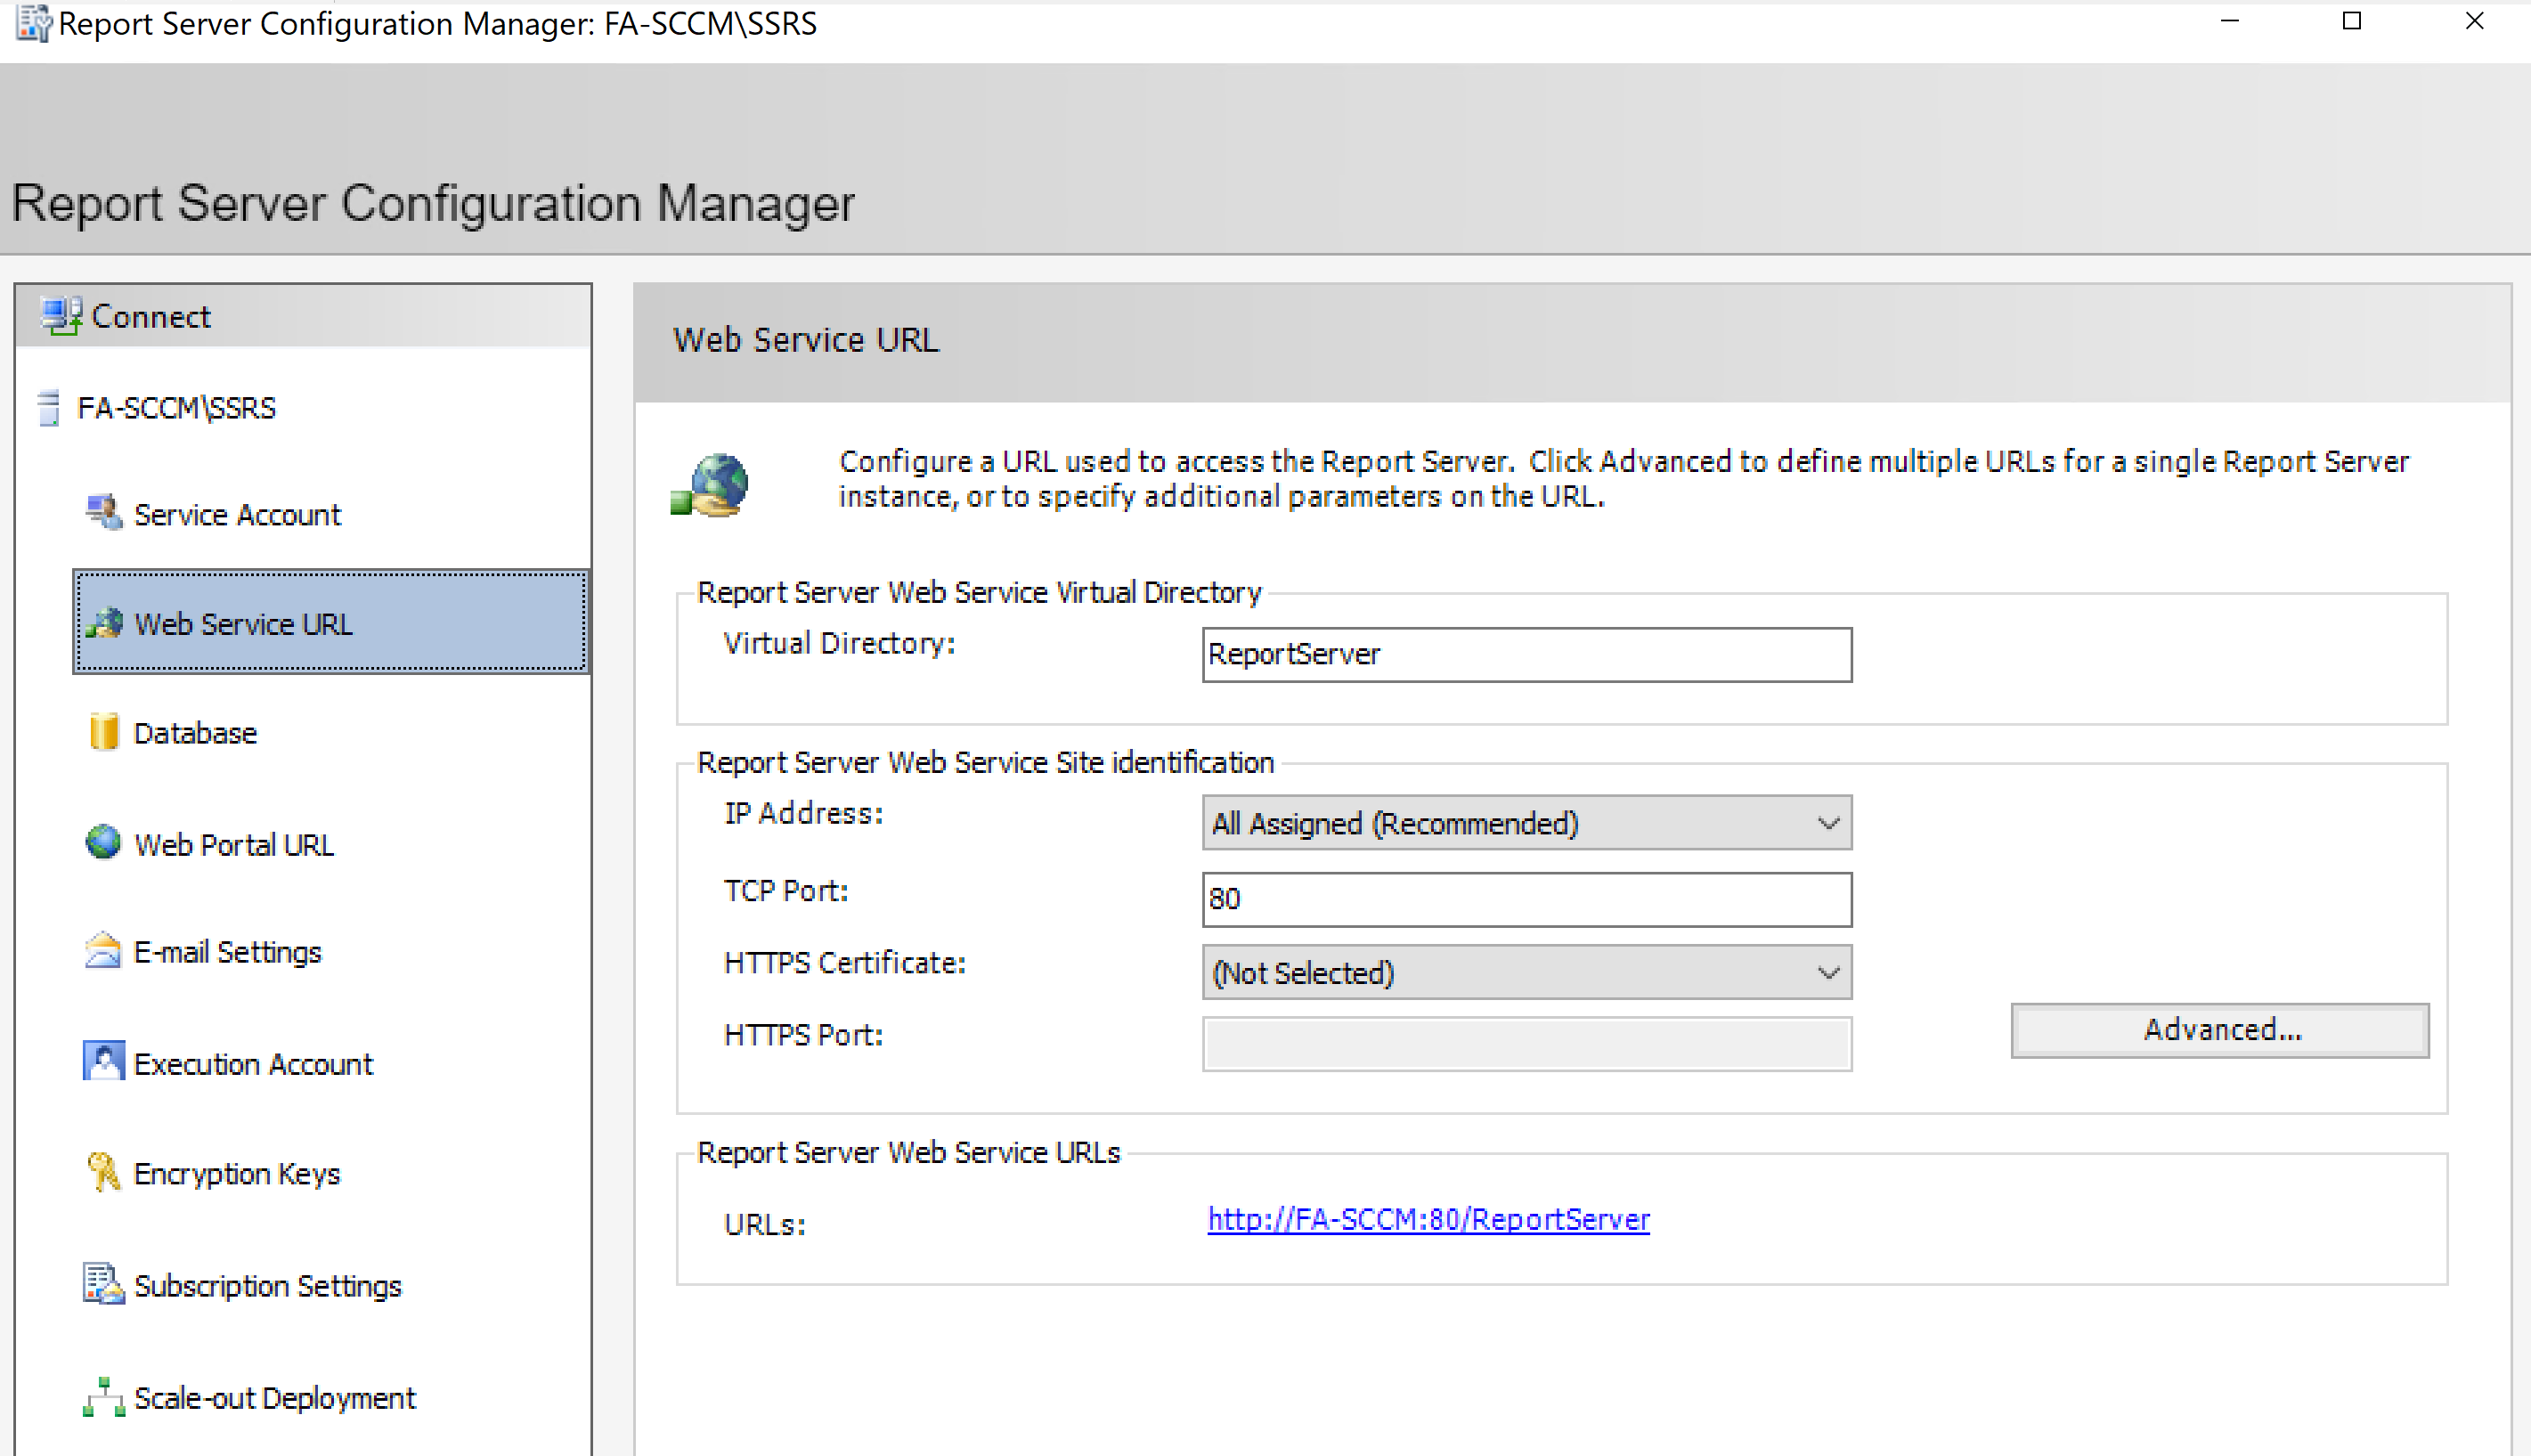
Launch Report Server Configuration Manager and Configure Web Service URL
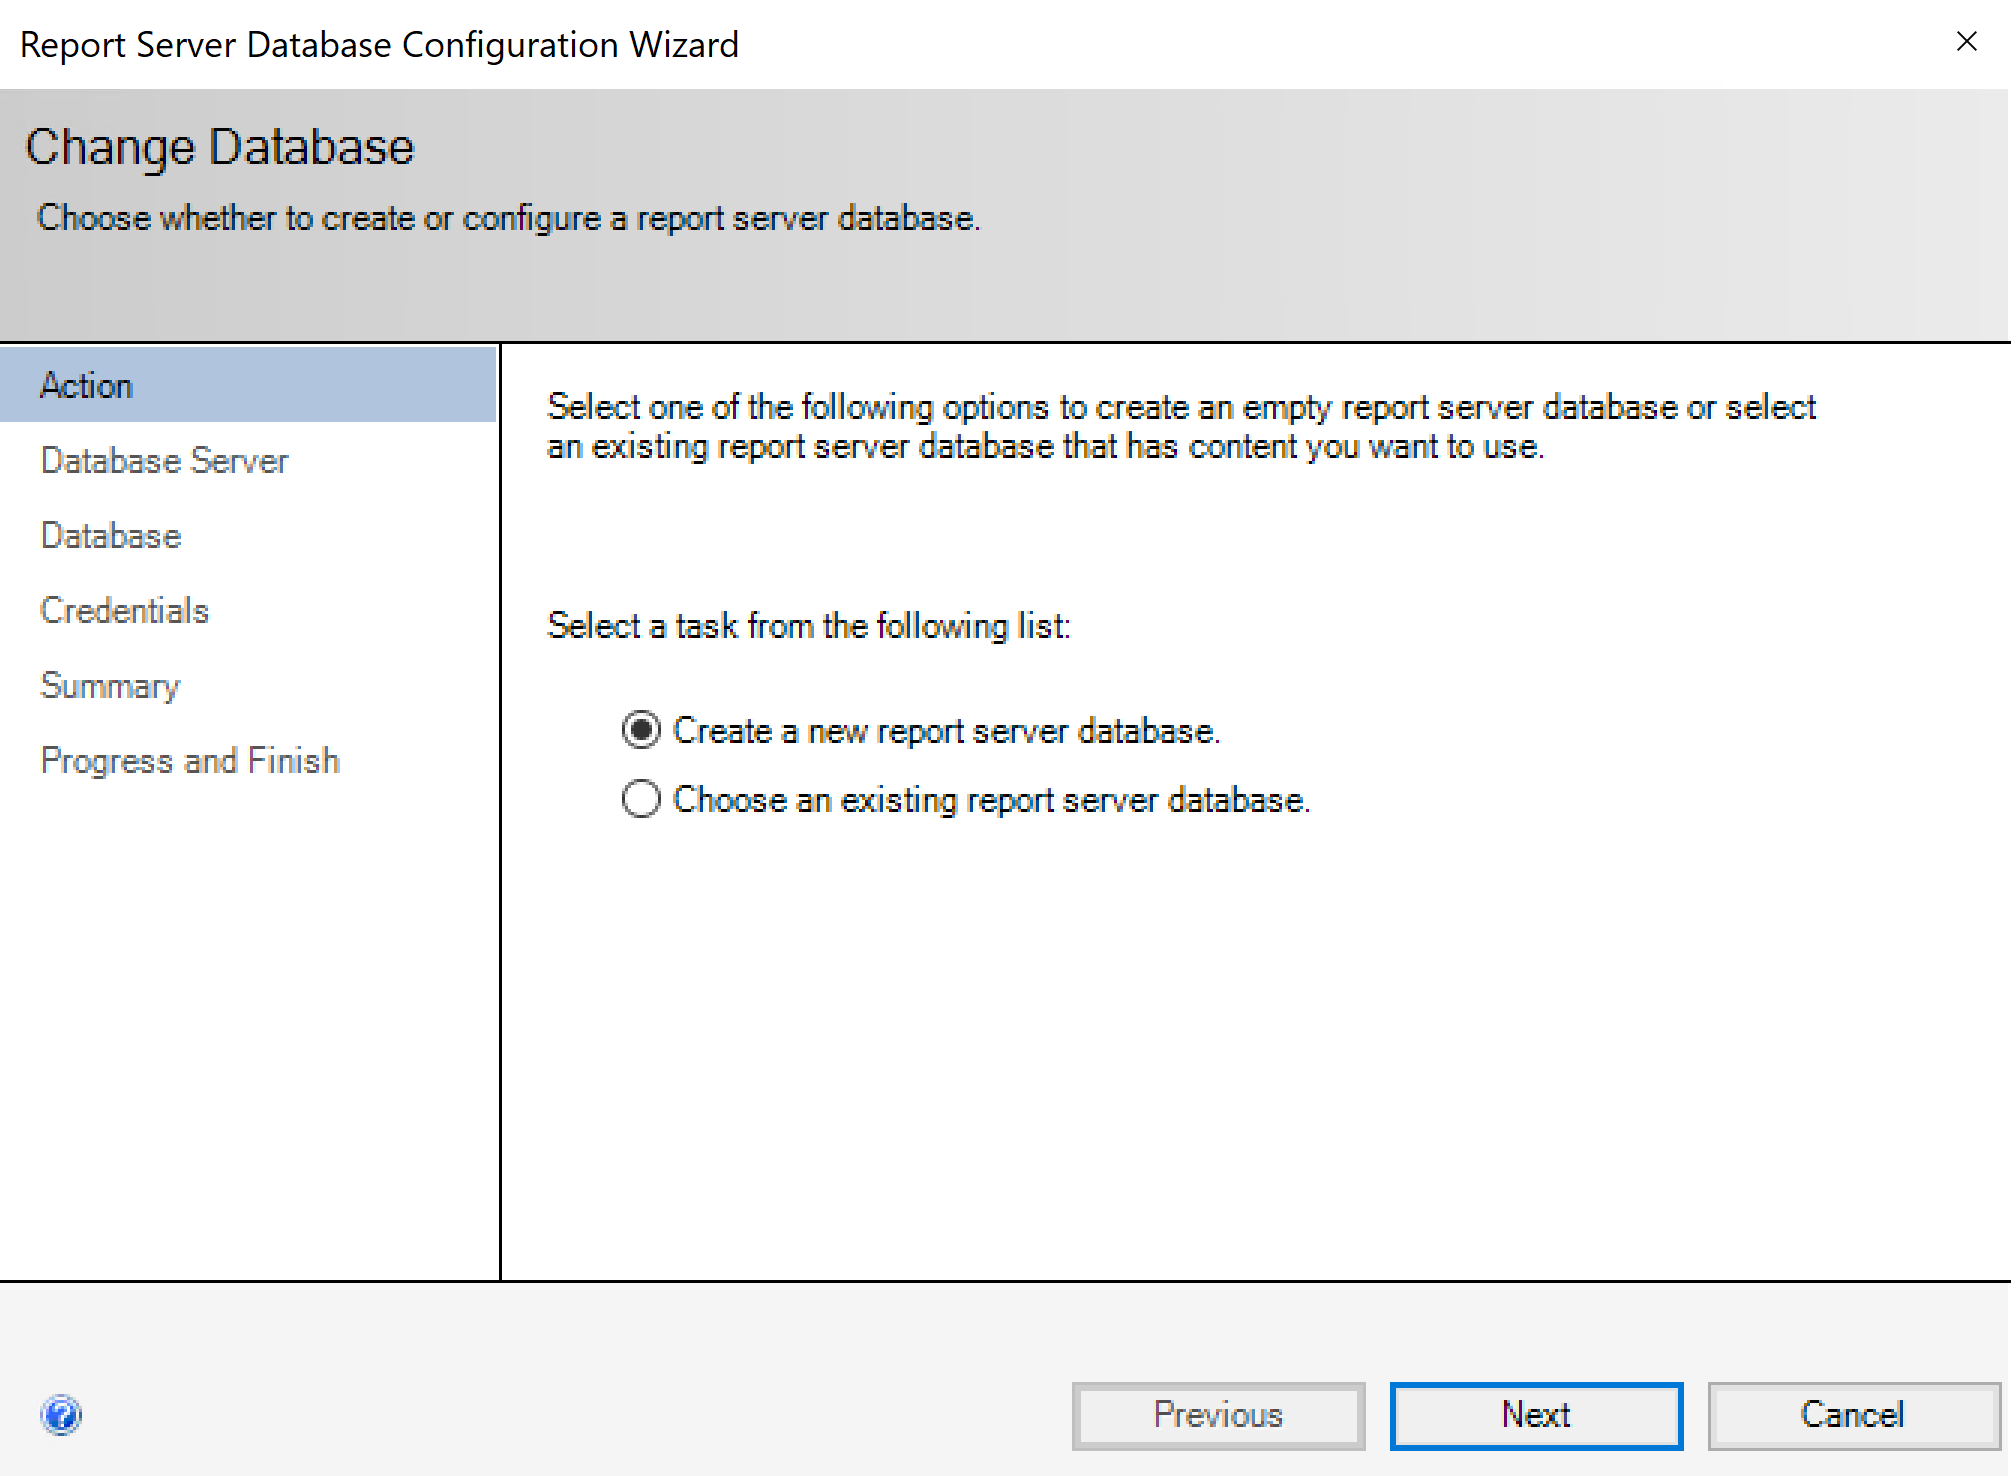
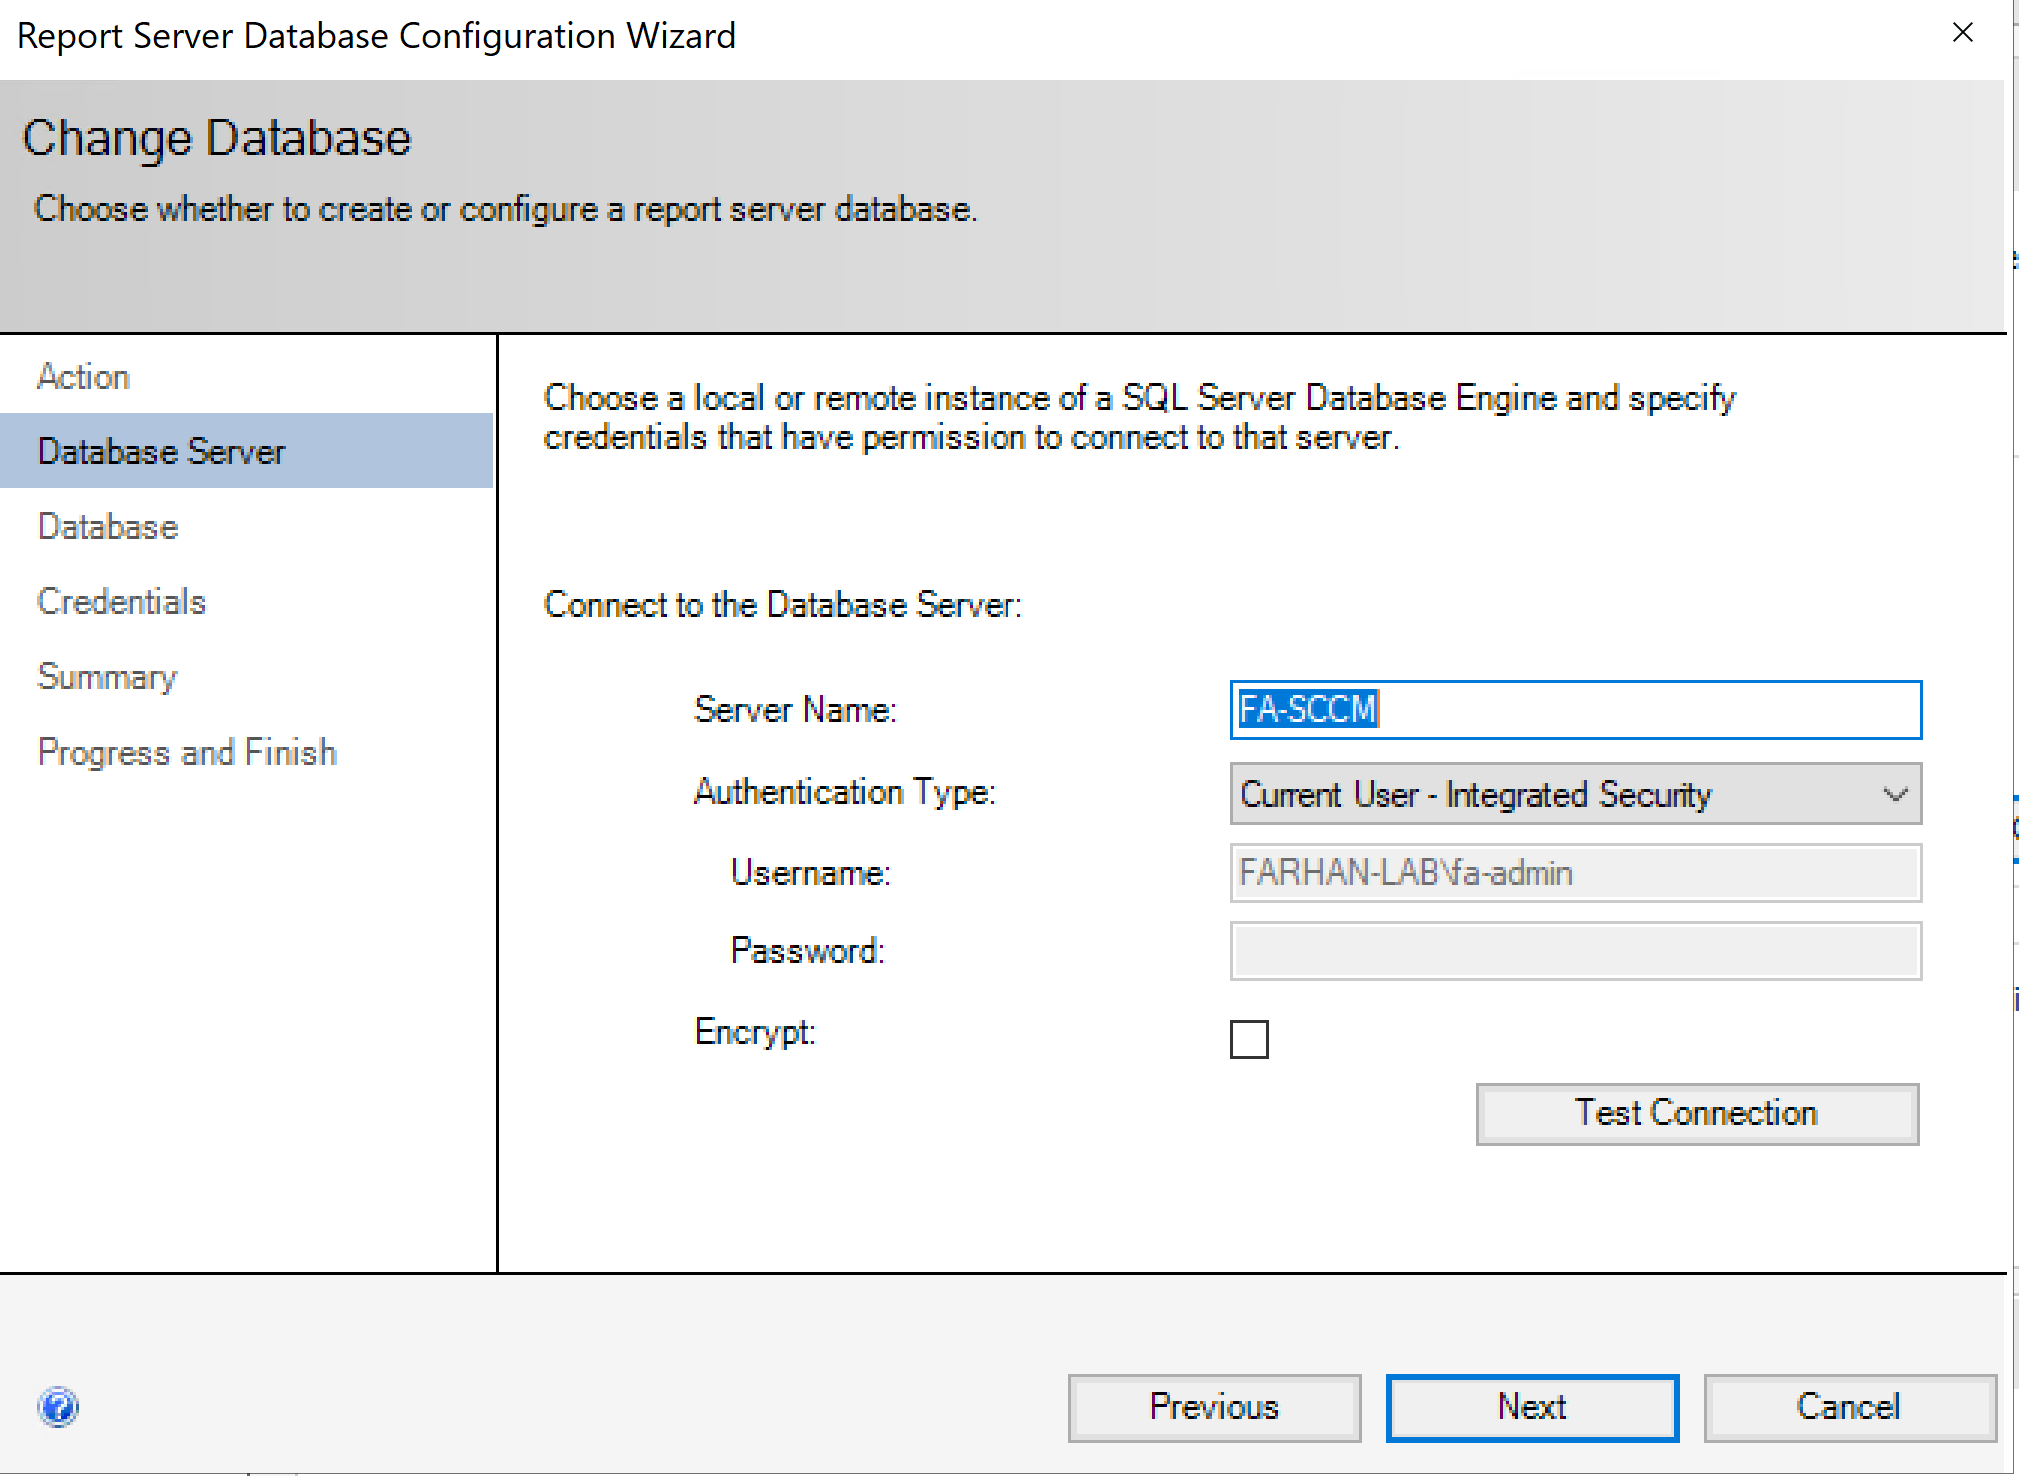
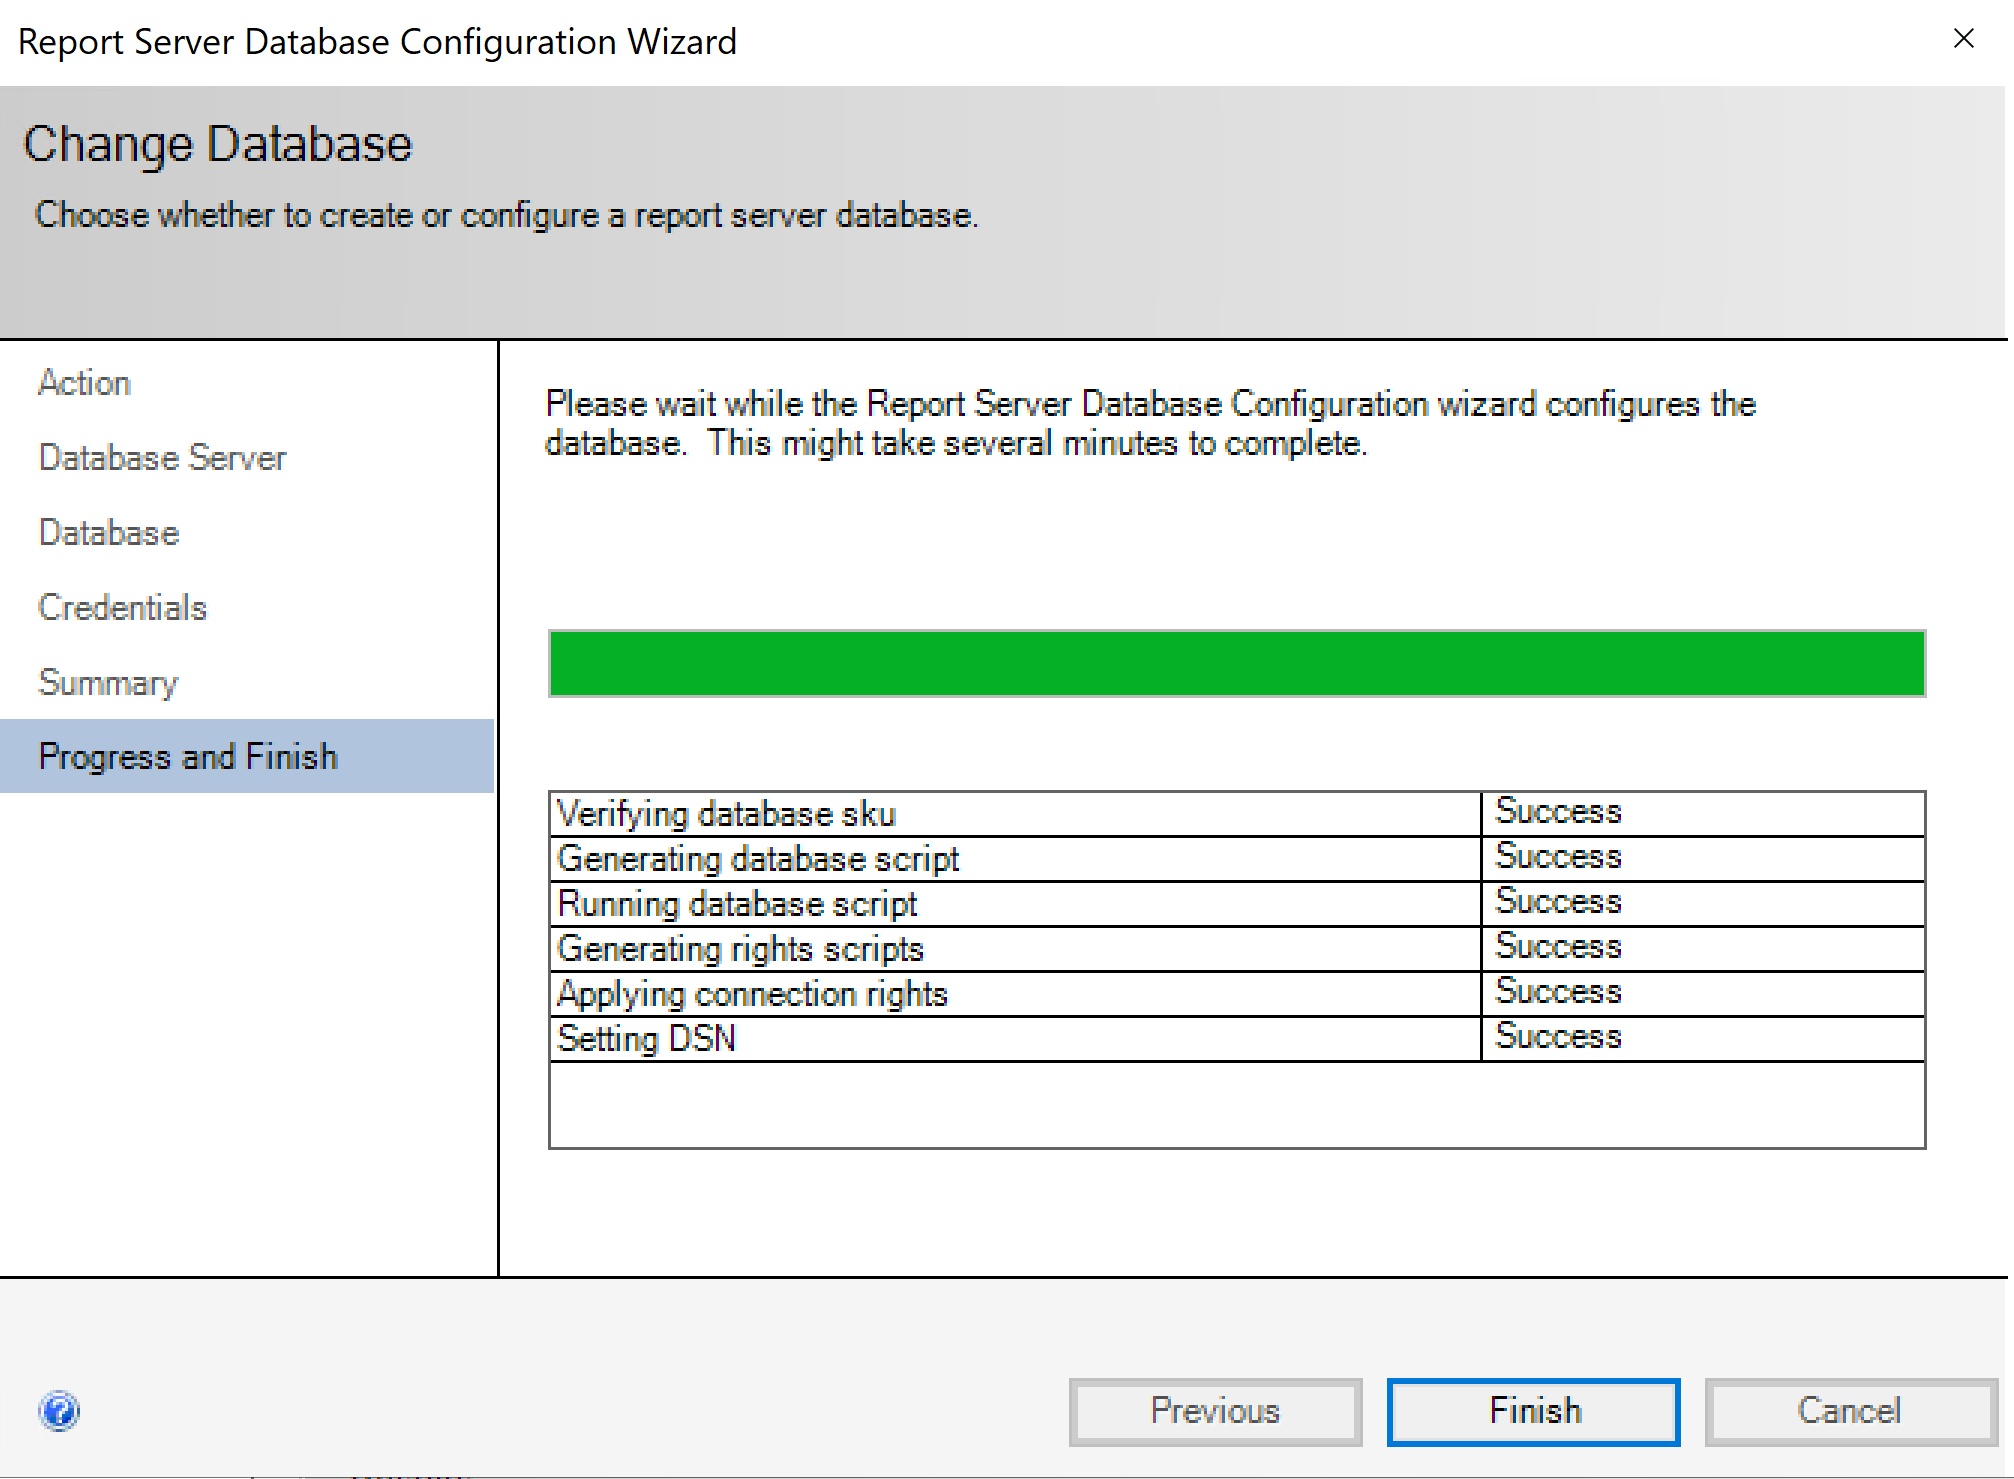
Change Database → Create a new report server database

Install SCCM Site System Roles
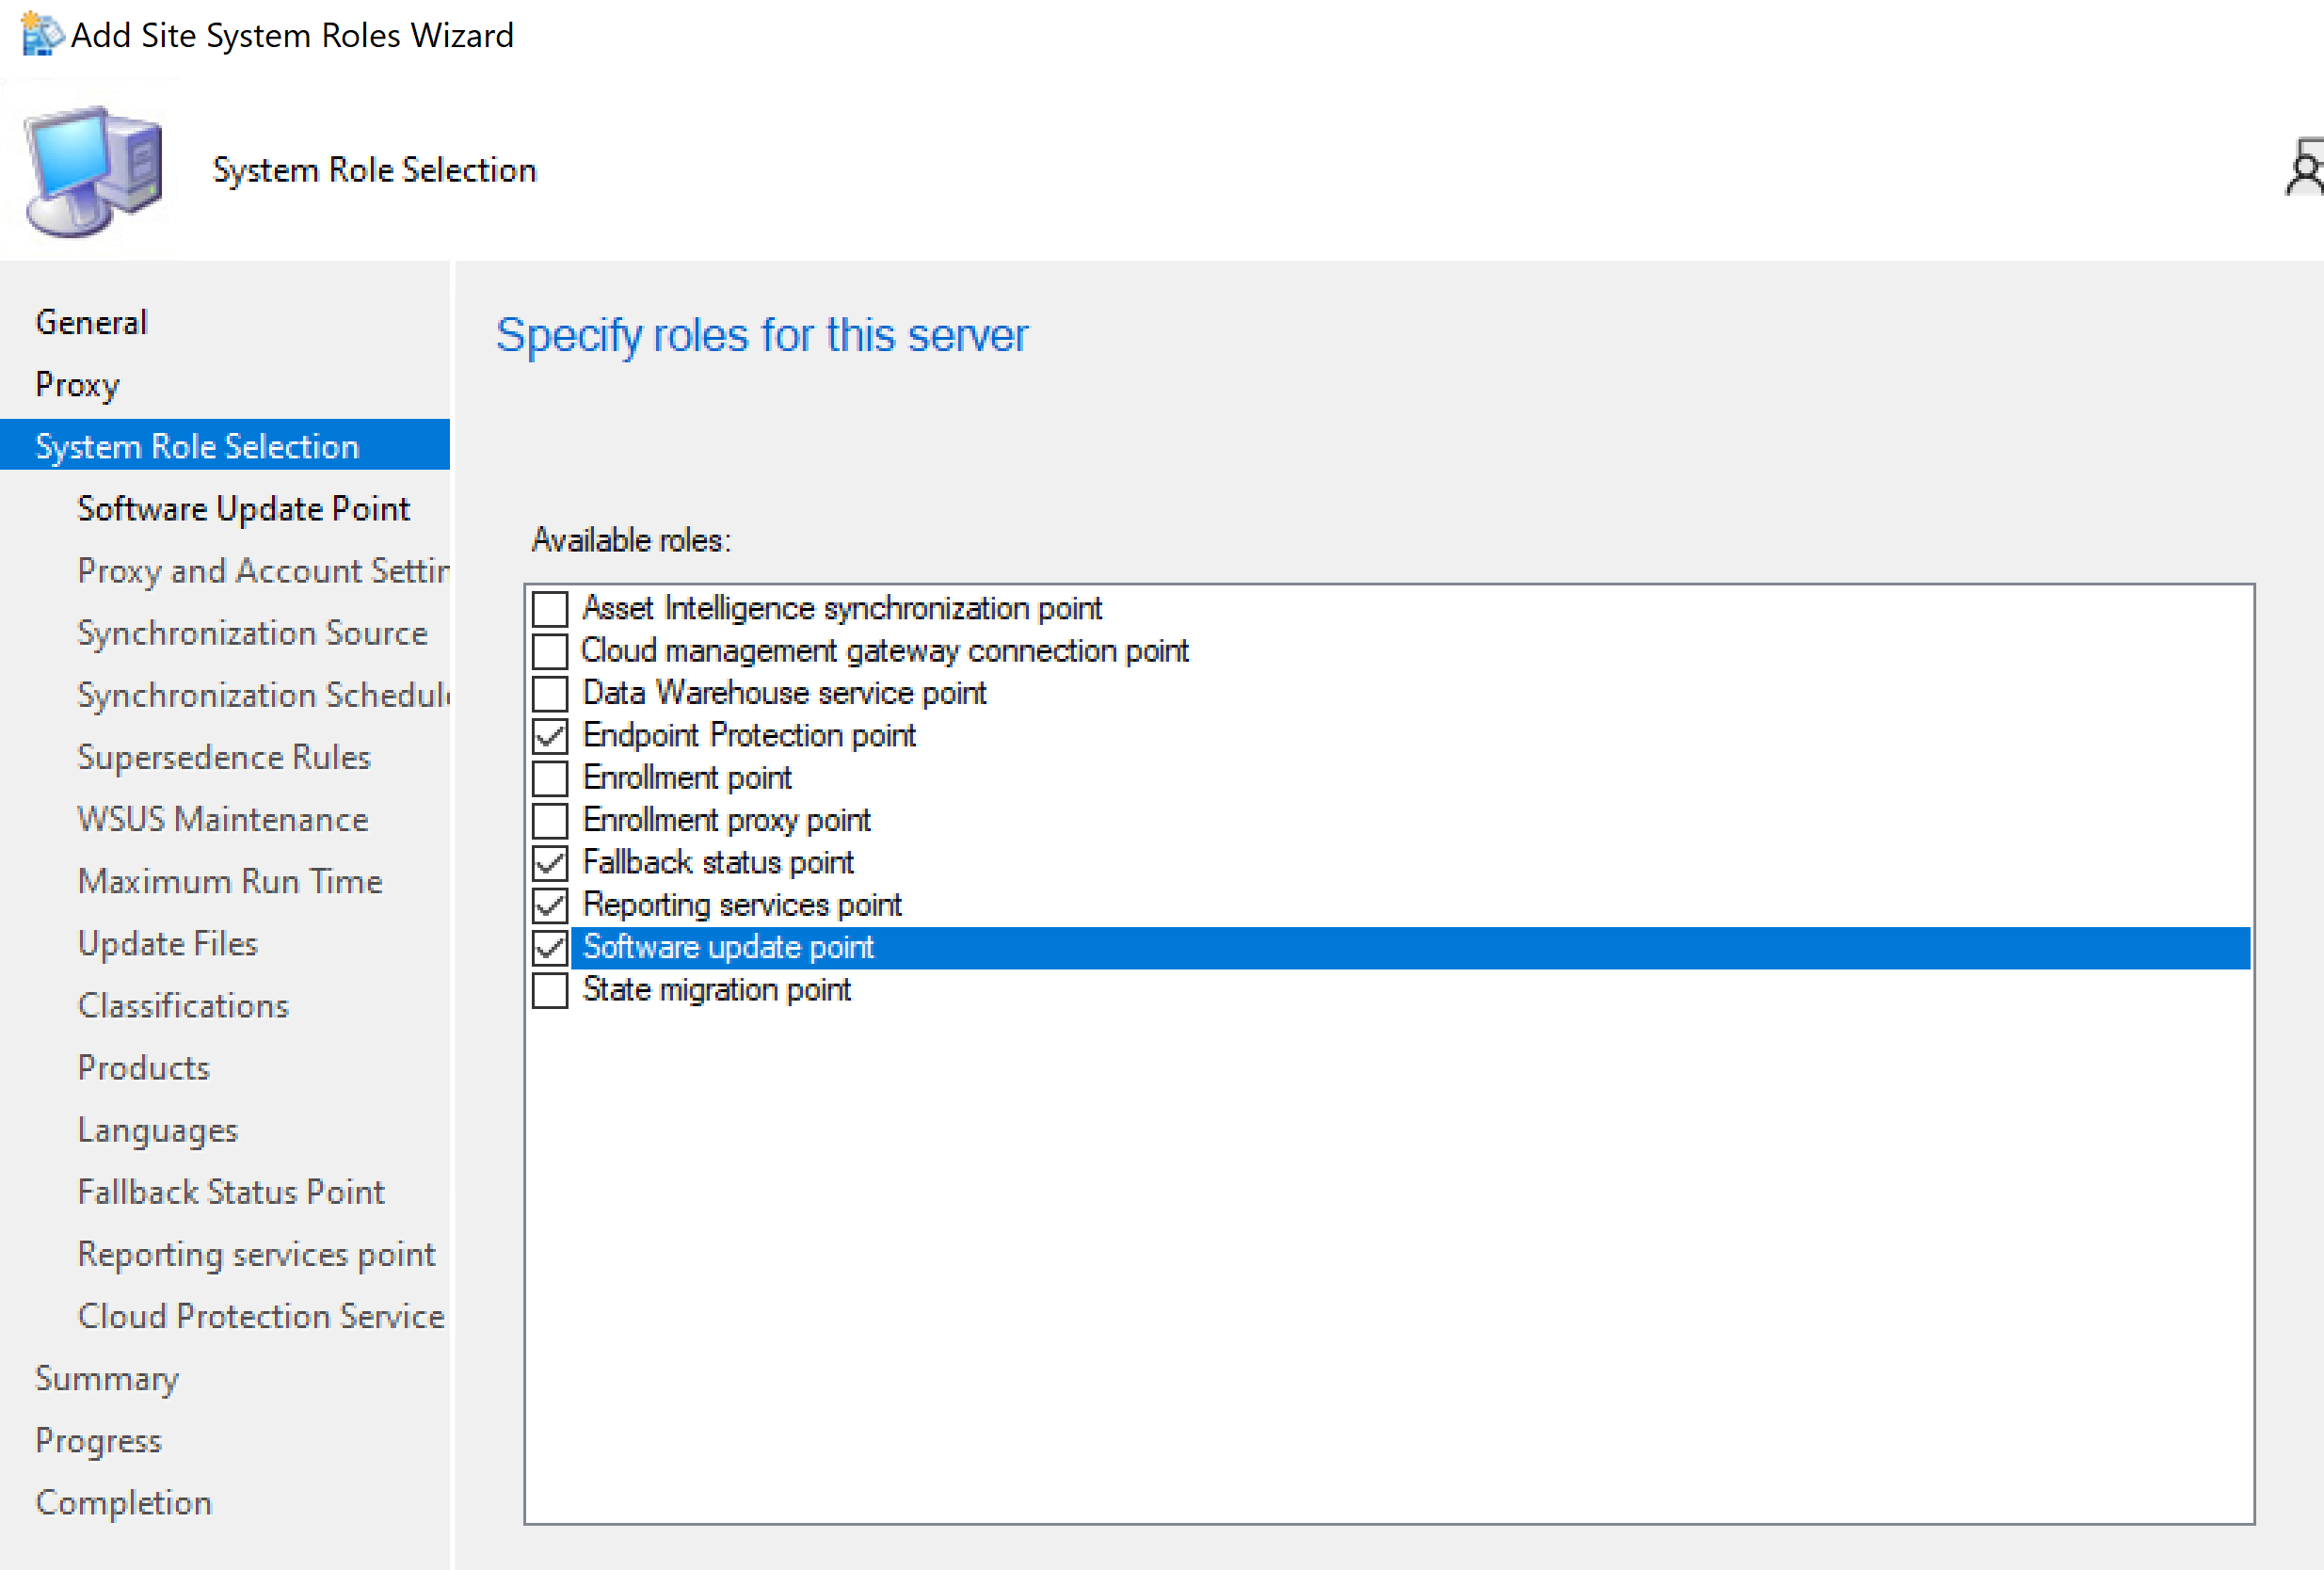
SCCM (Microsoft Configuration Manager) Site System Roles are specific server functions that provide management capabilities. I will configure following roles for this lab:
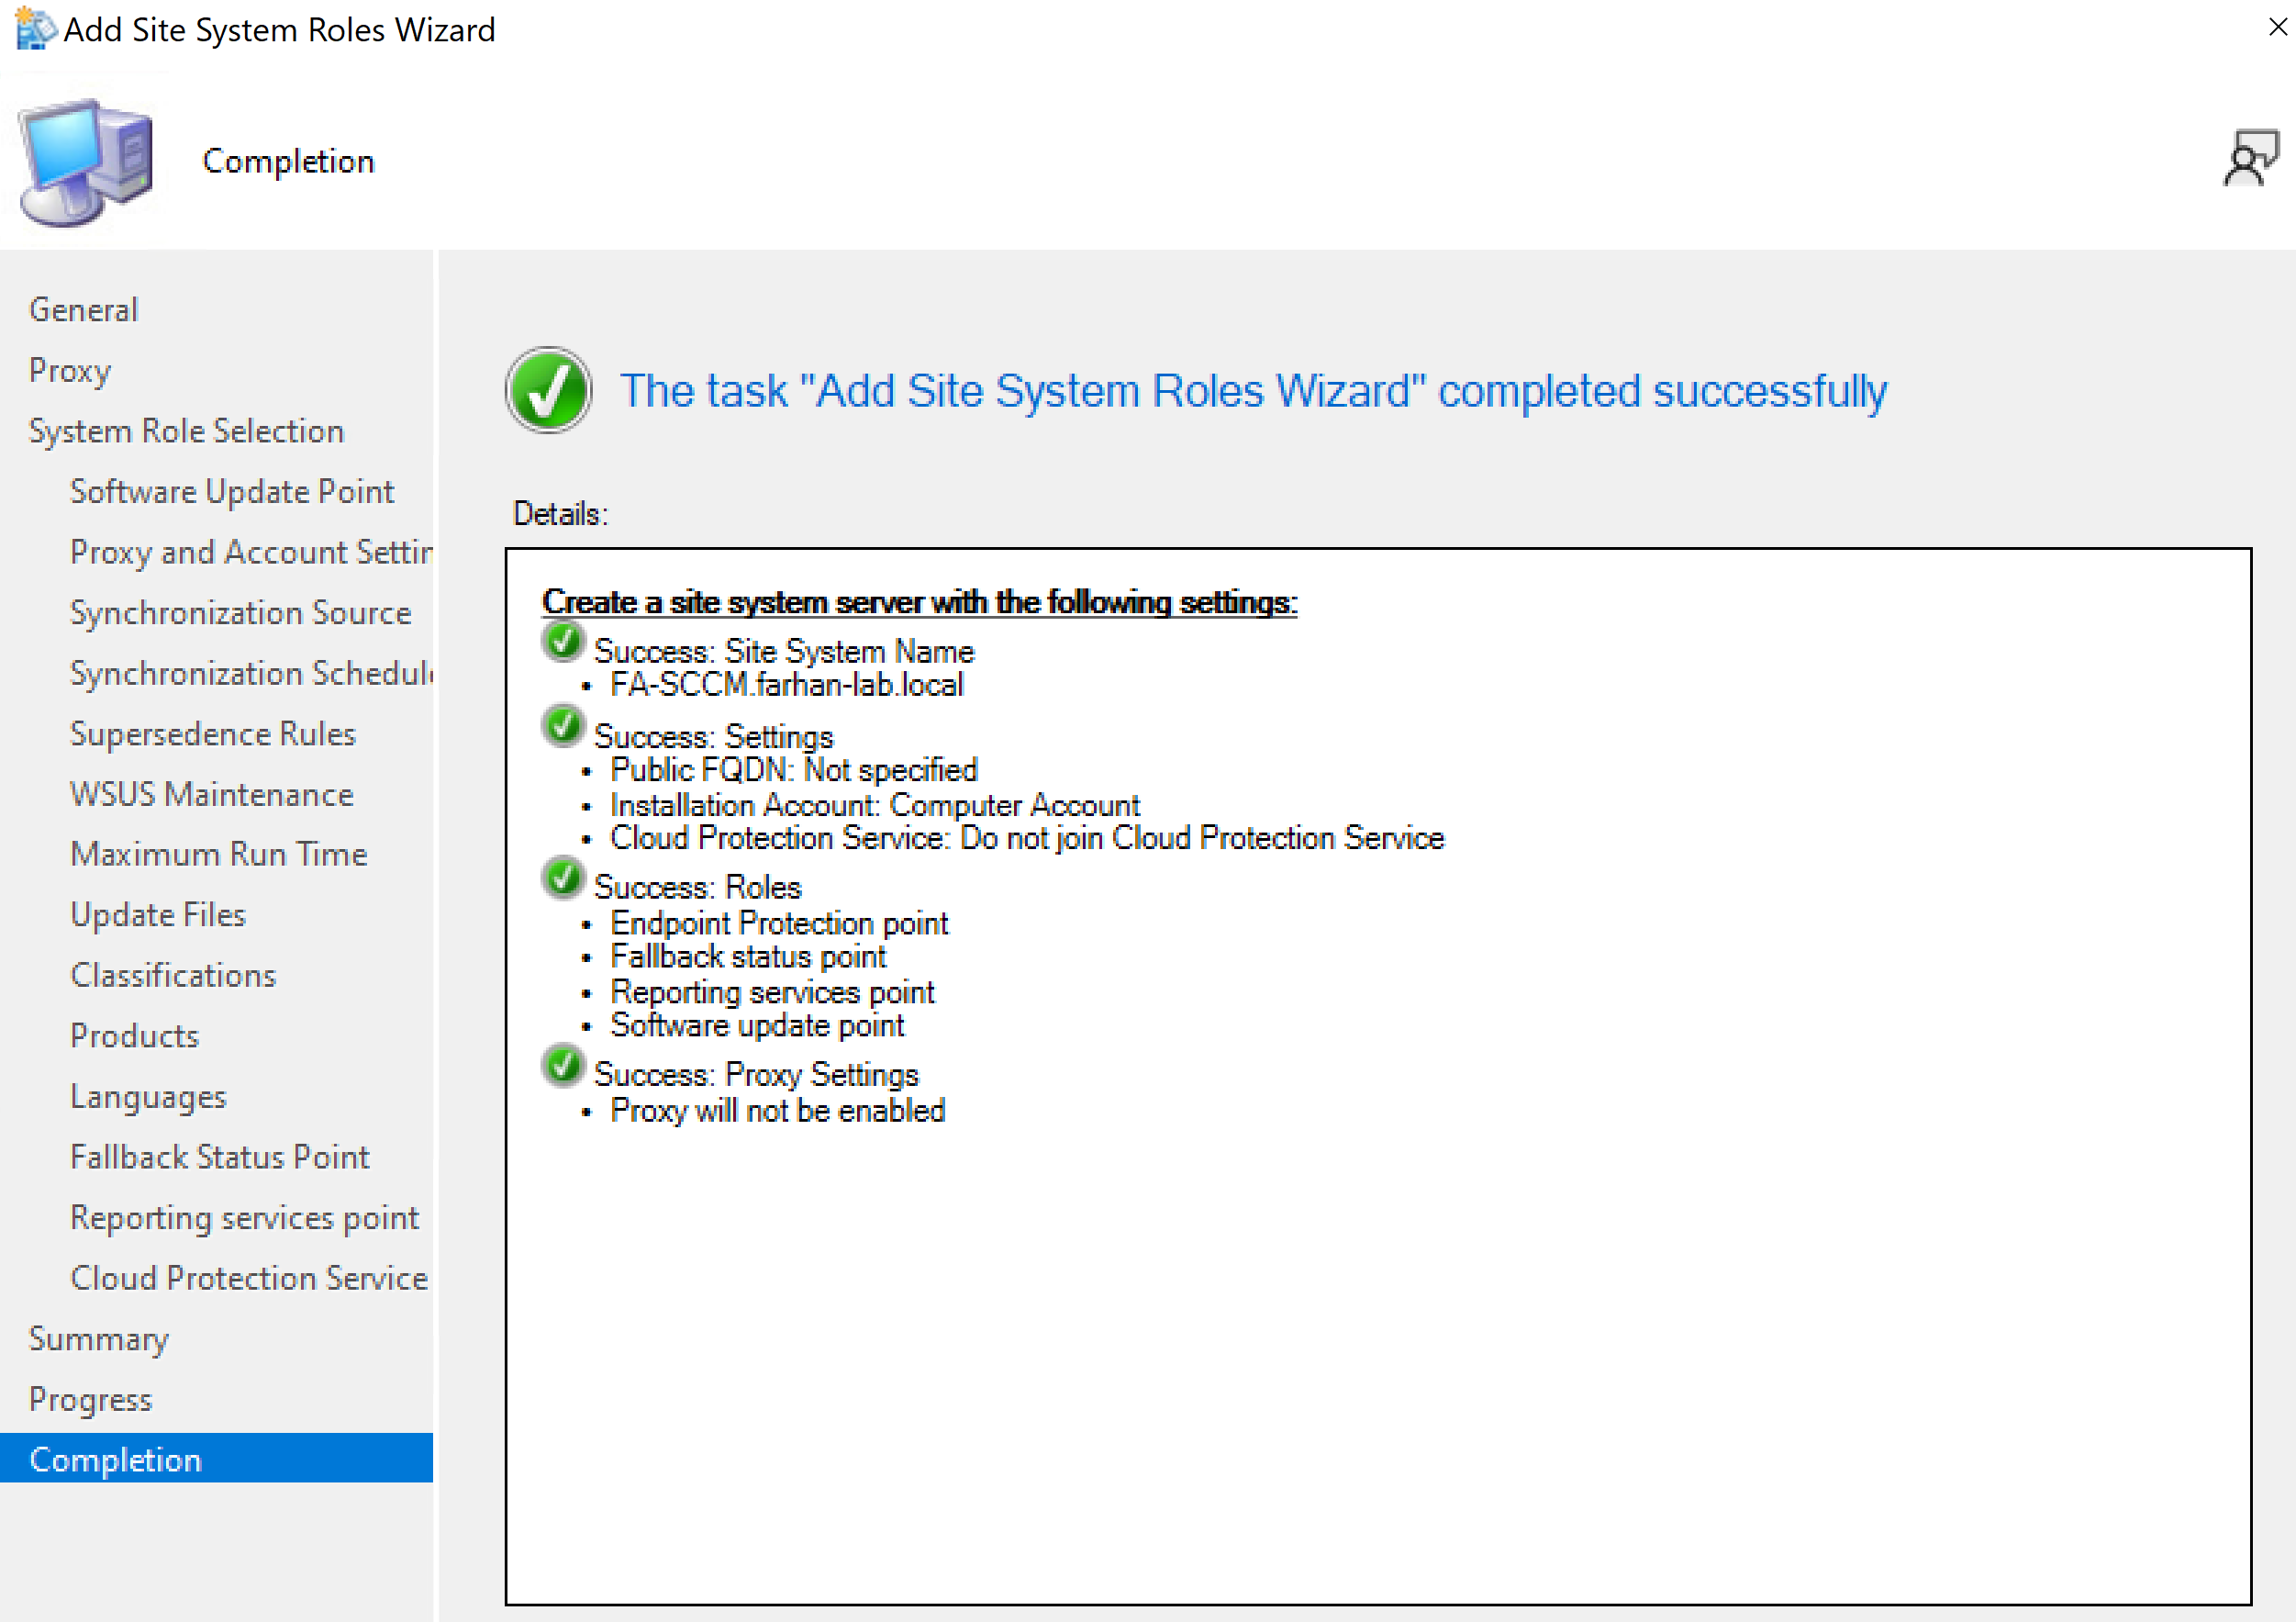
- Reporting Services Point: Integrates with SQL Reporting Services for monitoring and reporting.
- Endpoint Protection Point: Enables centralized management of Microsoft Defender Antivirus for client devices.
- Fallback Status Point: Receives error codes from clients during failed installations.
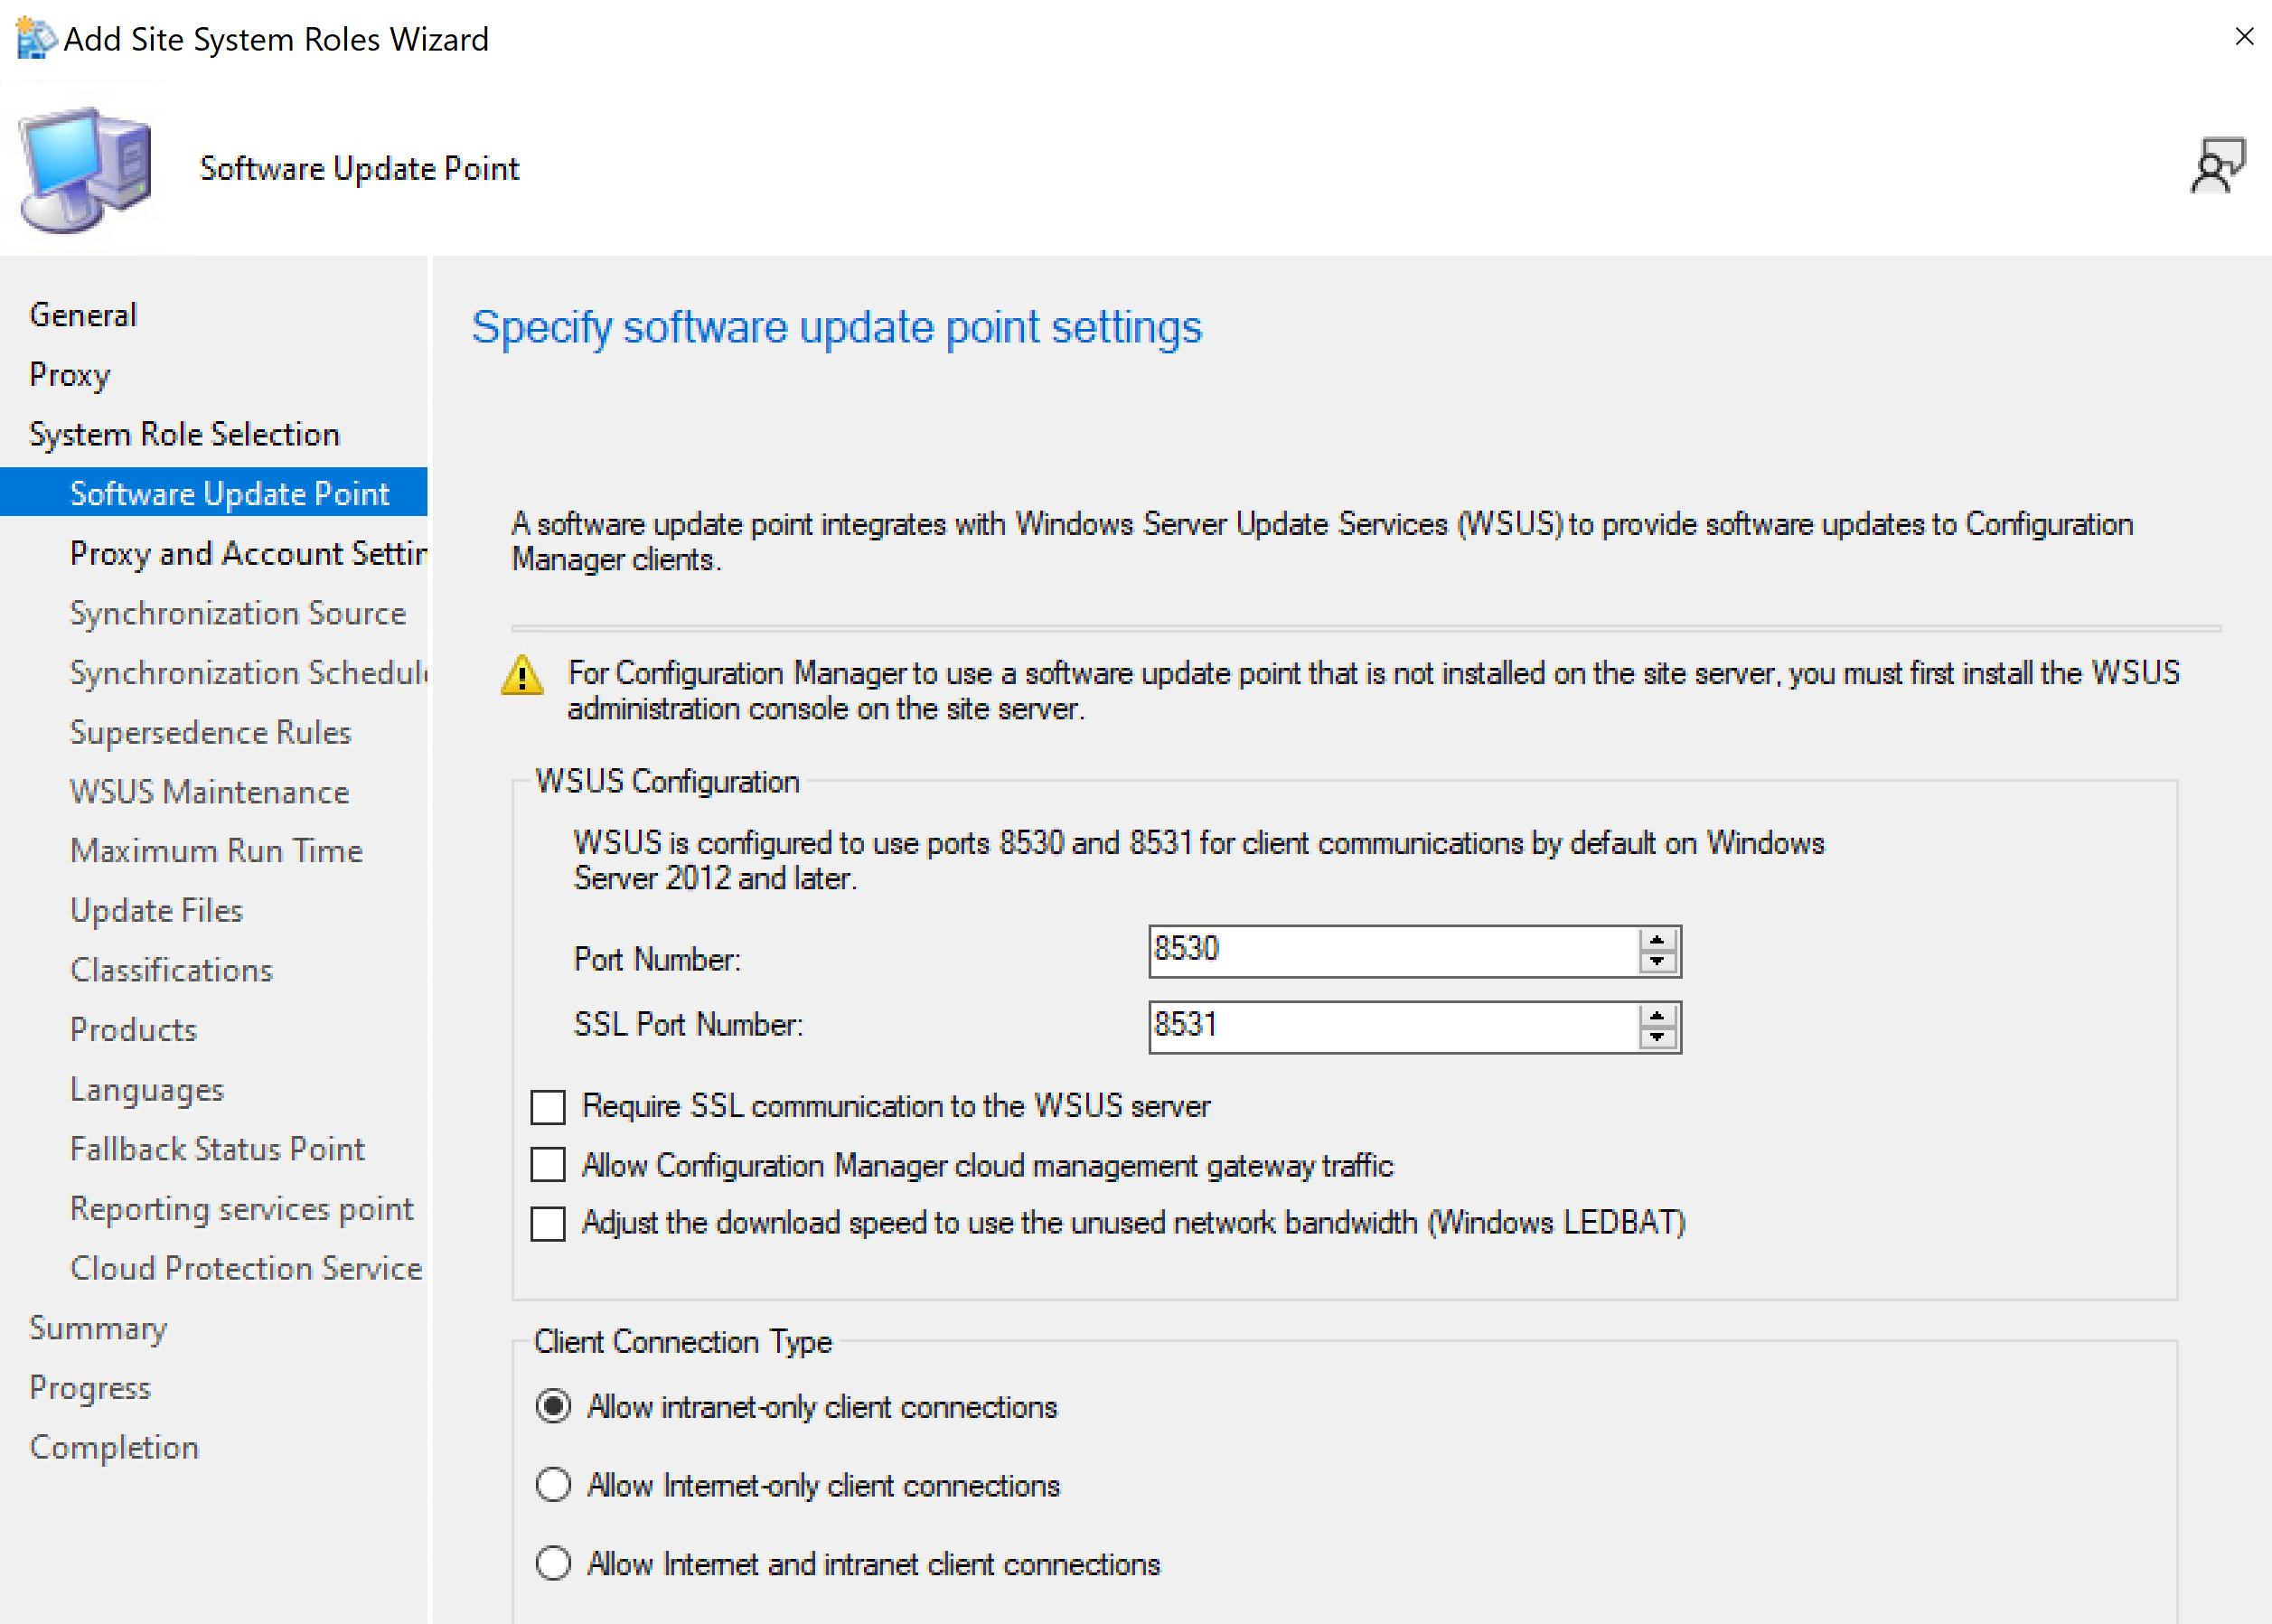
- Software Update Point (SUP): Manages Windows updates for devices.
Launch Microsoft Configuration Manager
SCCM Console → Administration → Site Configuration → Servers and Site System Roles
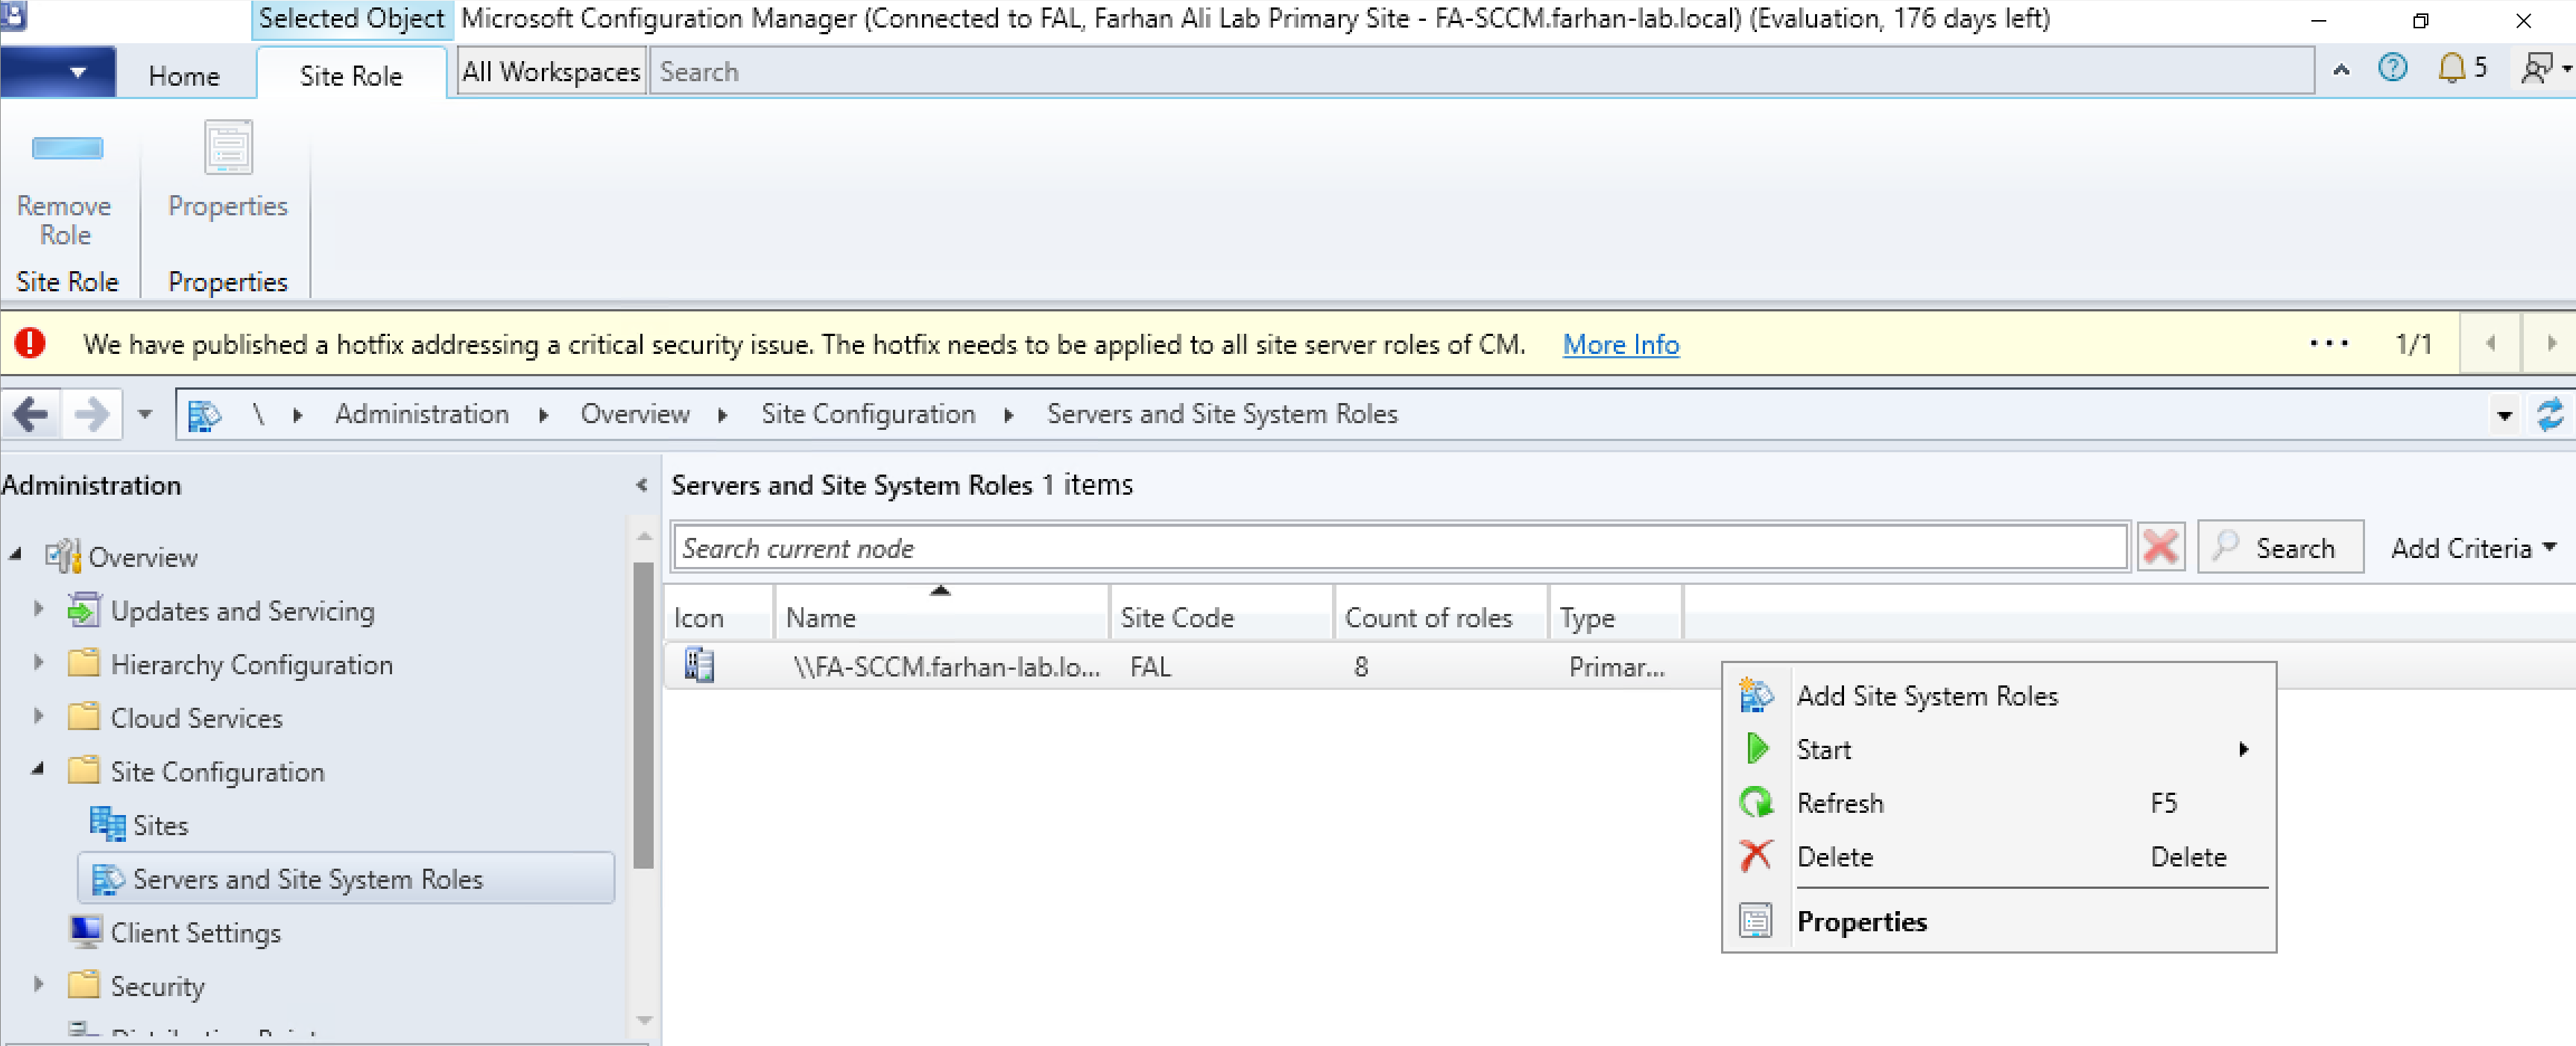
Select required roles.
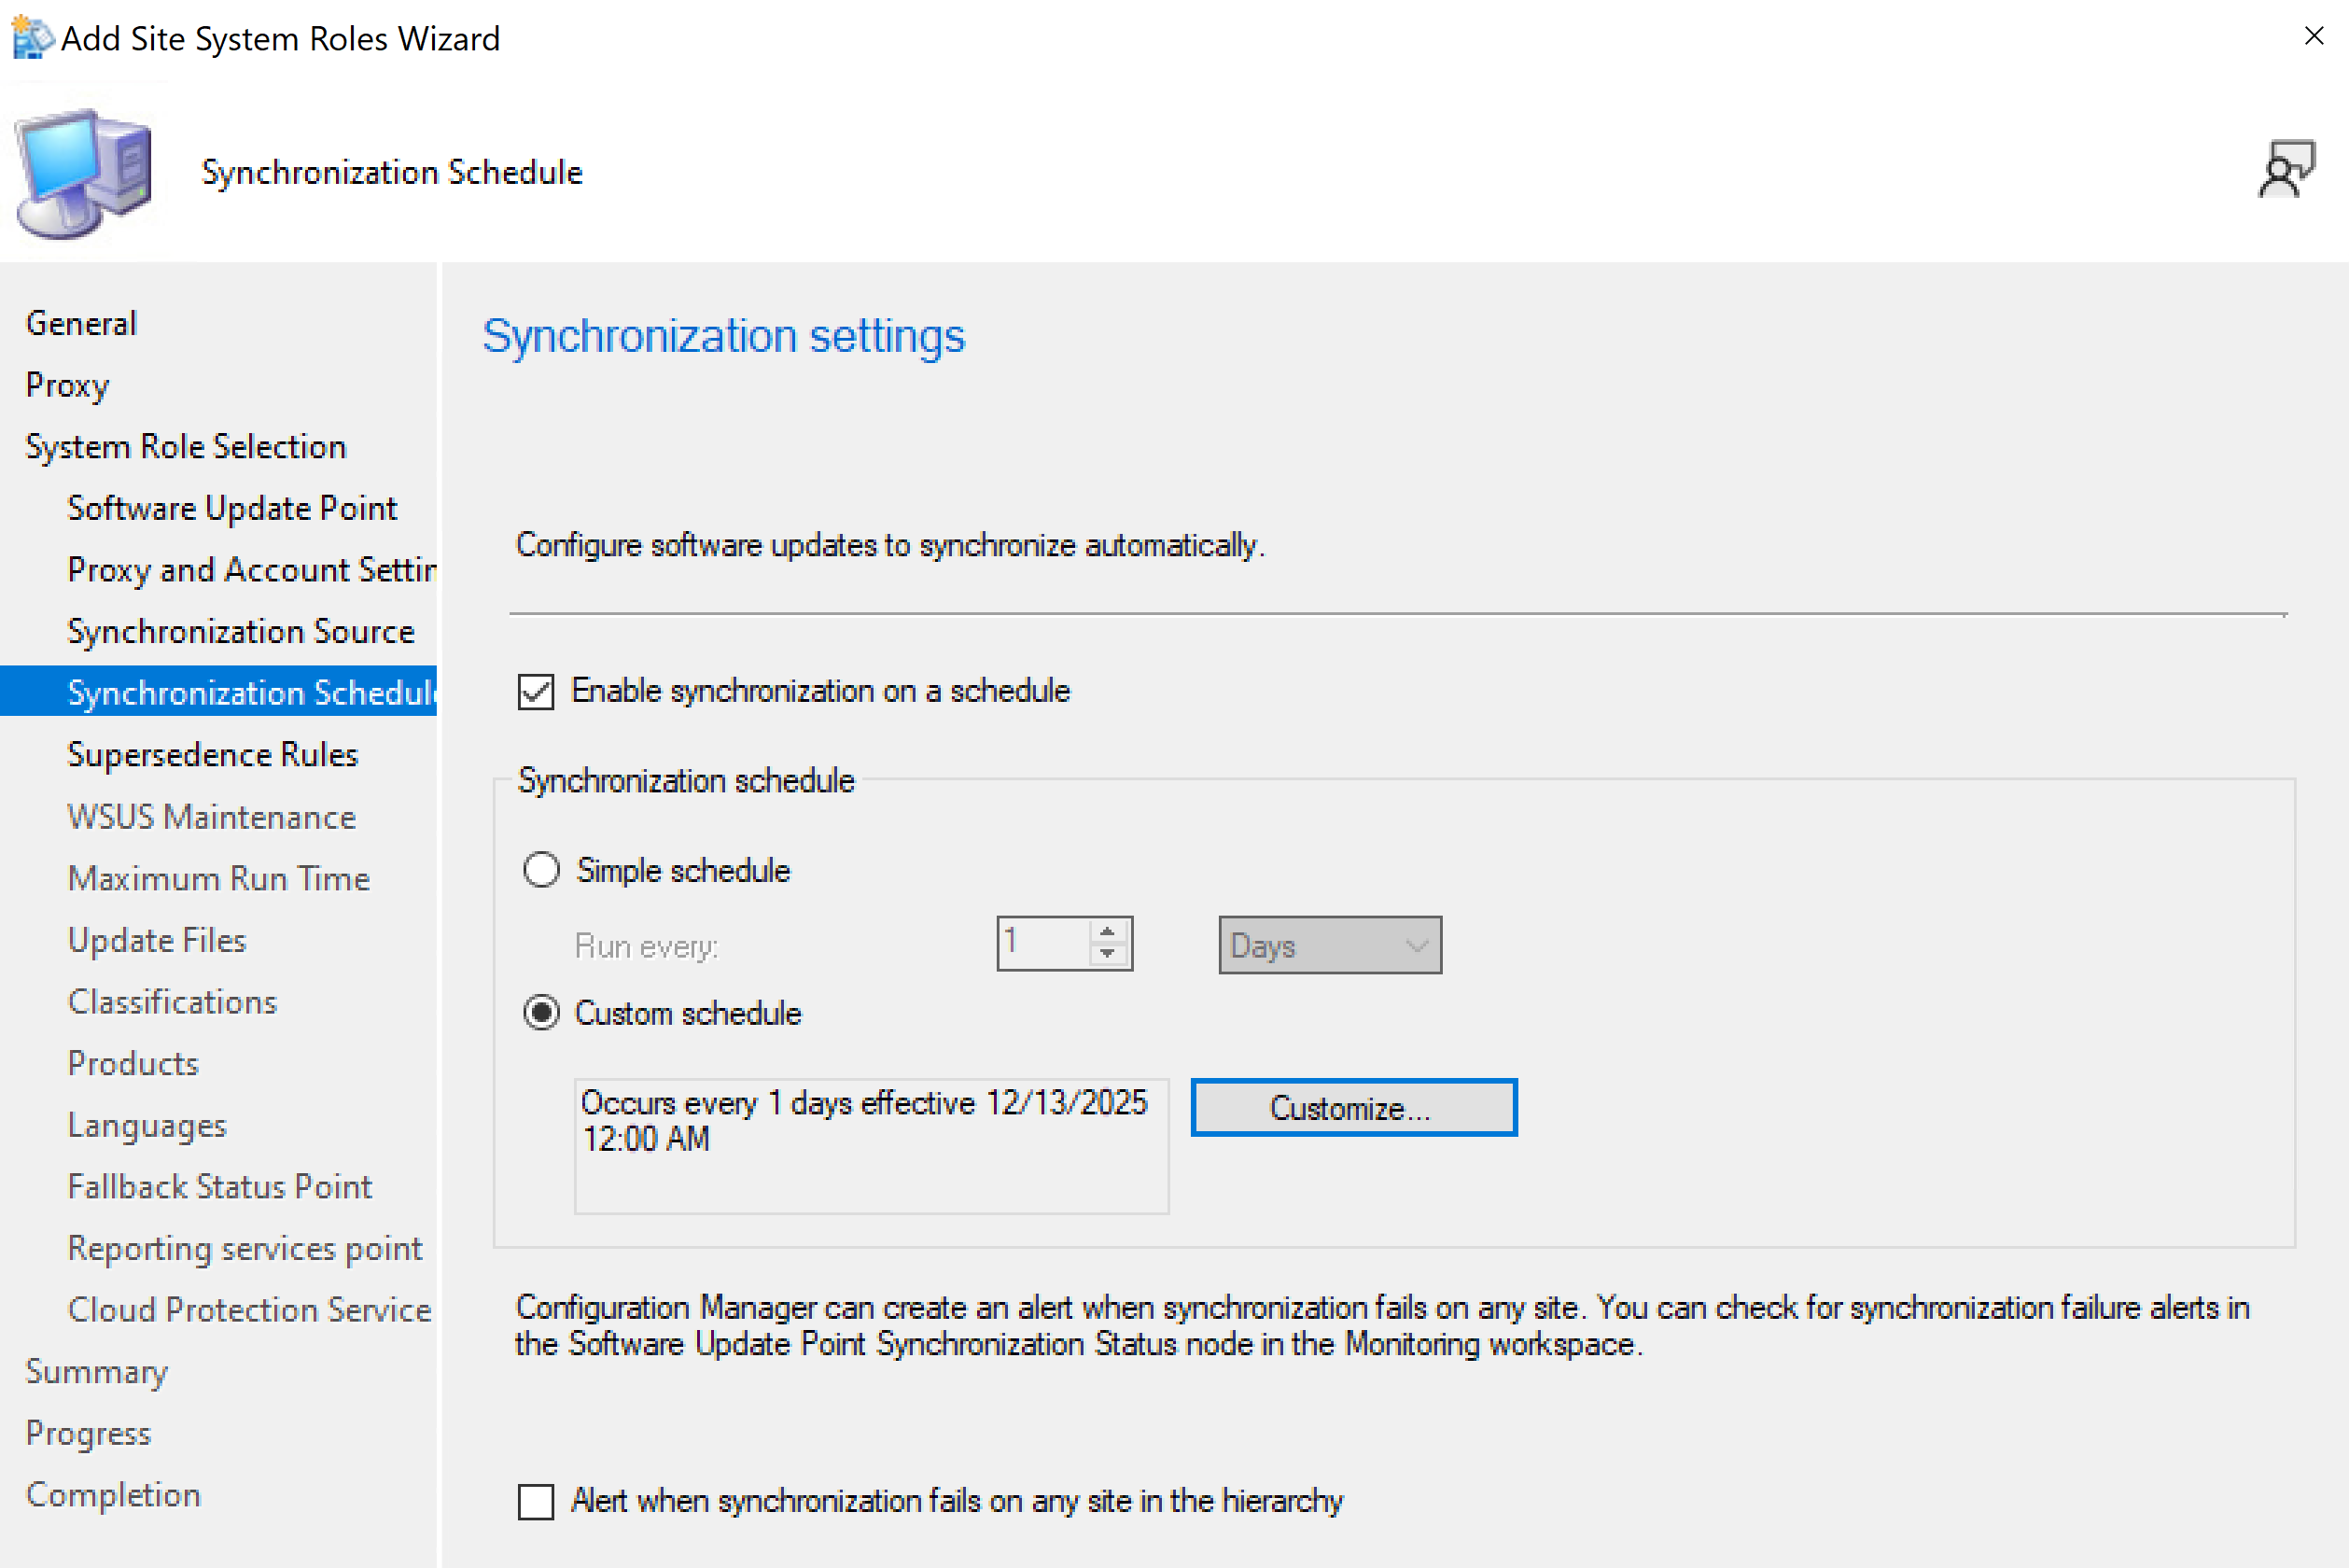
WSUS is configured to use ports 8530 and 8531.
Enabled synchronization on a schedule: Daily at 12:00AM
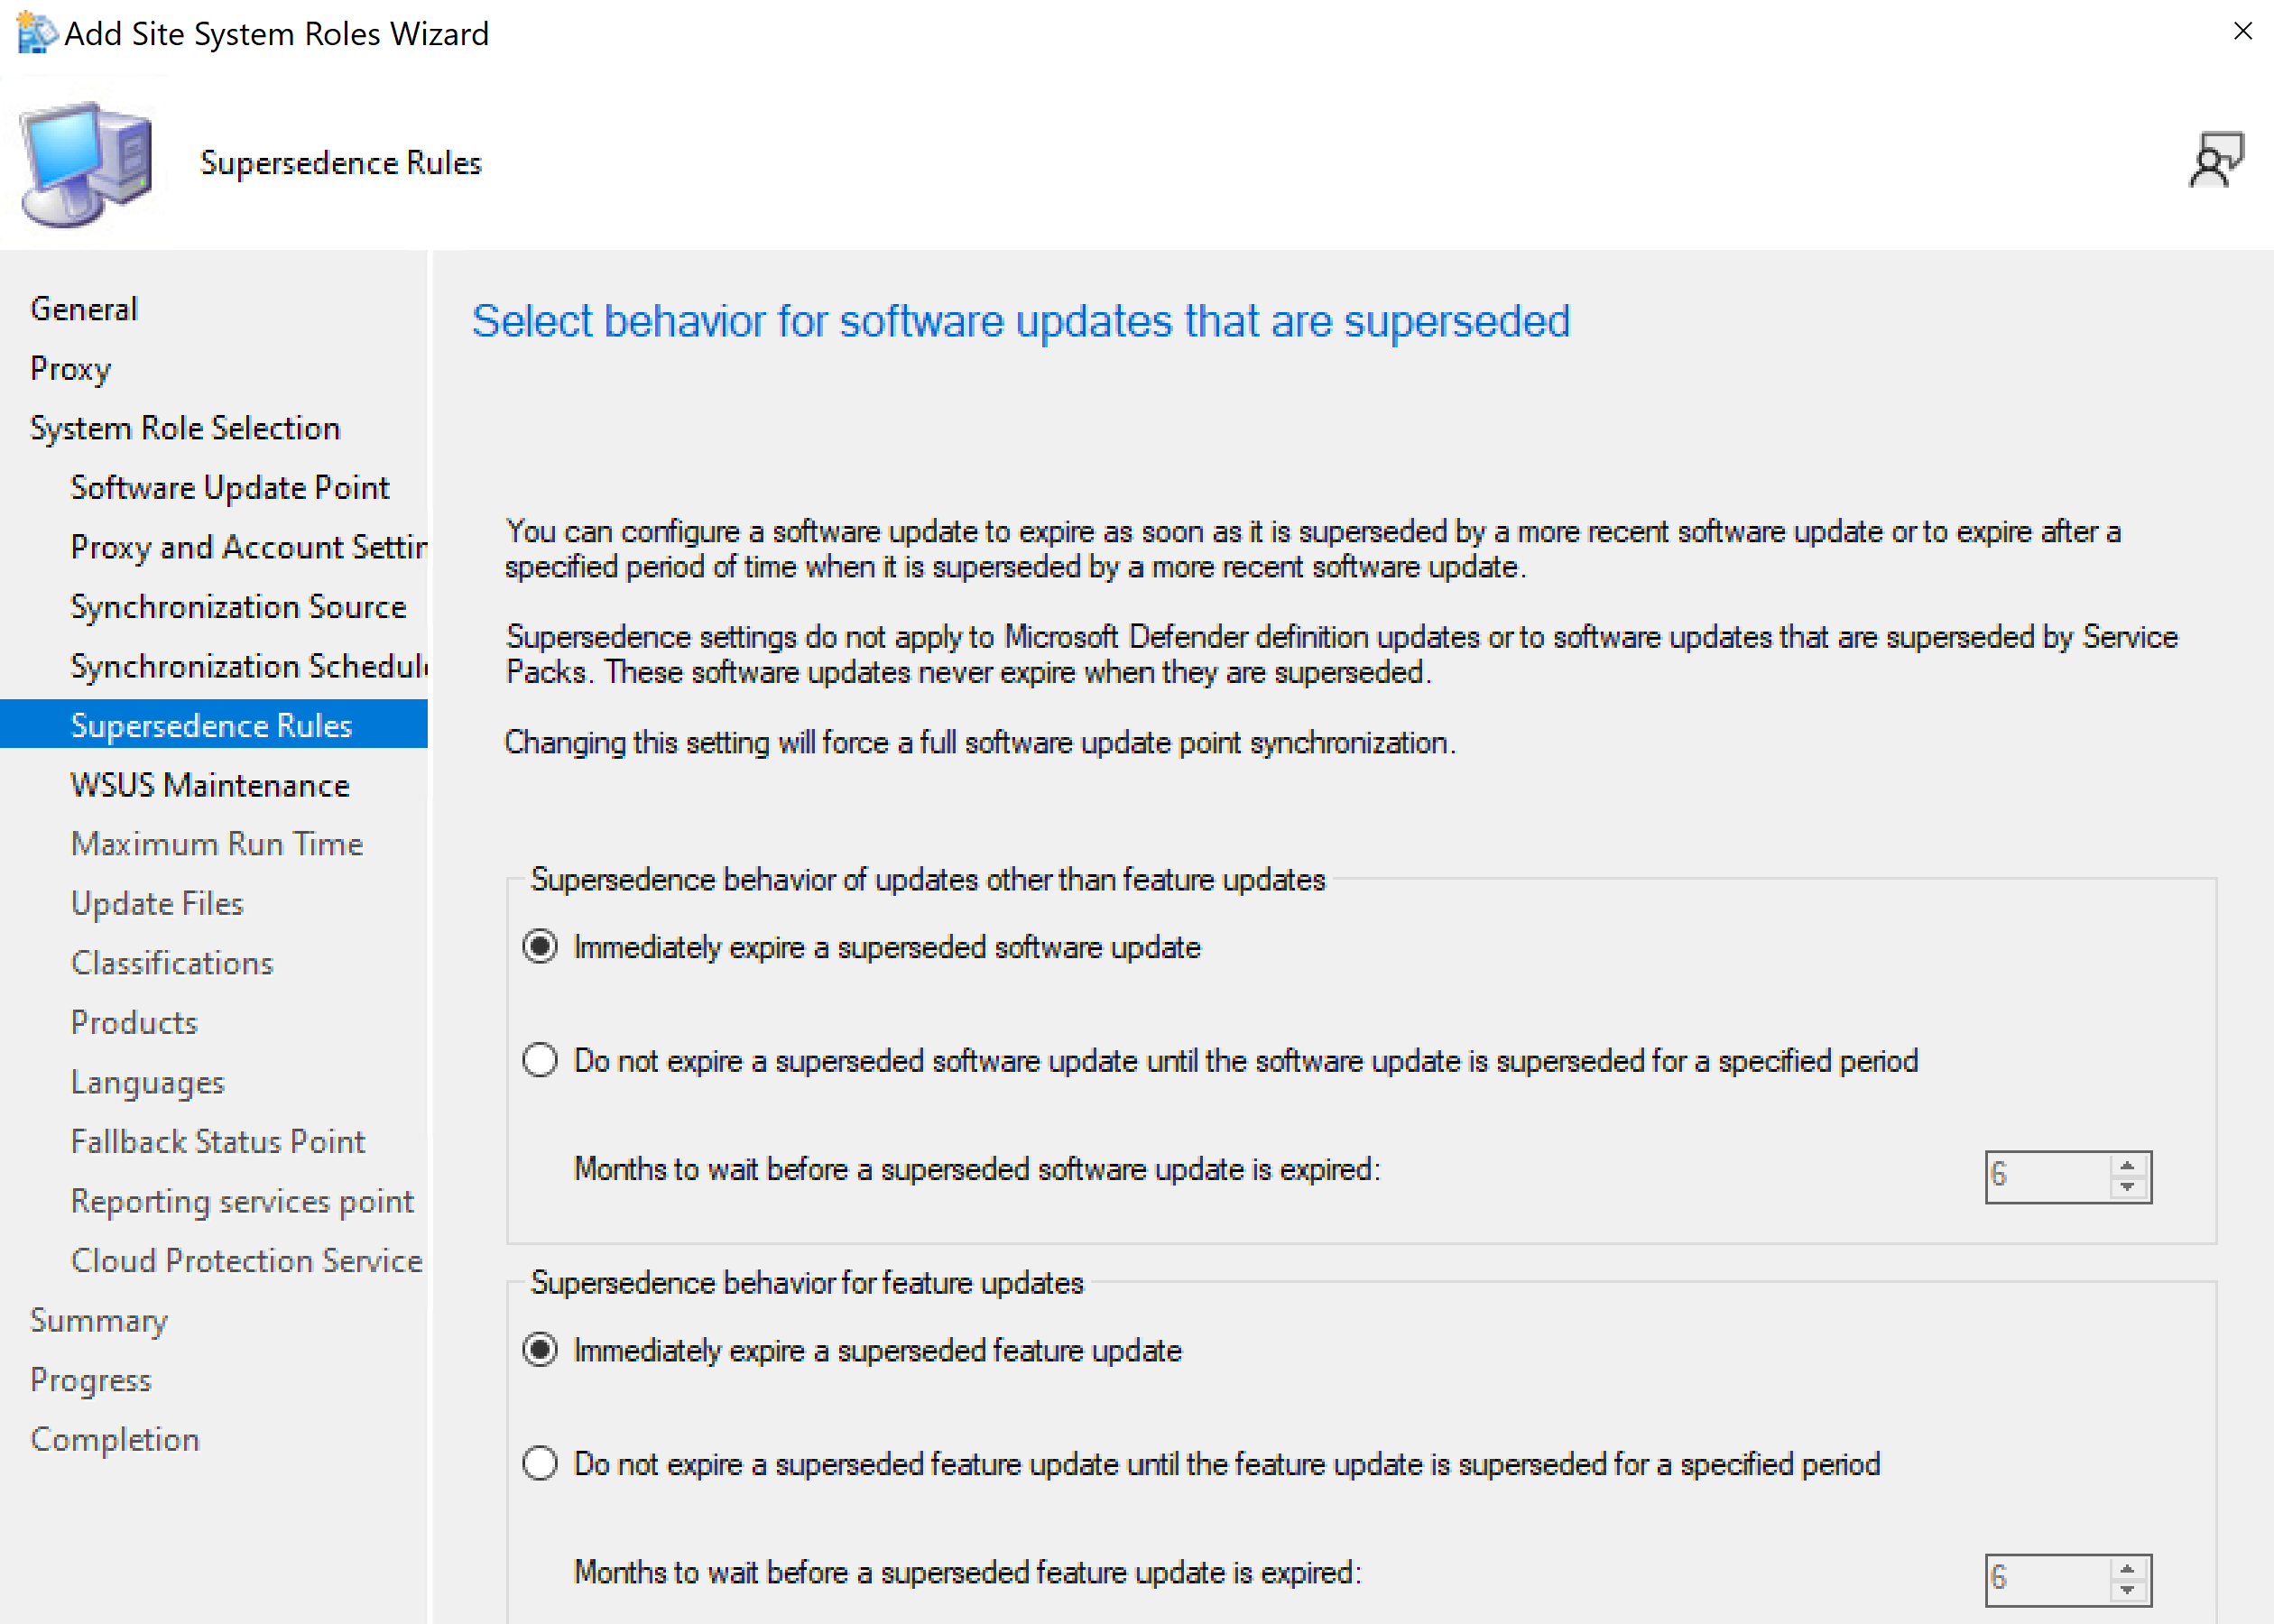
Set Supersedence behavior to immediate for the lab environment.
Selecting the option to download full files for all approved updates however, for enterprise environment express installation files can provide faster installation on computers because only the necessary files are downloaded.

Verify connectivity for the site database server, select SCCM_ SQLService (service account) as reporting services point account.
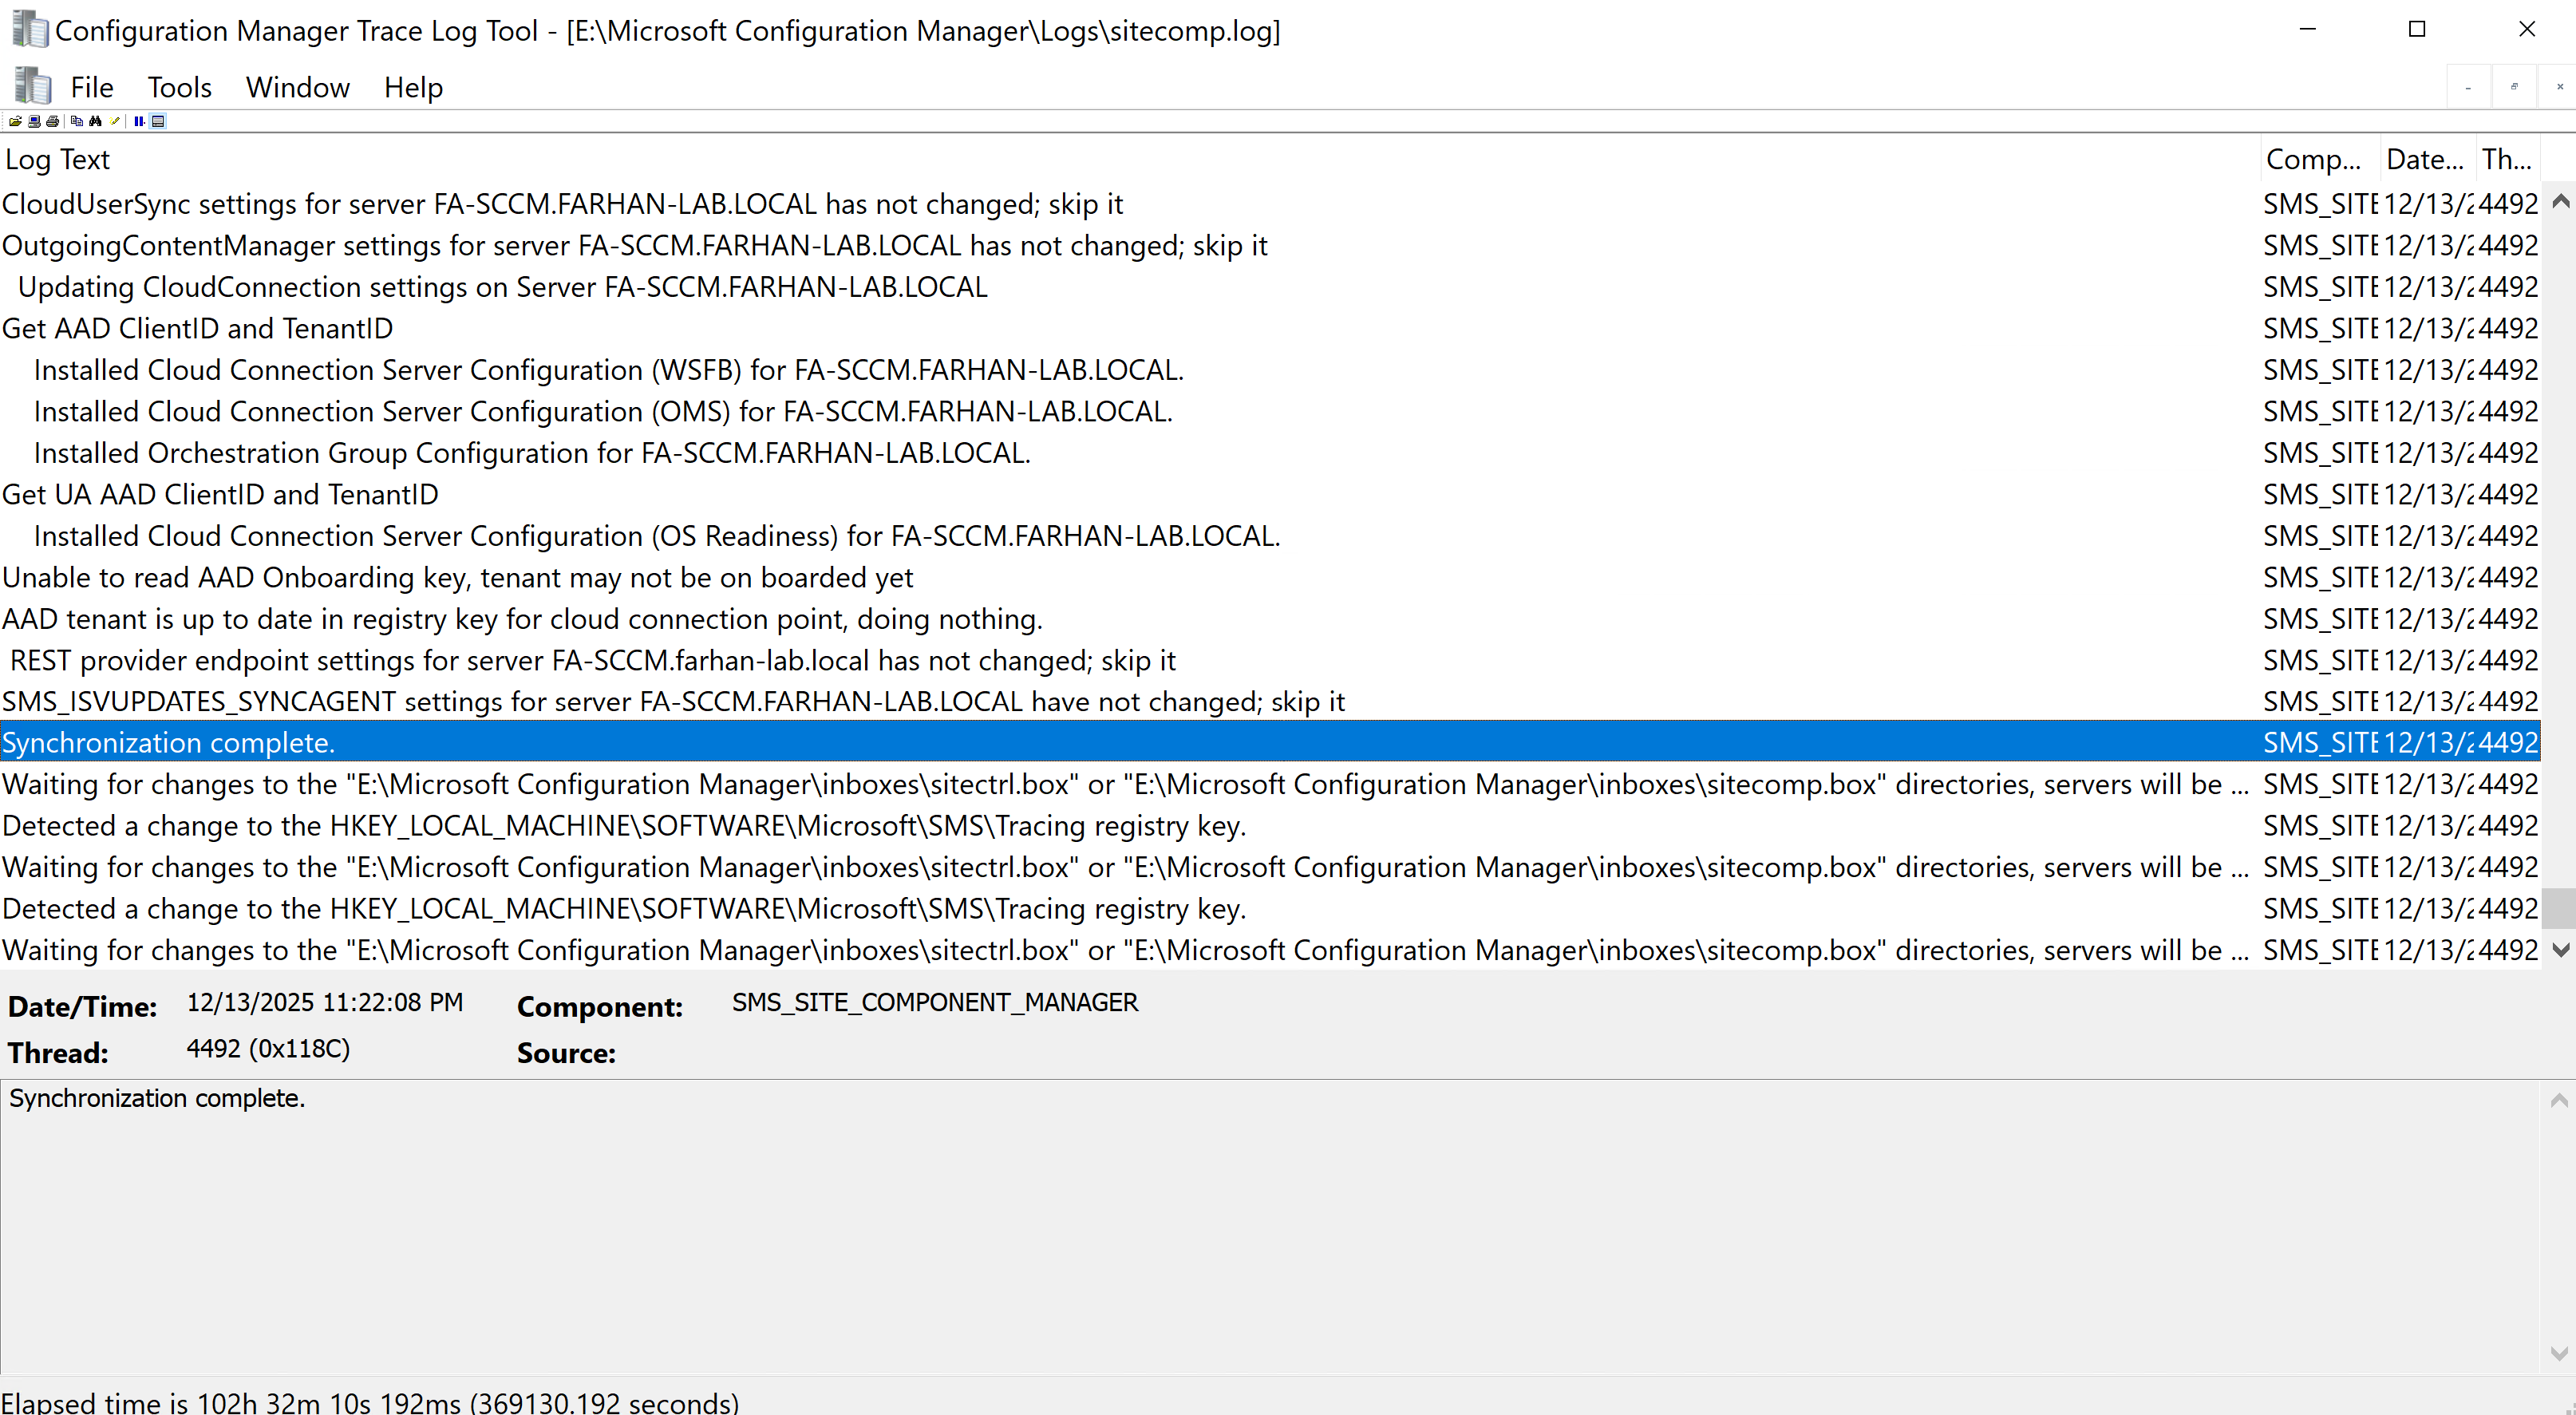
Verify installation.
Review sitecomp.log
2. Configure Boundaries and Boundary Groups
A boundary defines where a client is on the network, and a boundary group tells SCCM which site and content sources that client should use.
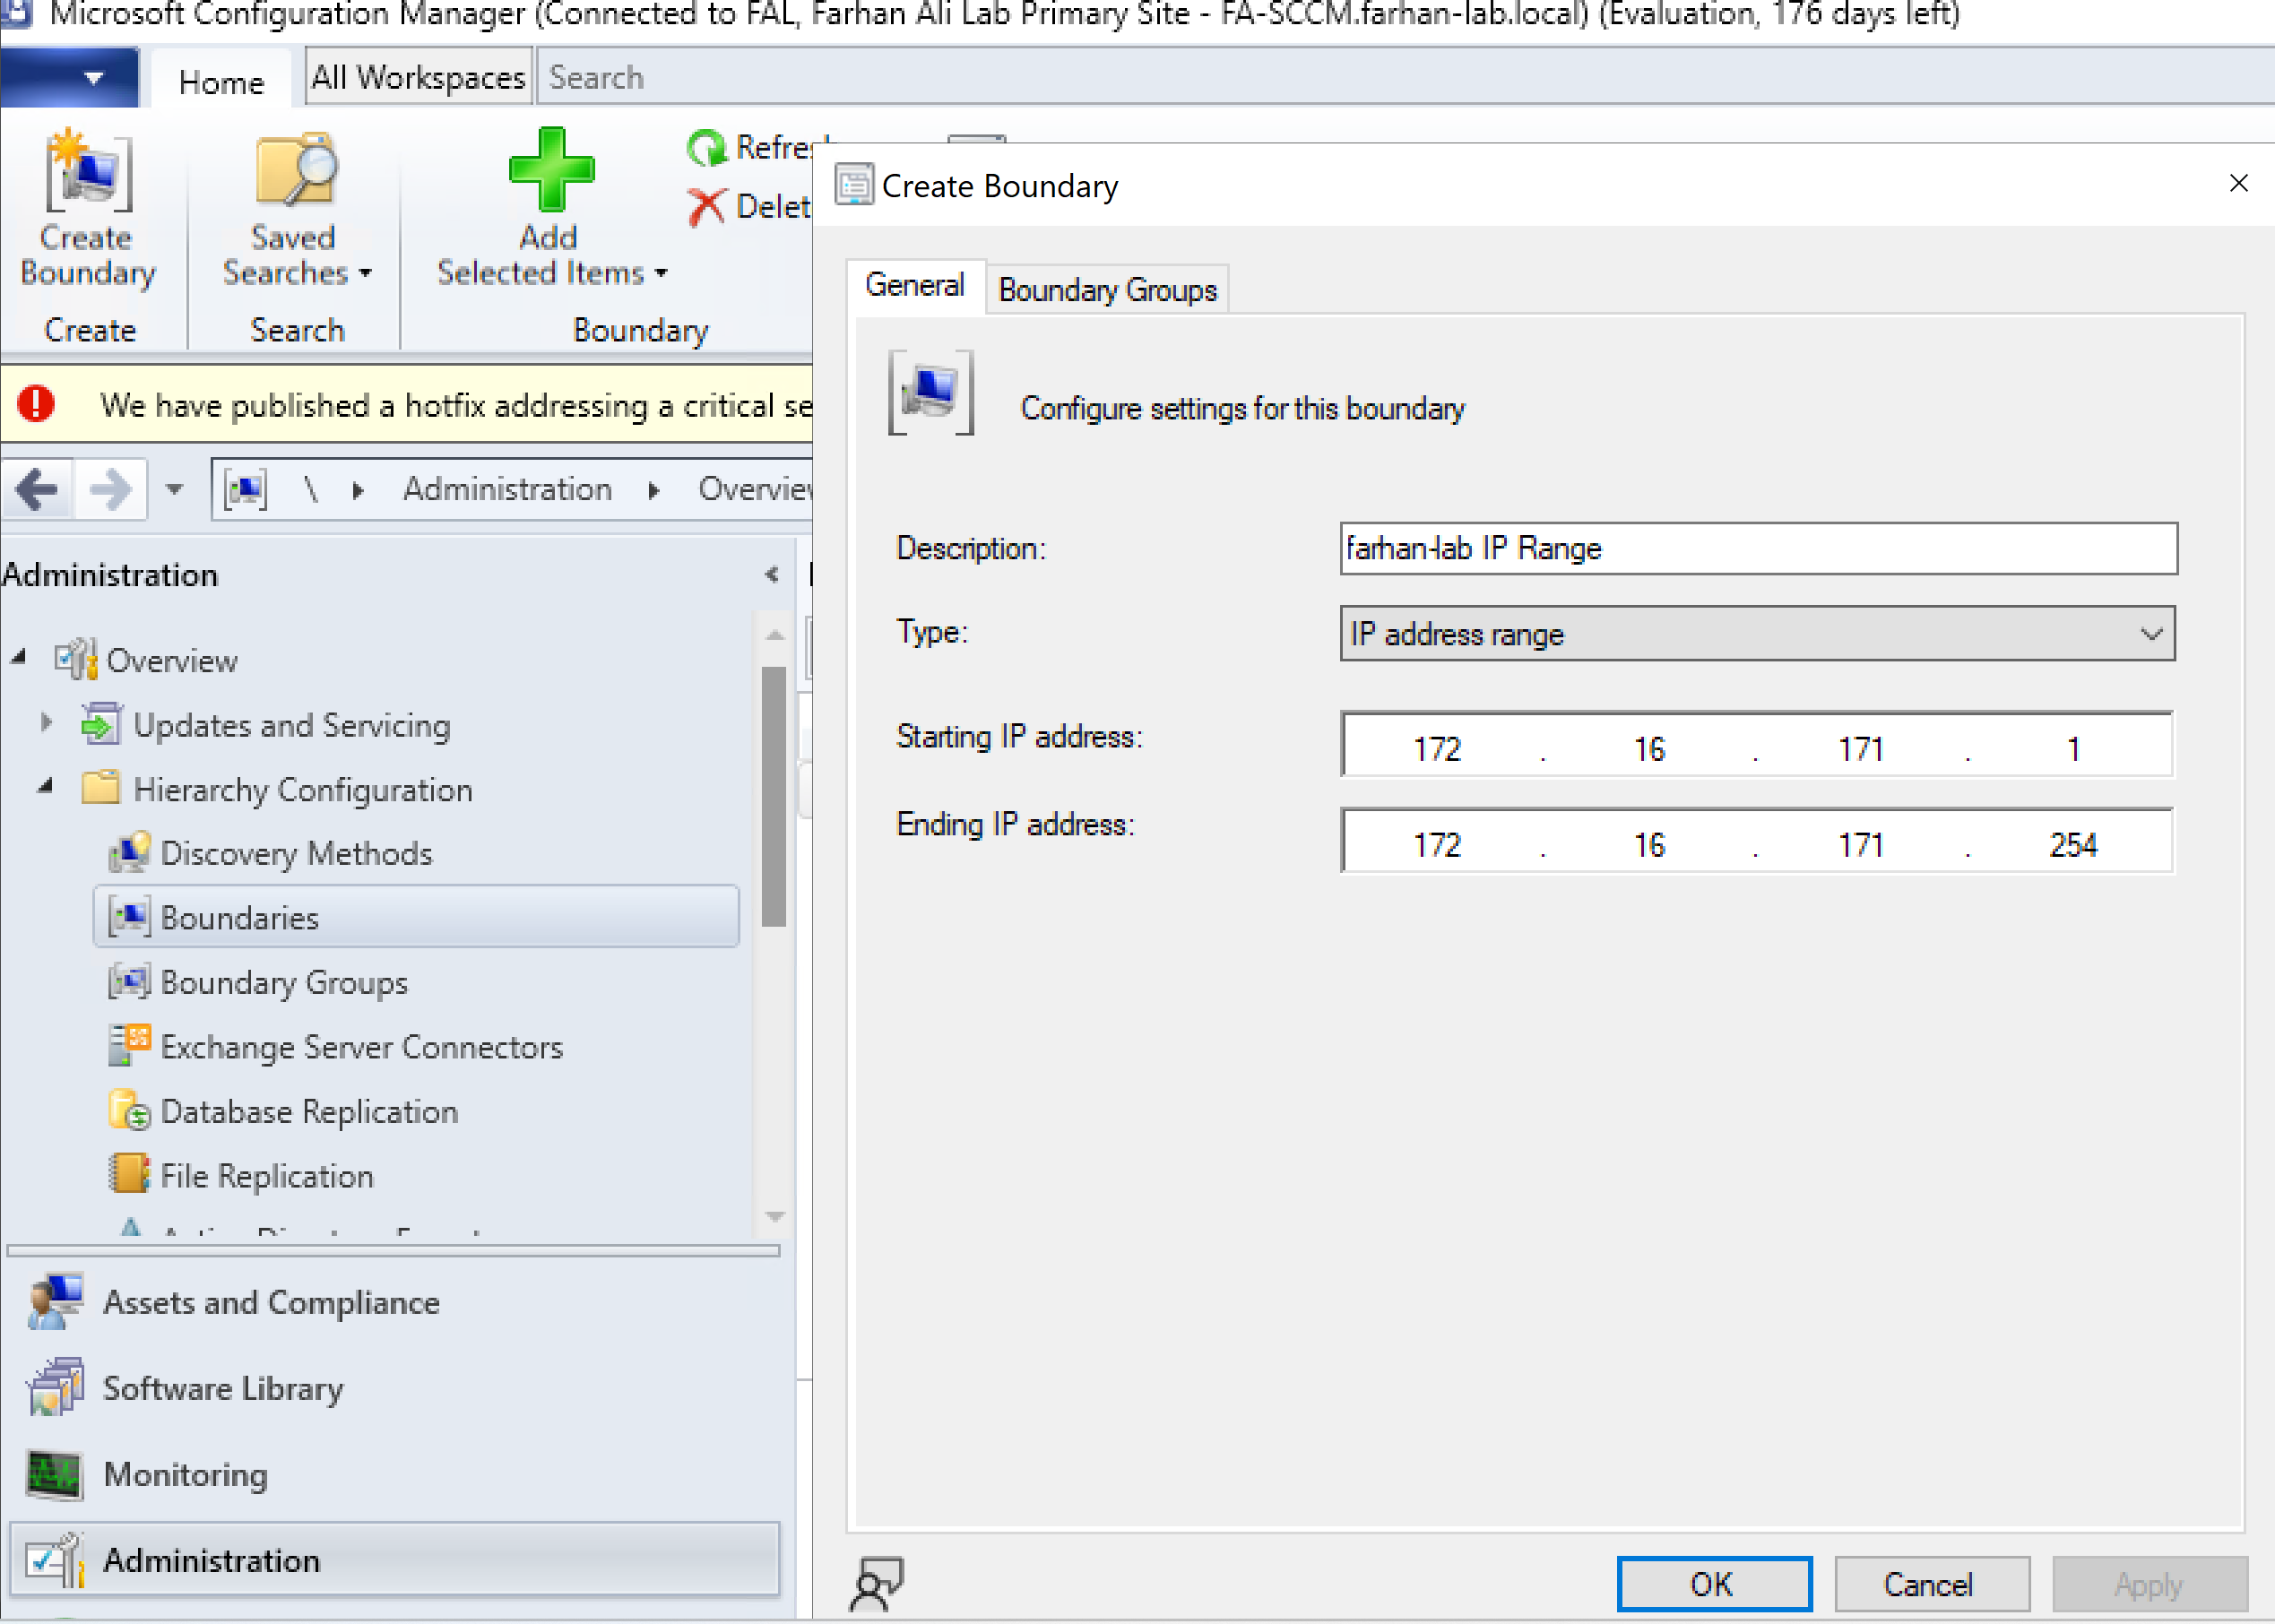
Create Boundary
I am creating a boundary for my lab’s IP address range.

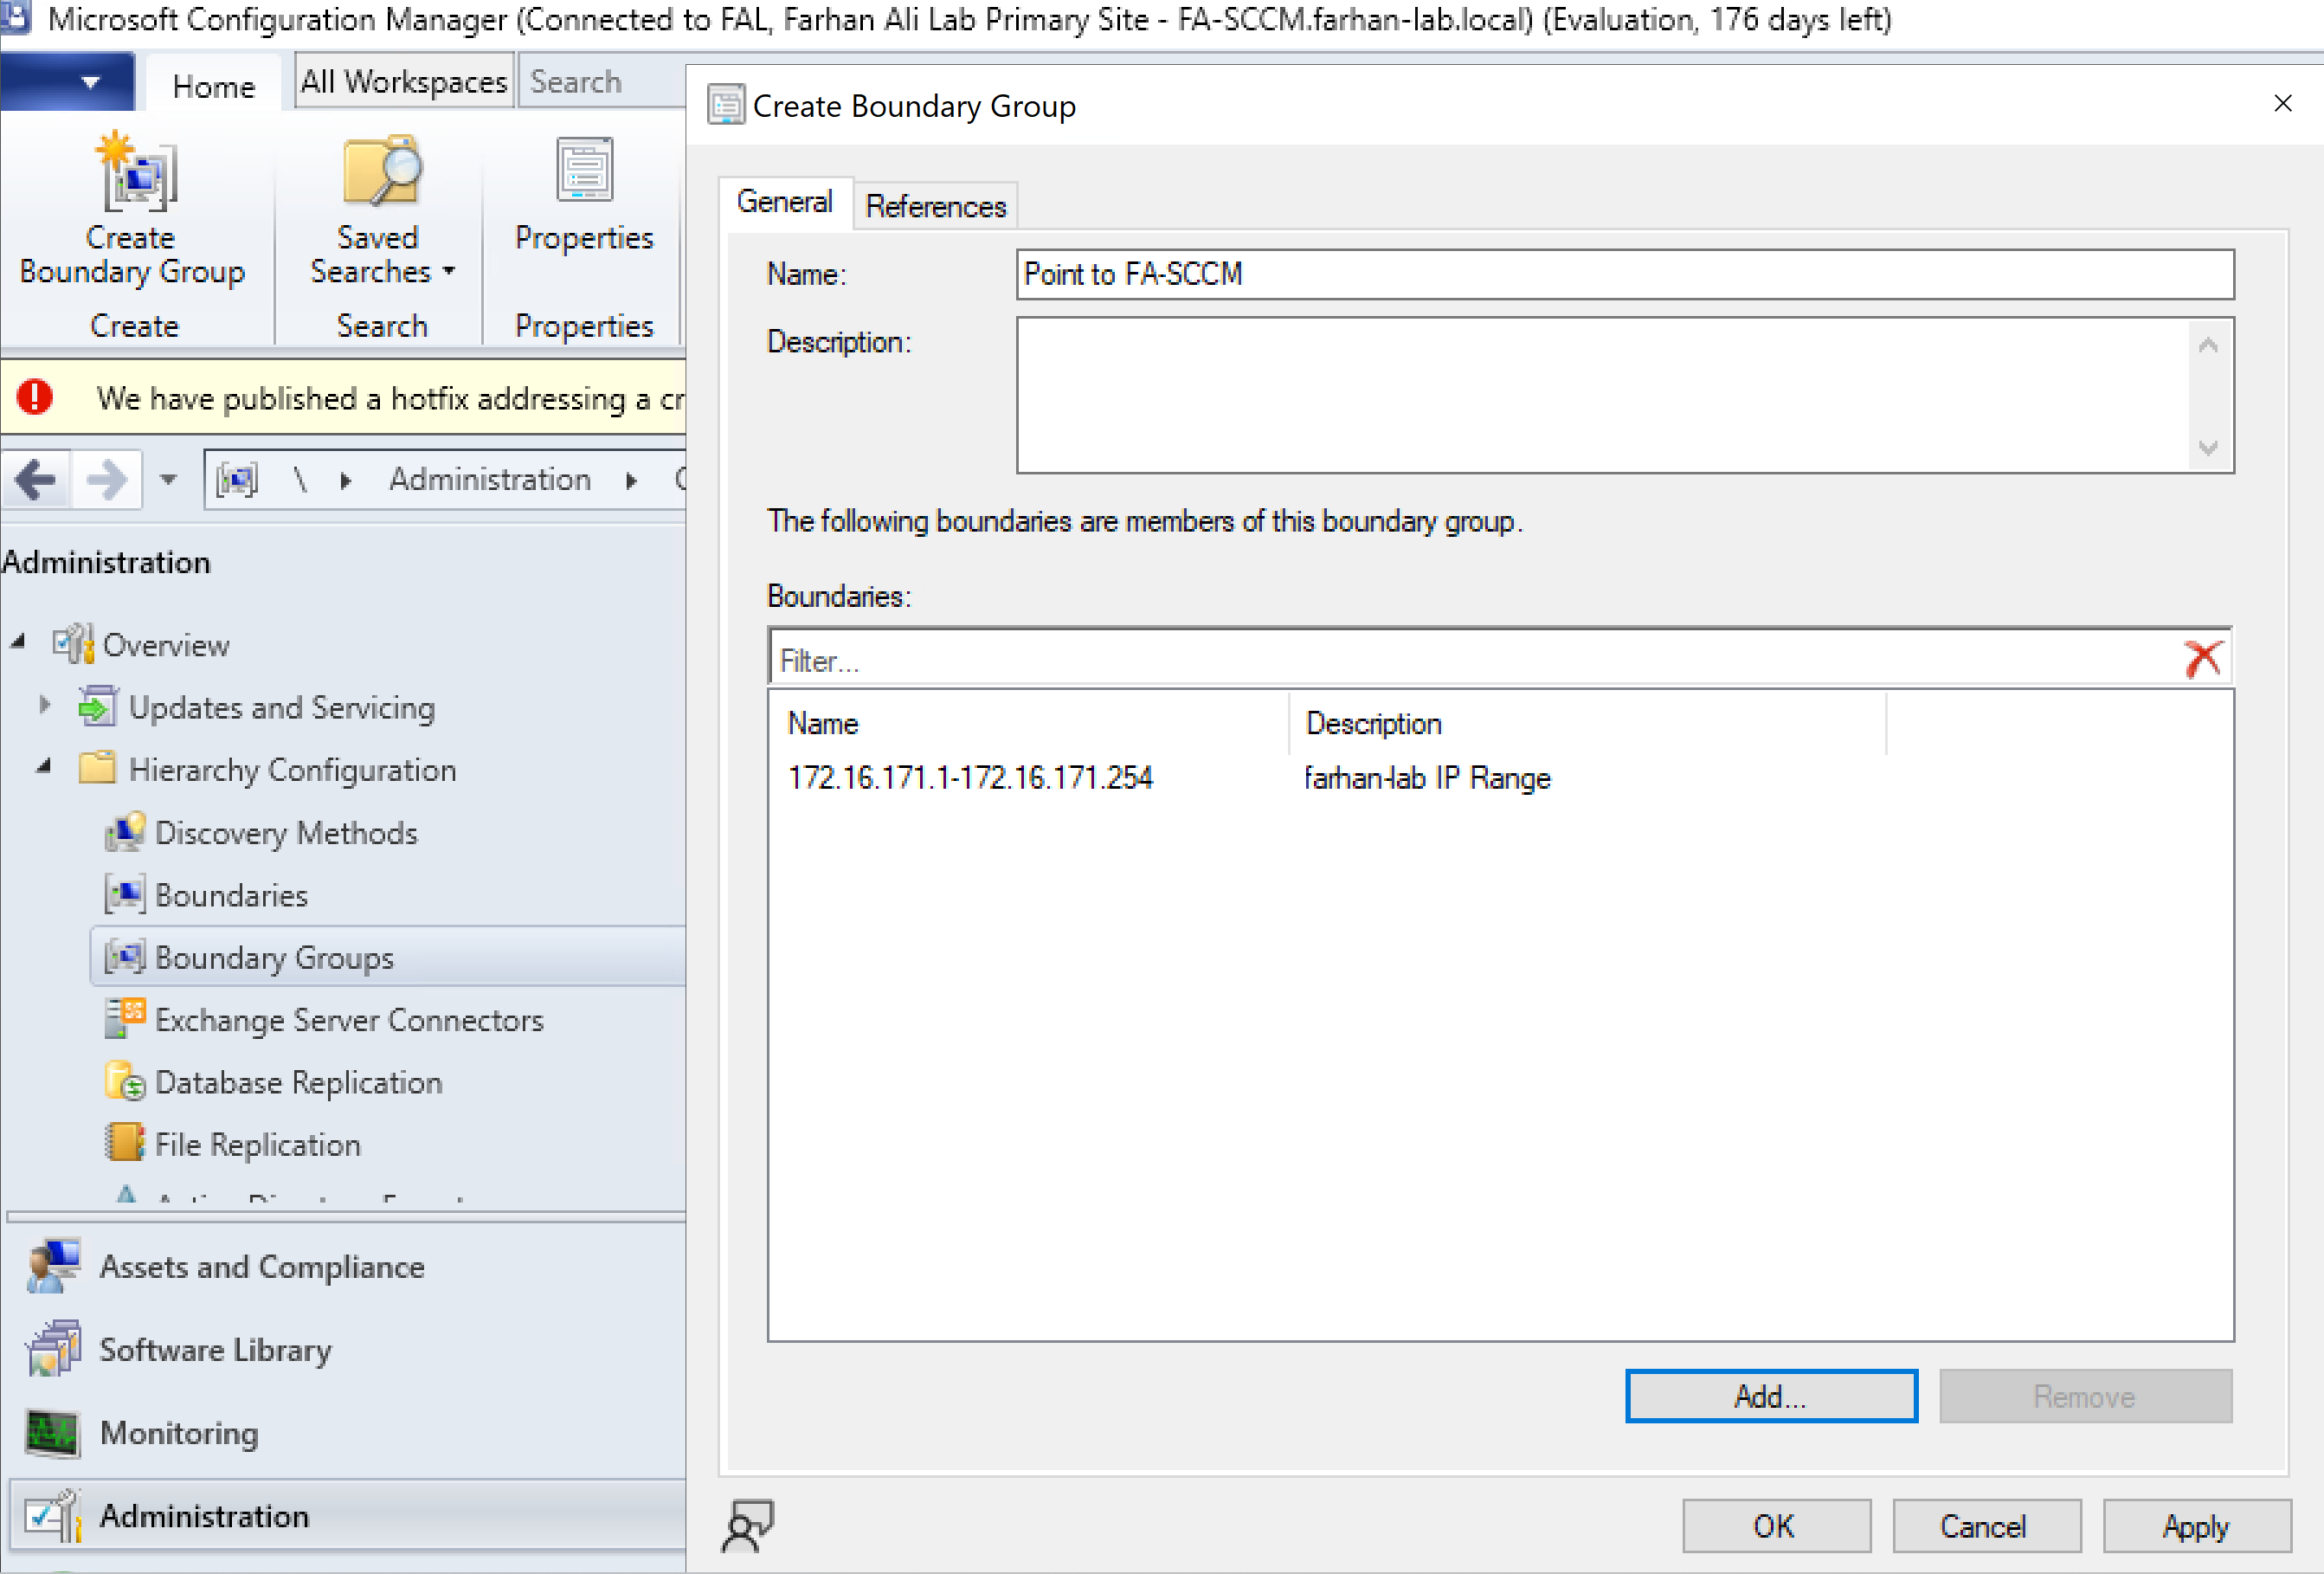
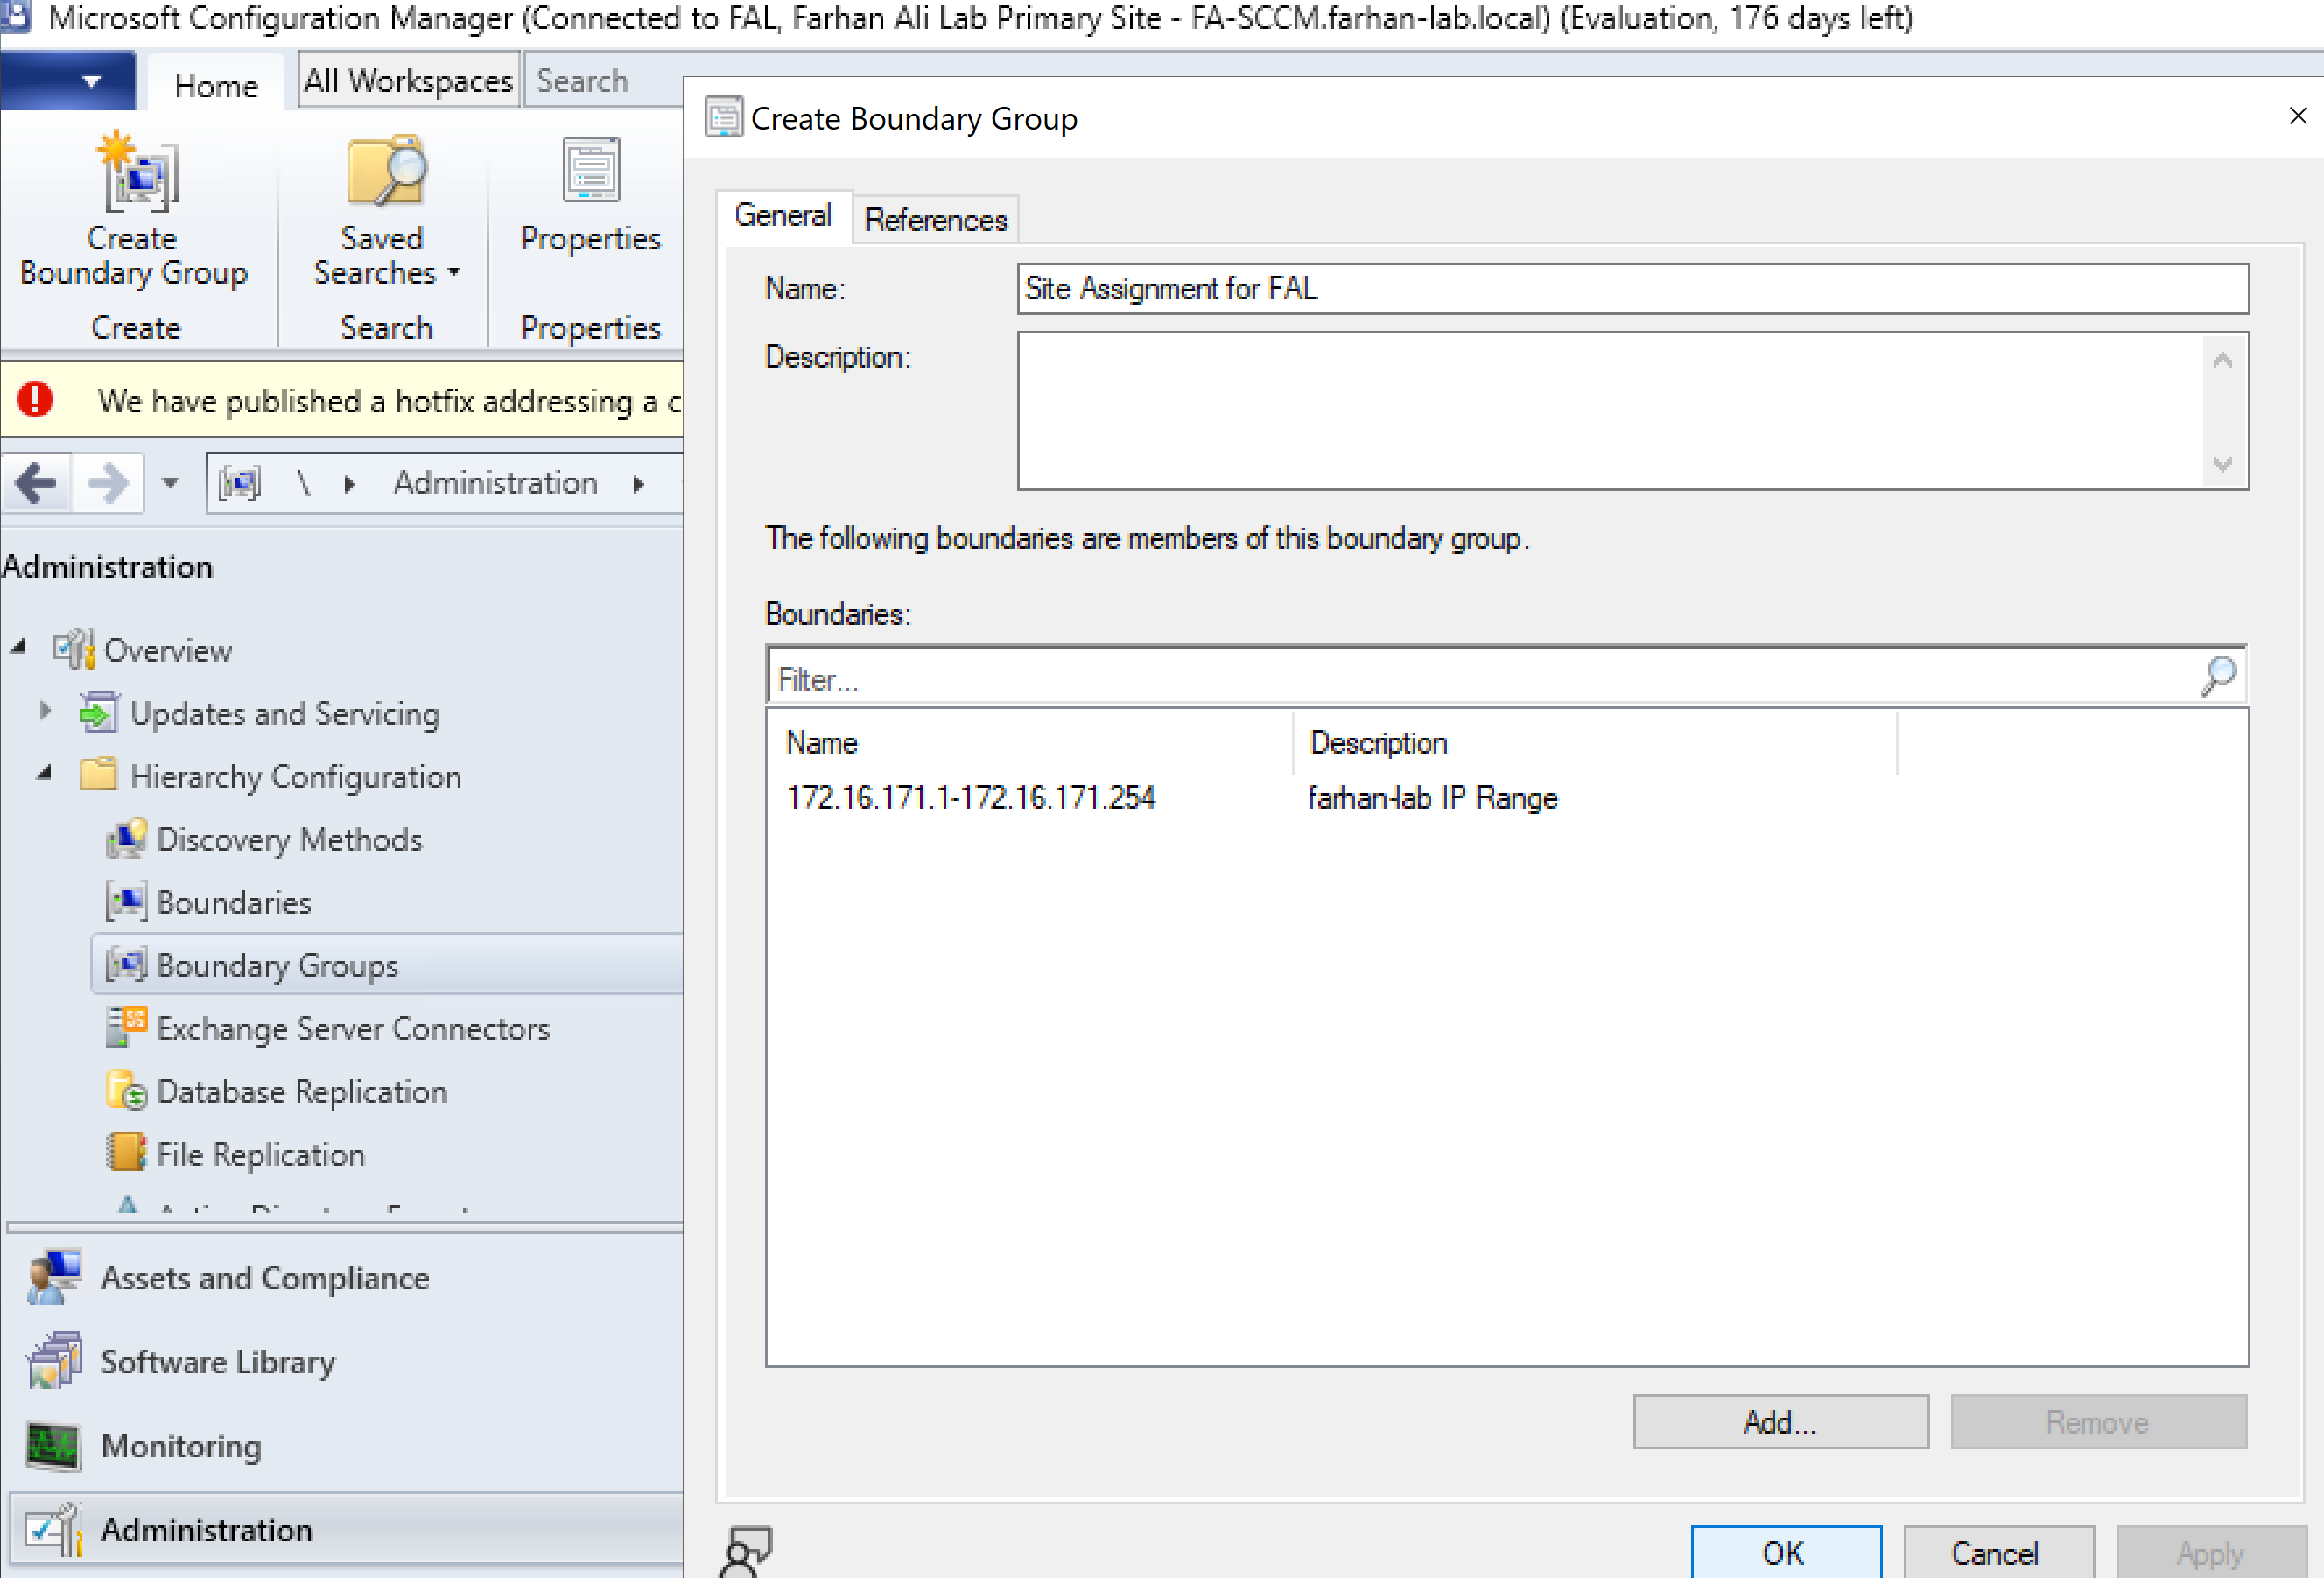
Create Boundary Group for Content Location
Configured a boundary group to point to the distribution point (FA-SCCM).
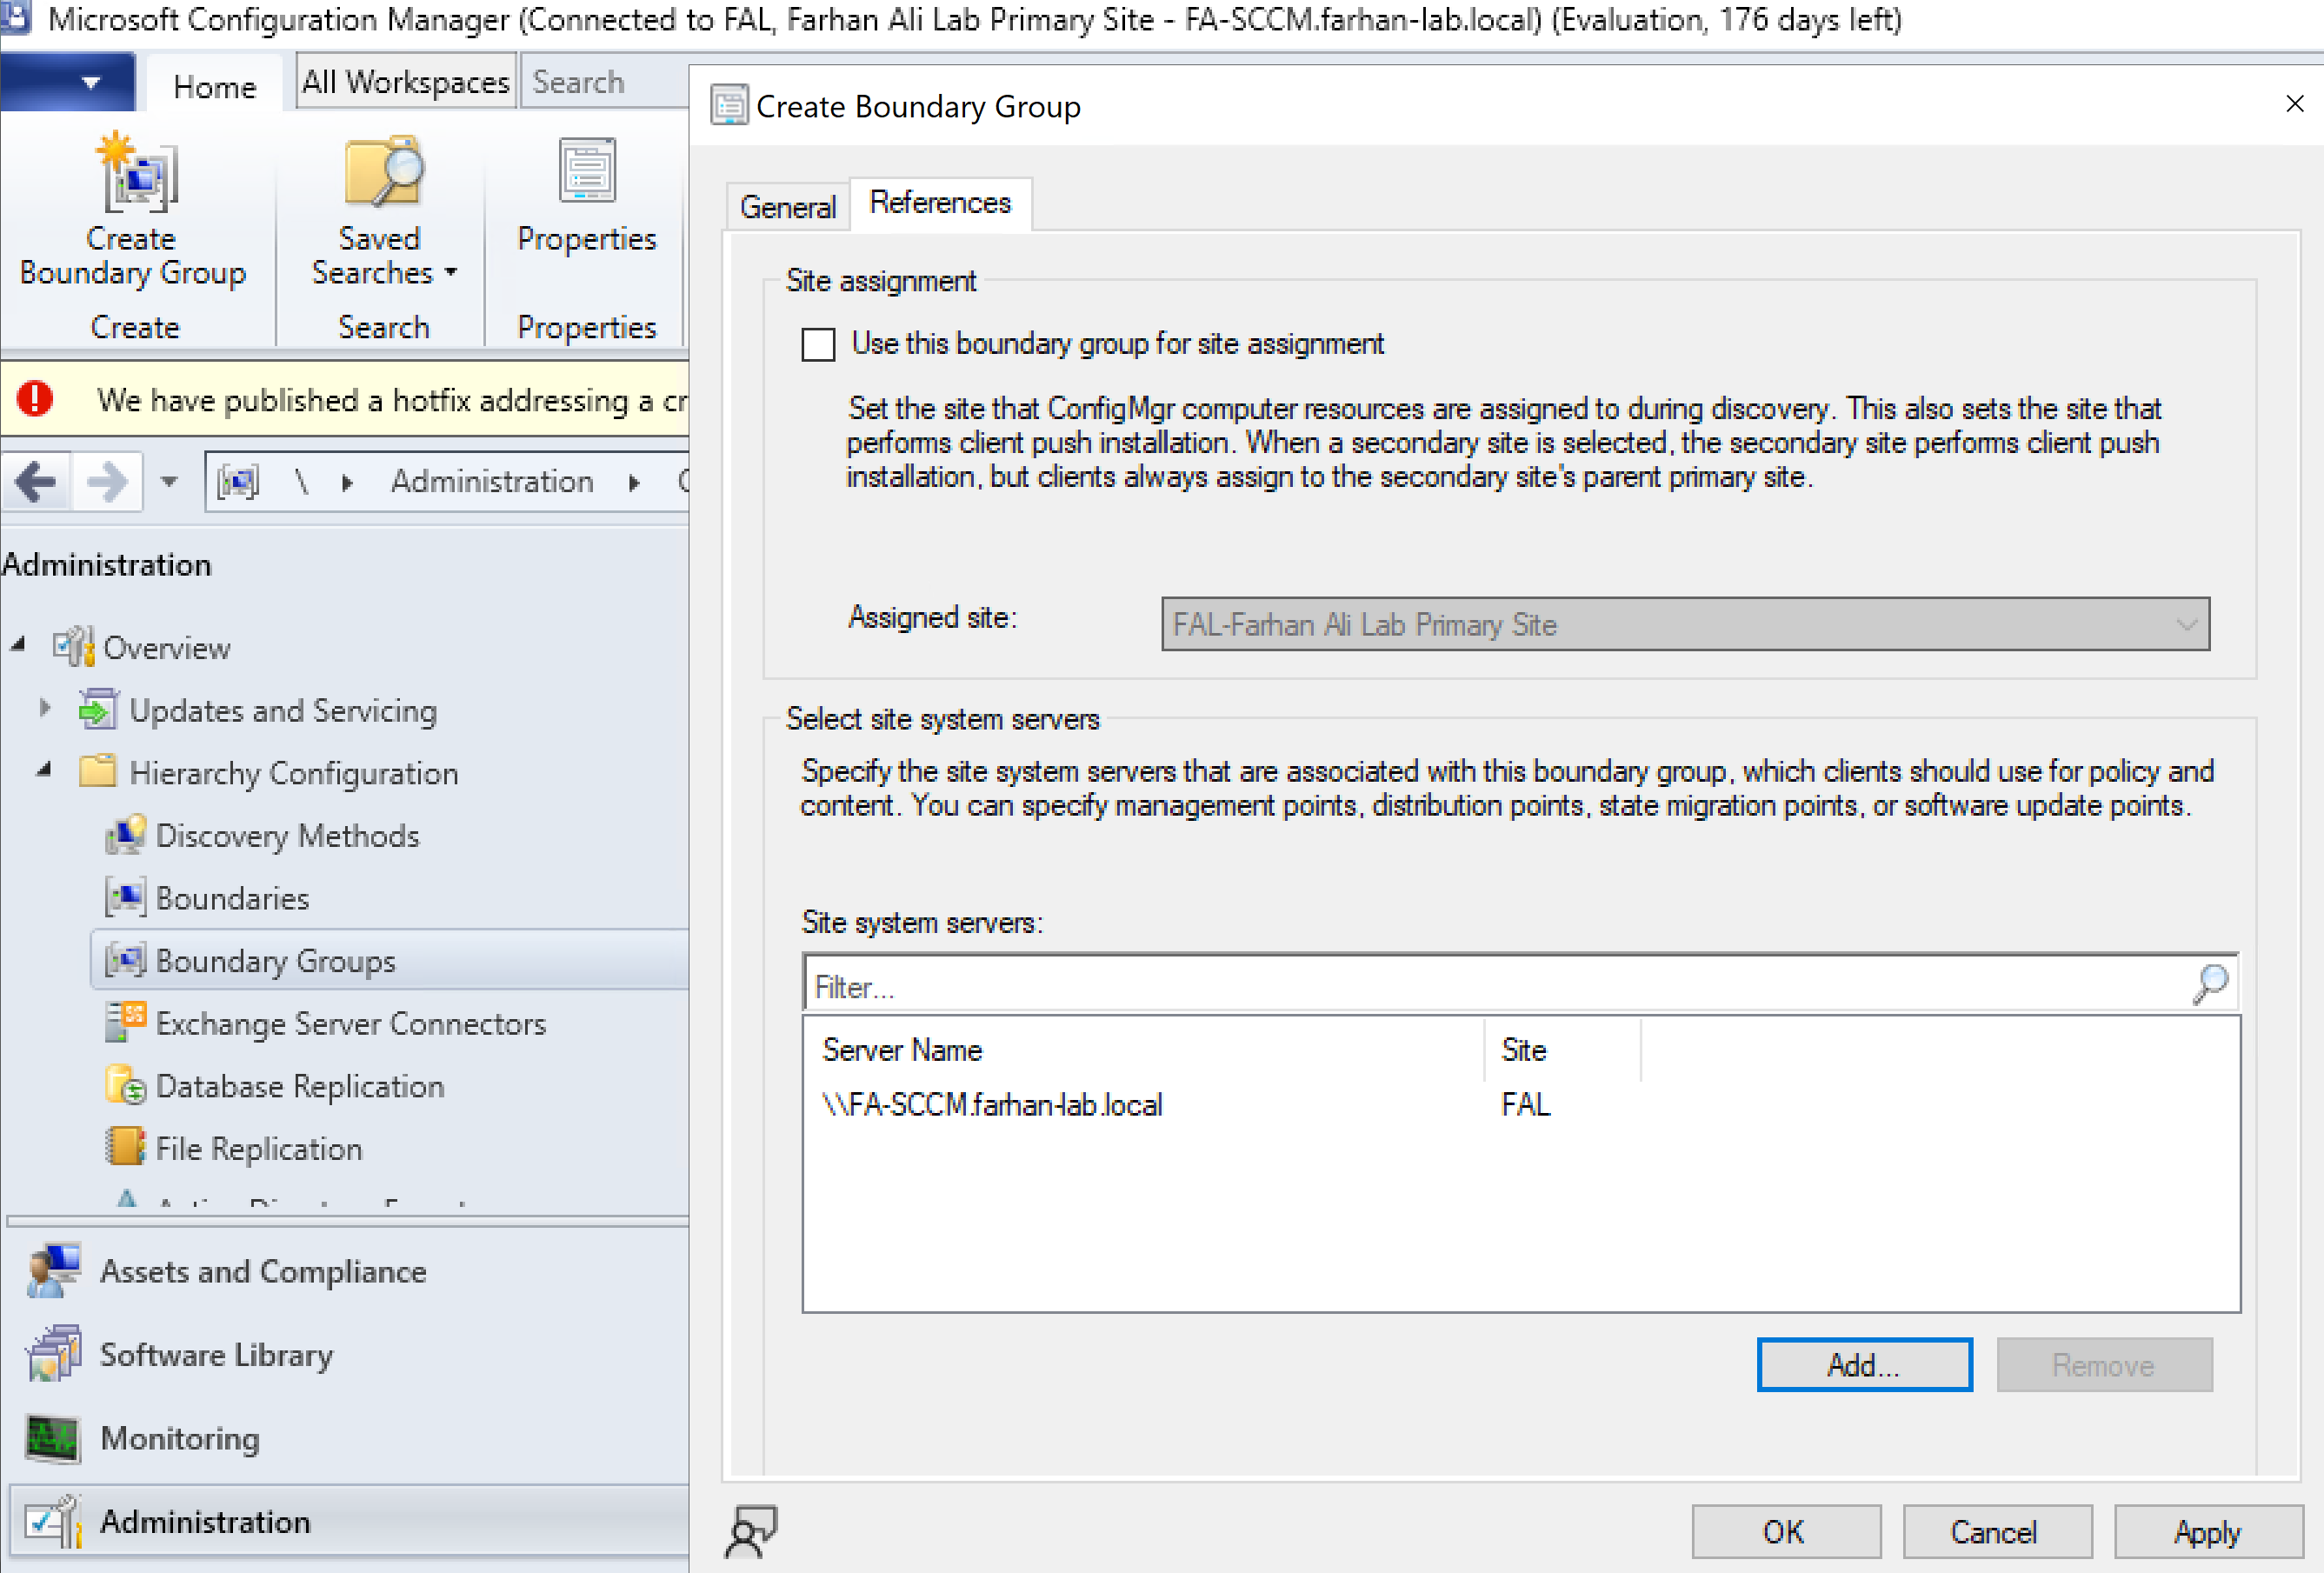
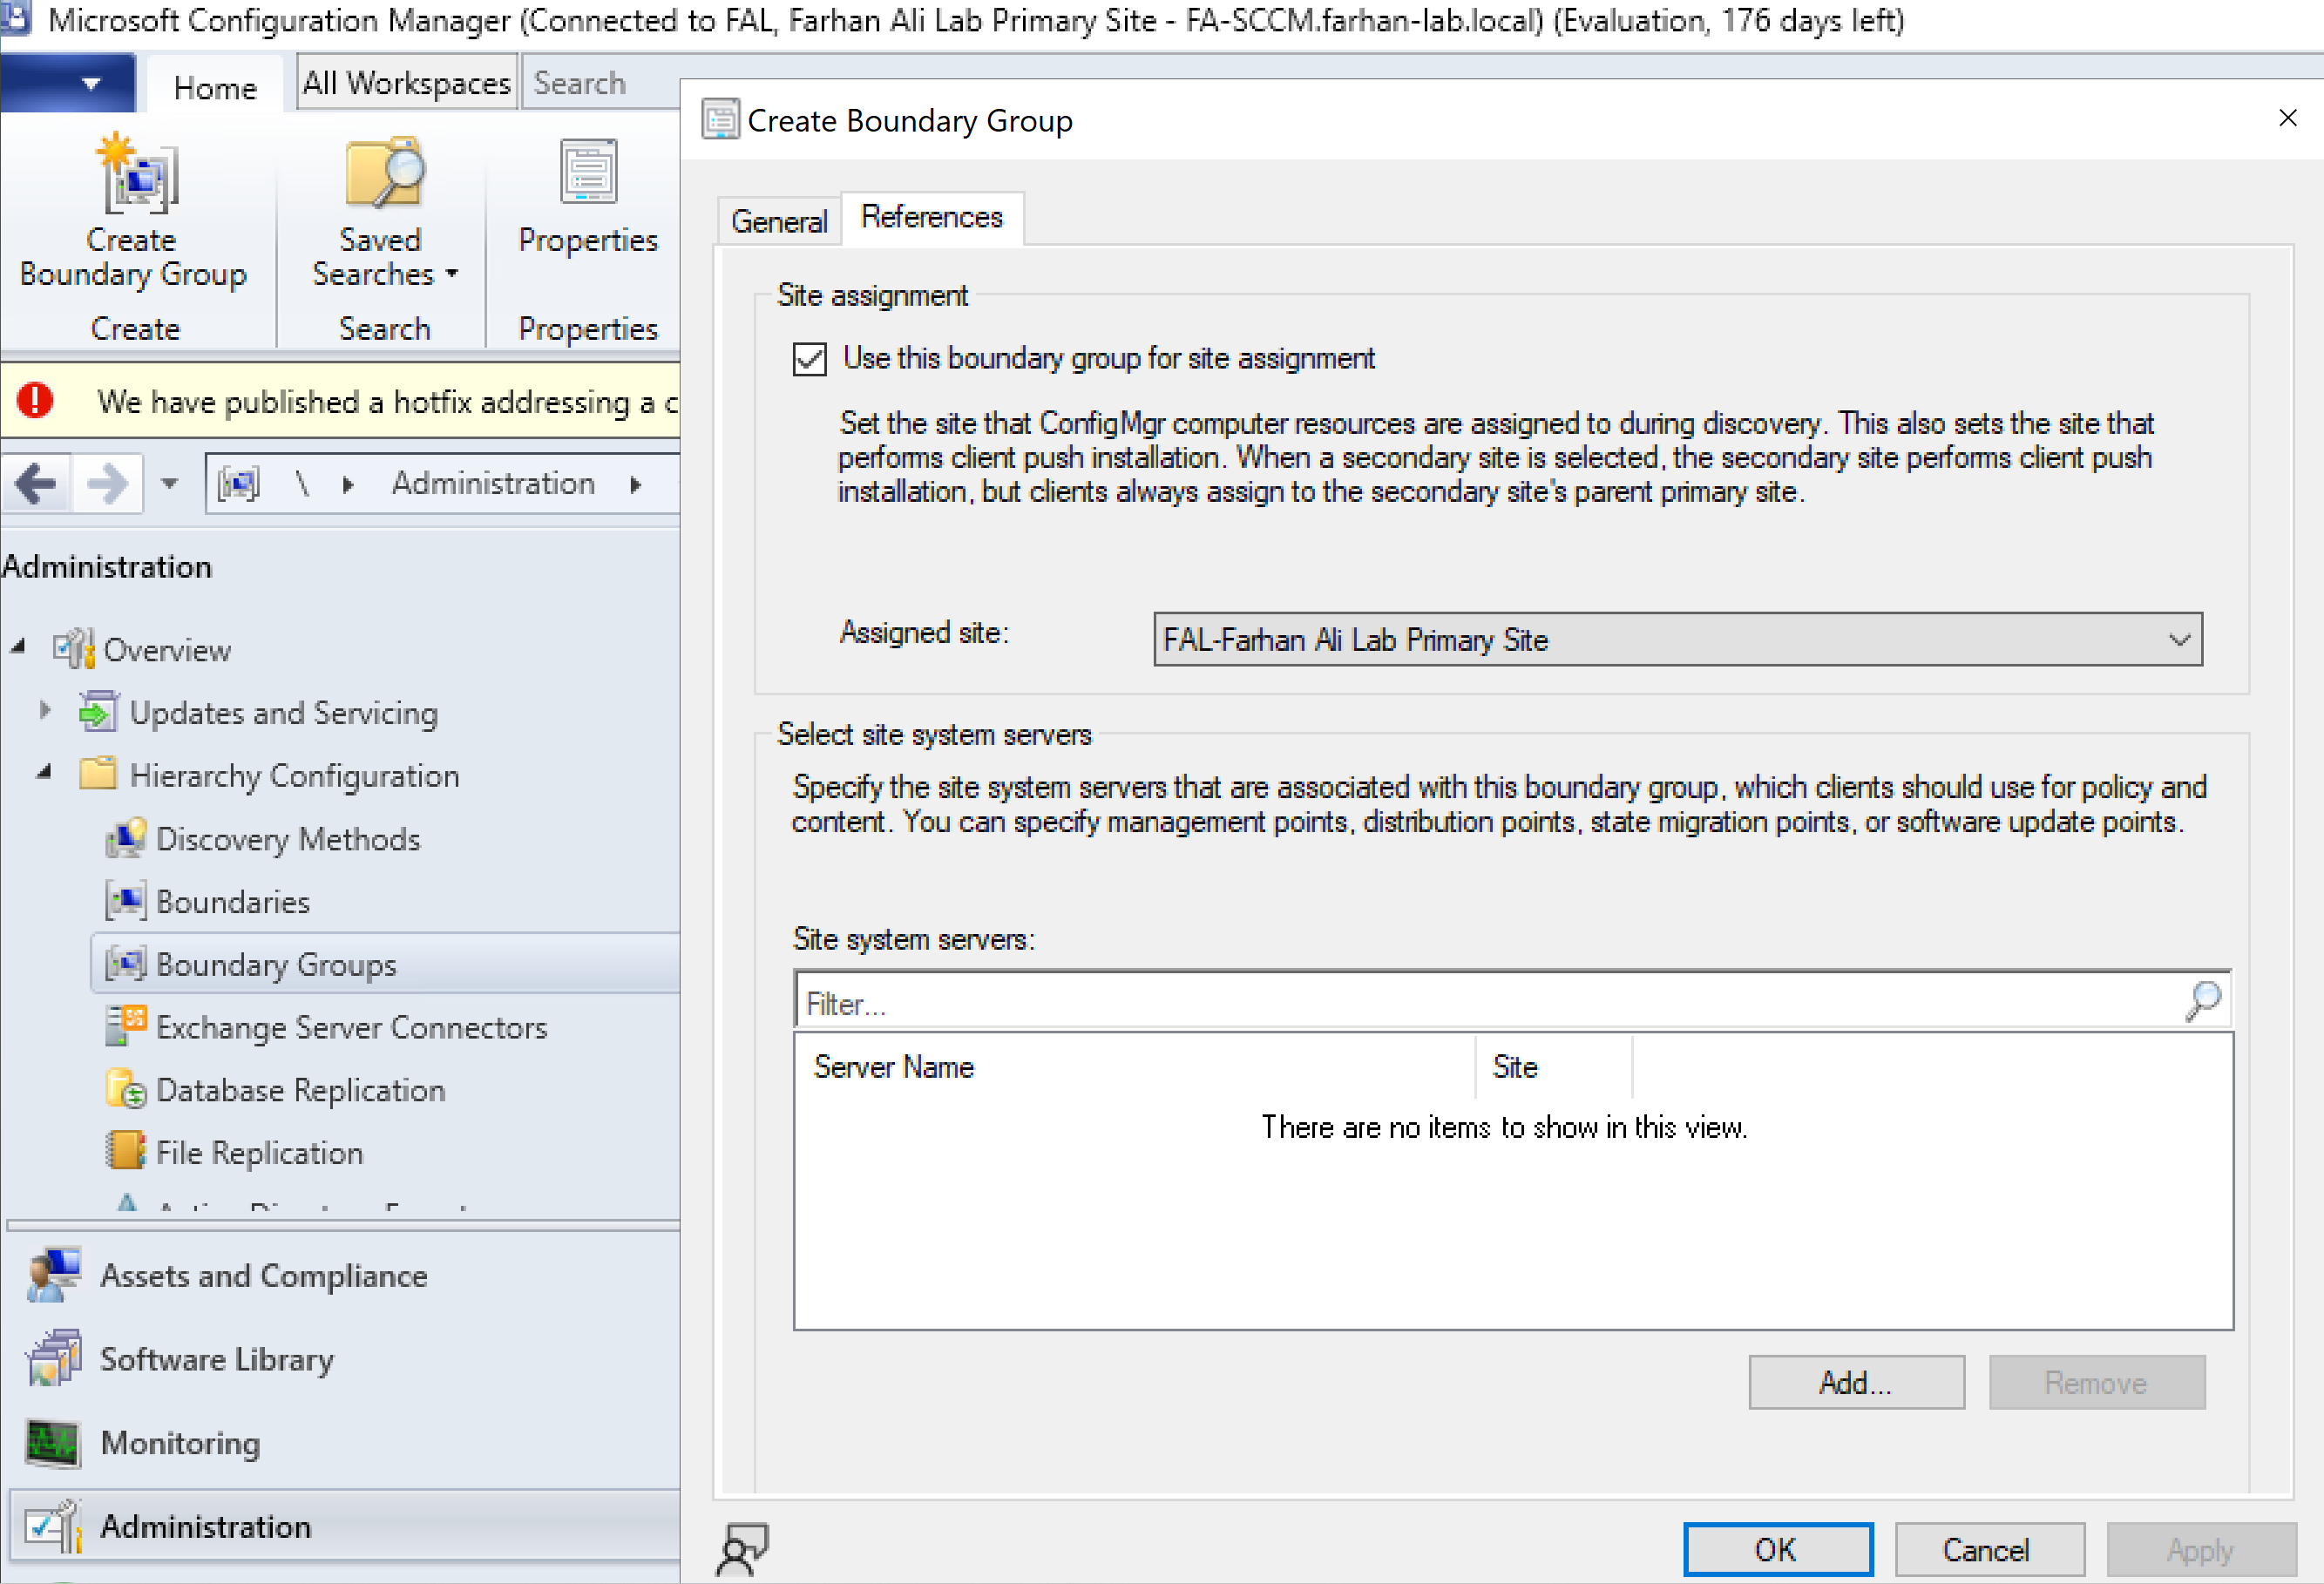
Create Boundary Group for Site Assignment
Configured a boundary group for automatic site assignment.
Check the option to use this boundary group for site assignment.
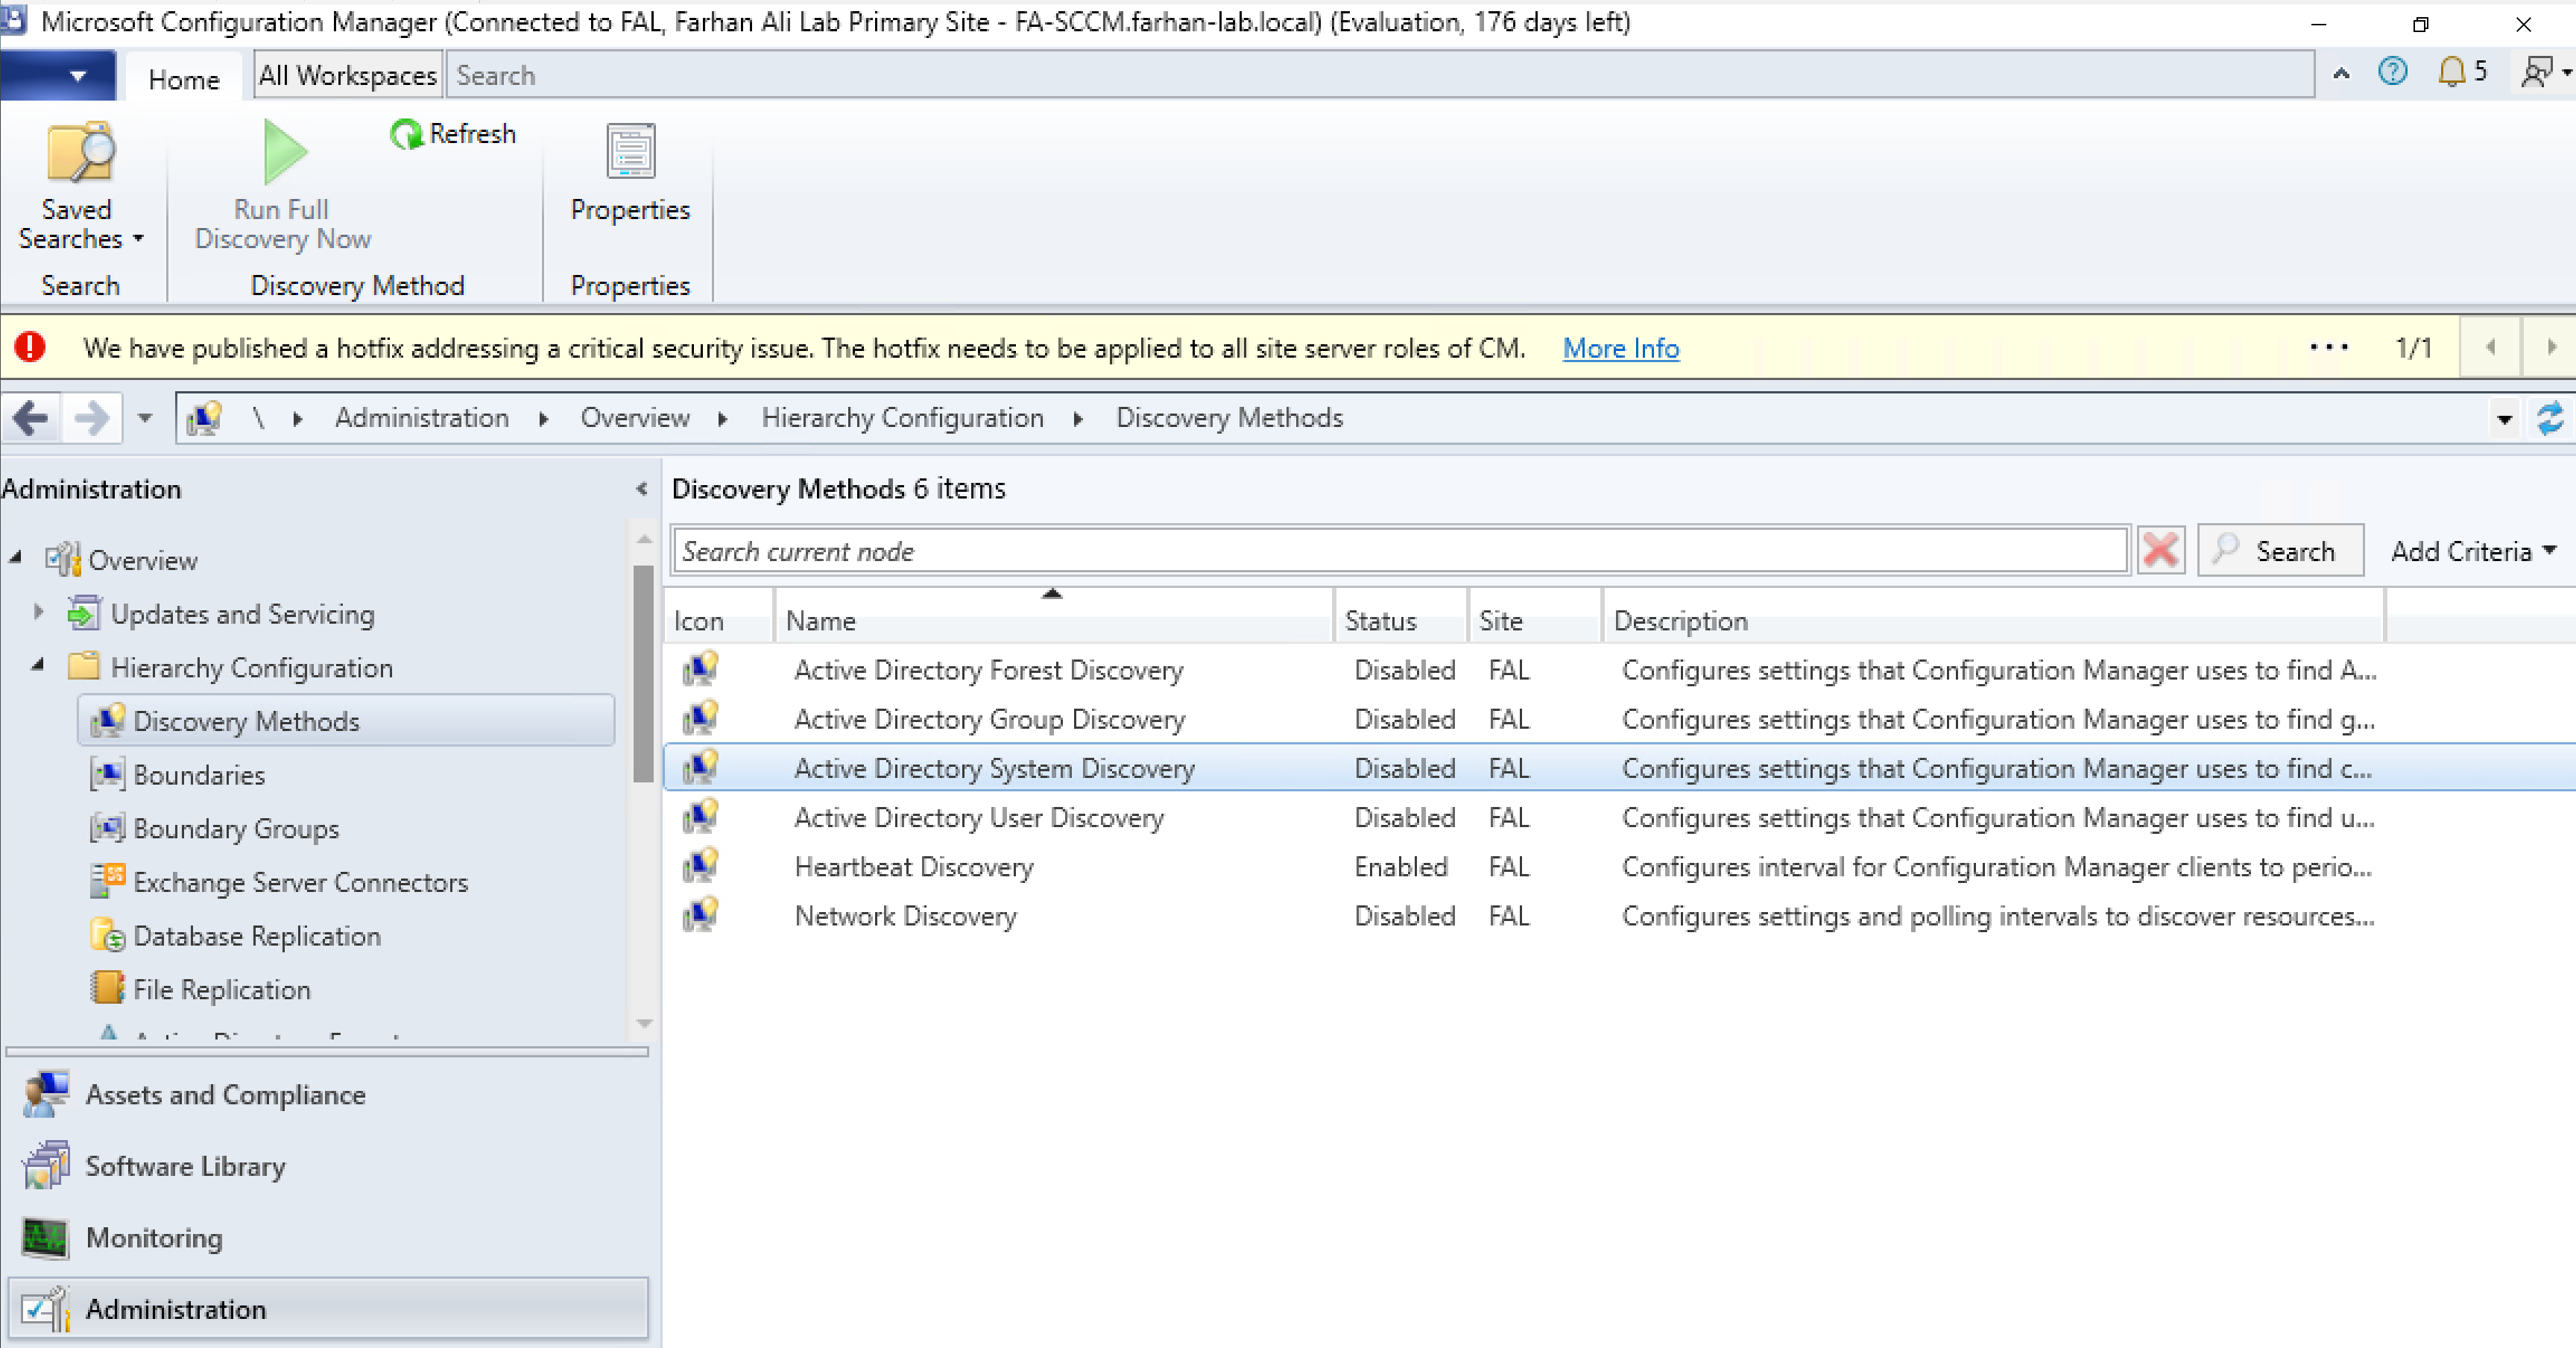
3. Configure Discovery
SCCM Discovery is the process where SCCM finds computers, users, and network resources in your organization, populating its database with this information.
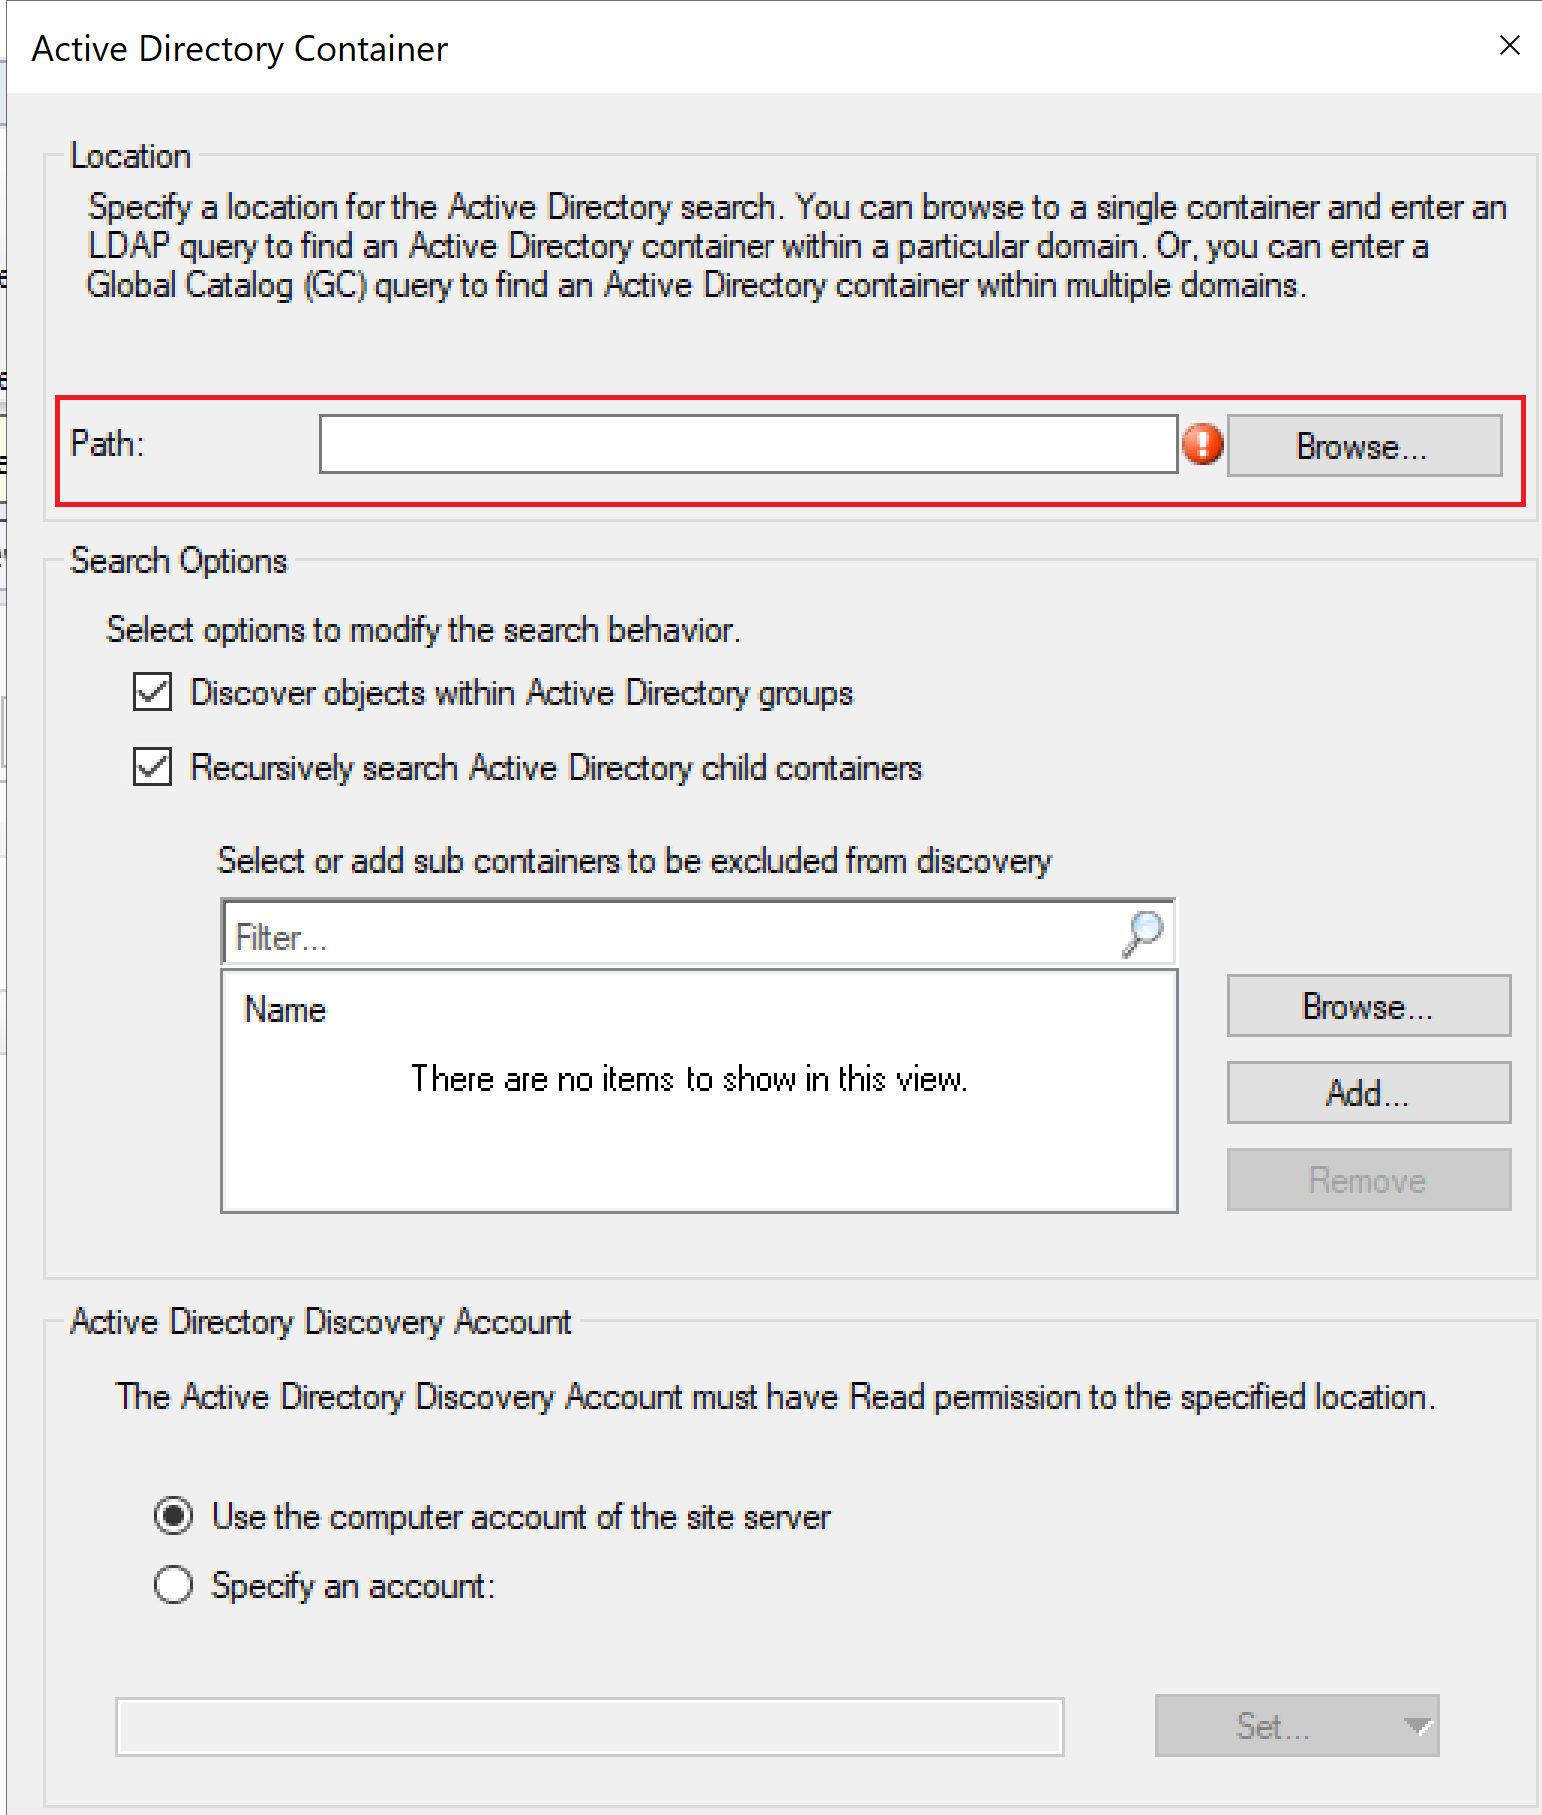
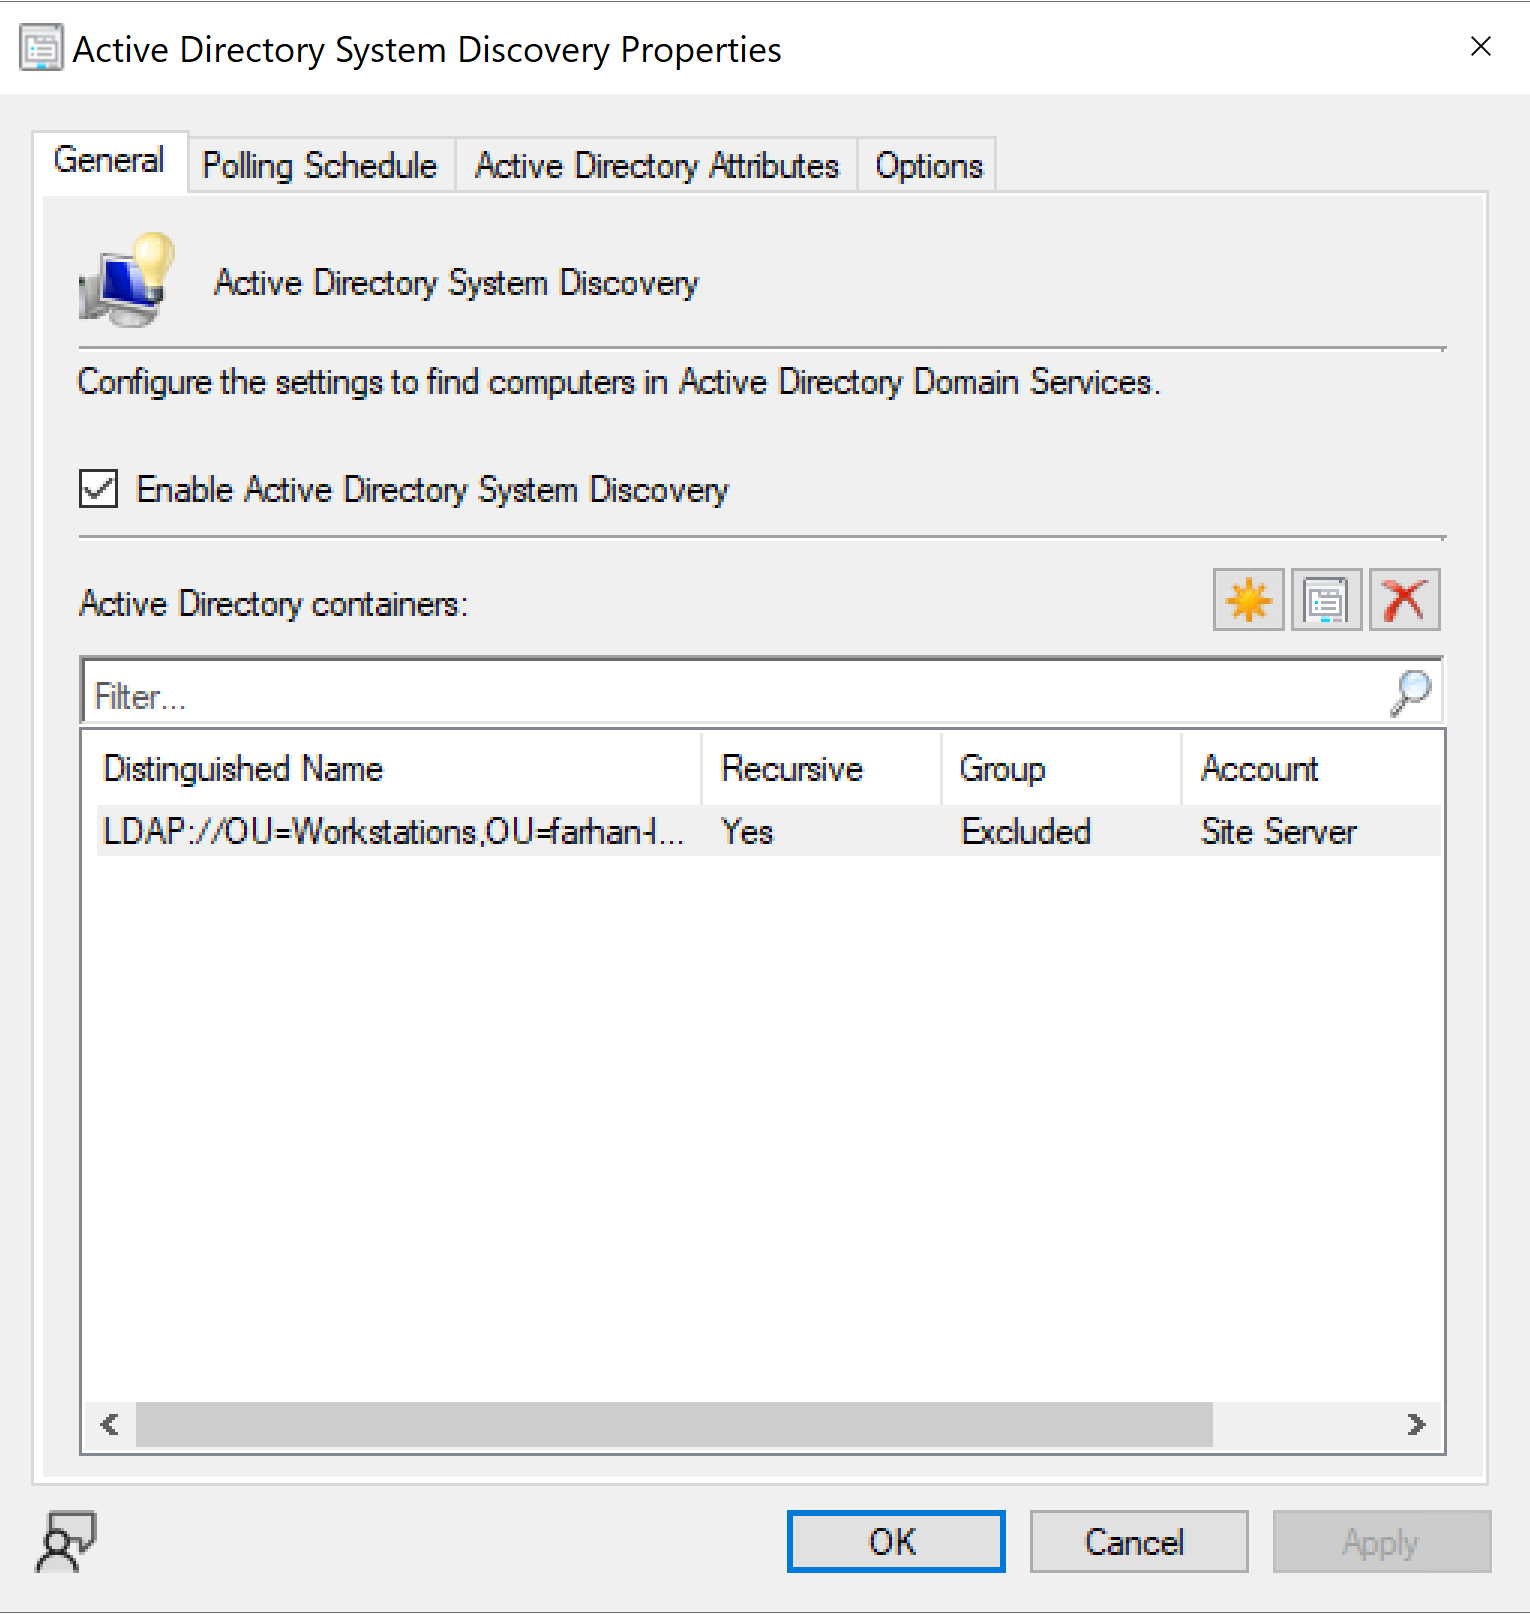
Navigate to Discovery Methods → Active Directory System Discovery
Enable Active Directory System Discovery
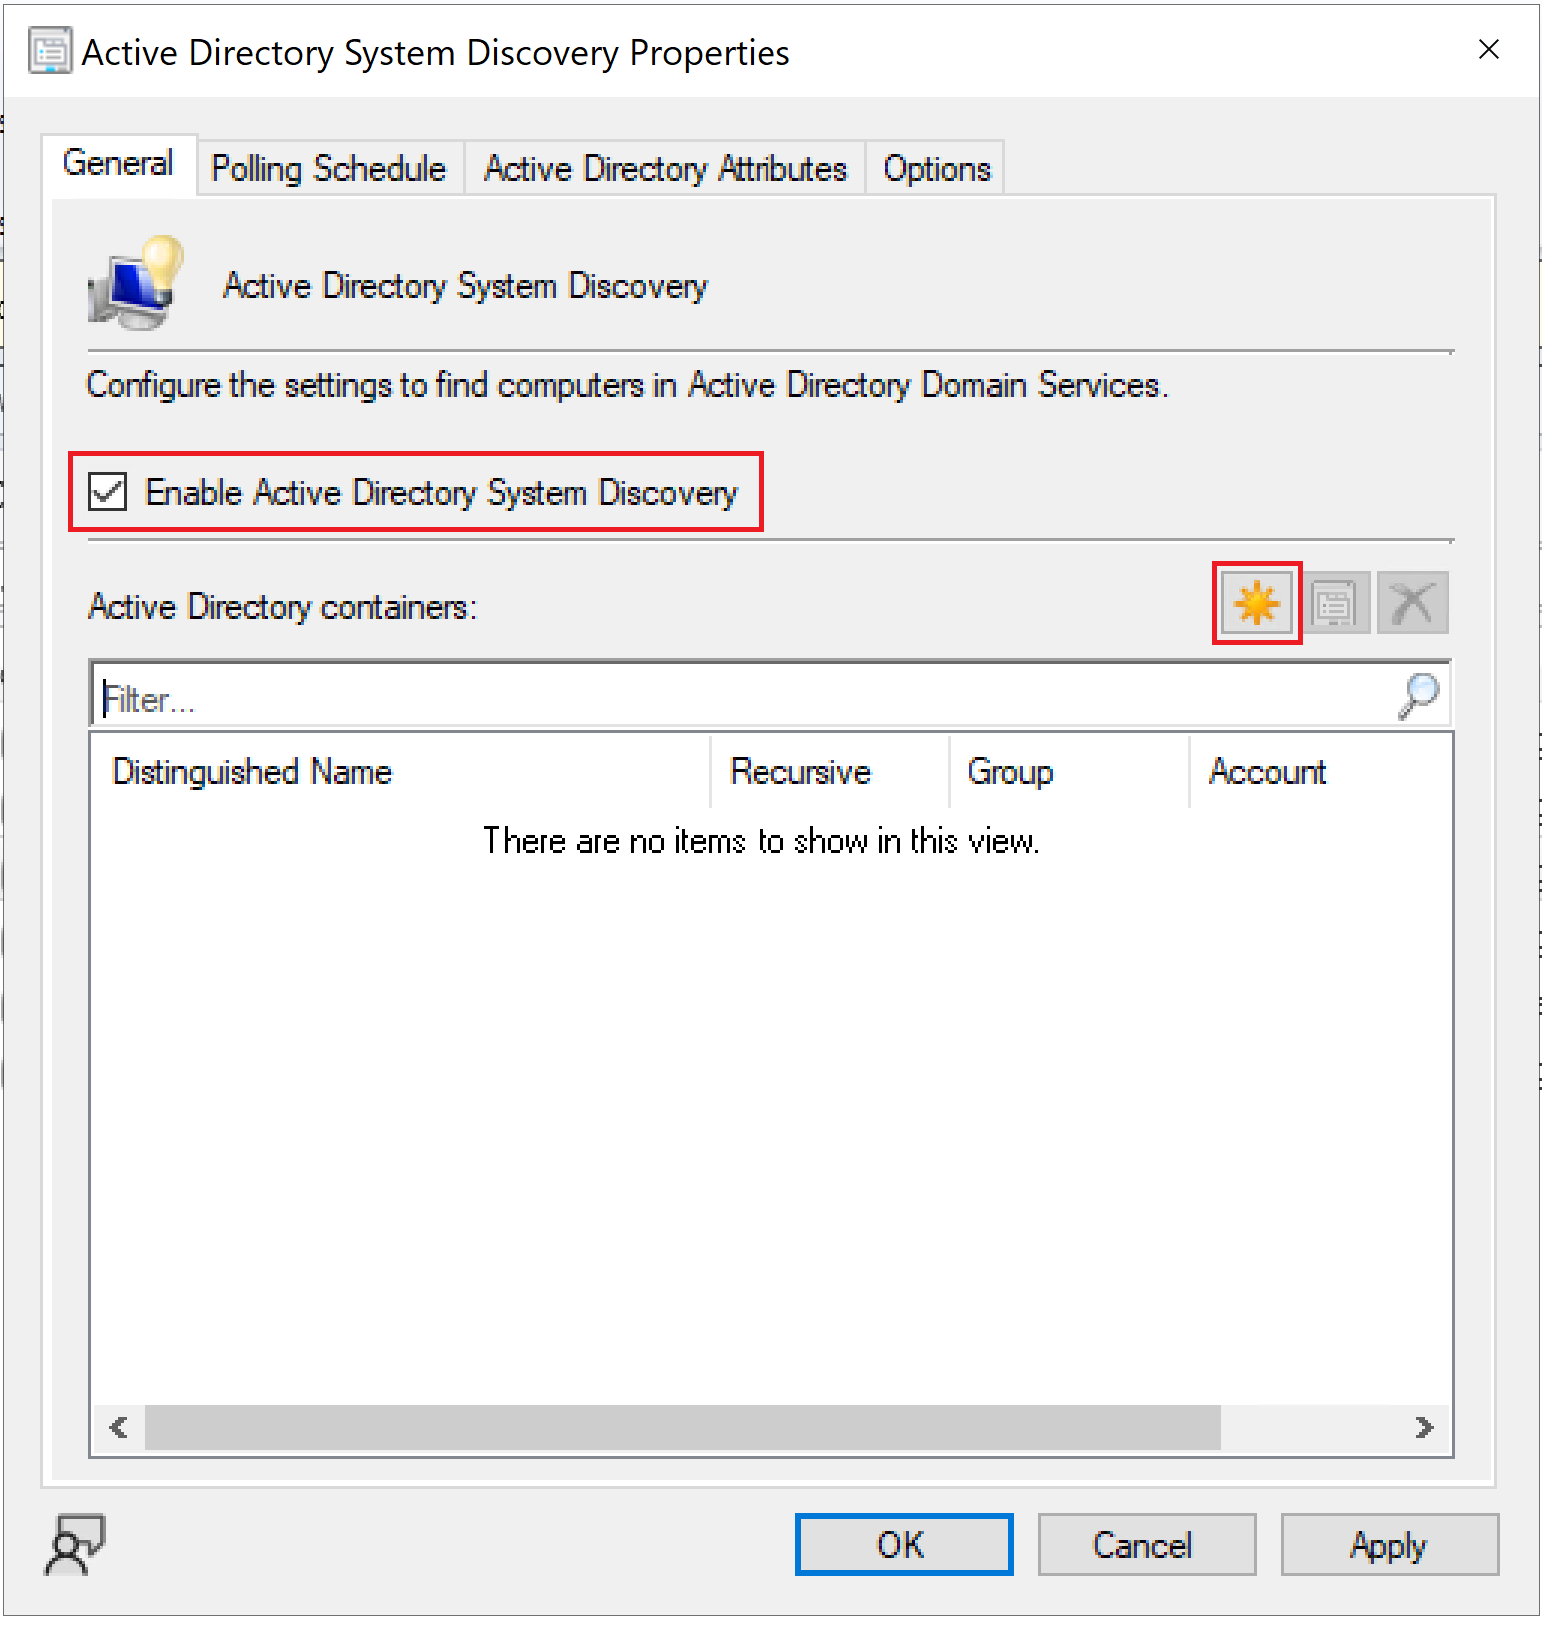
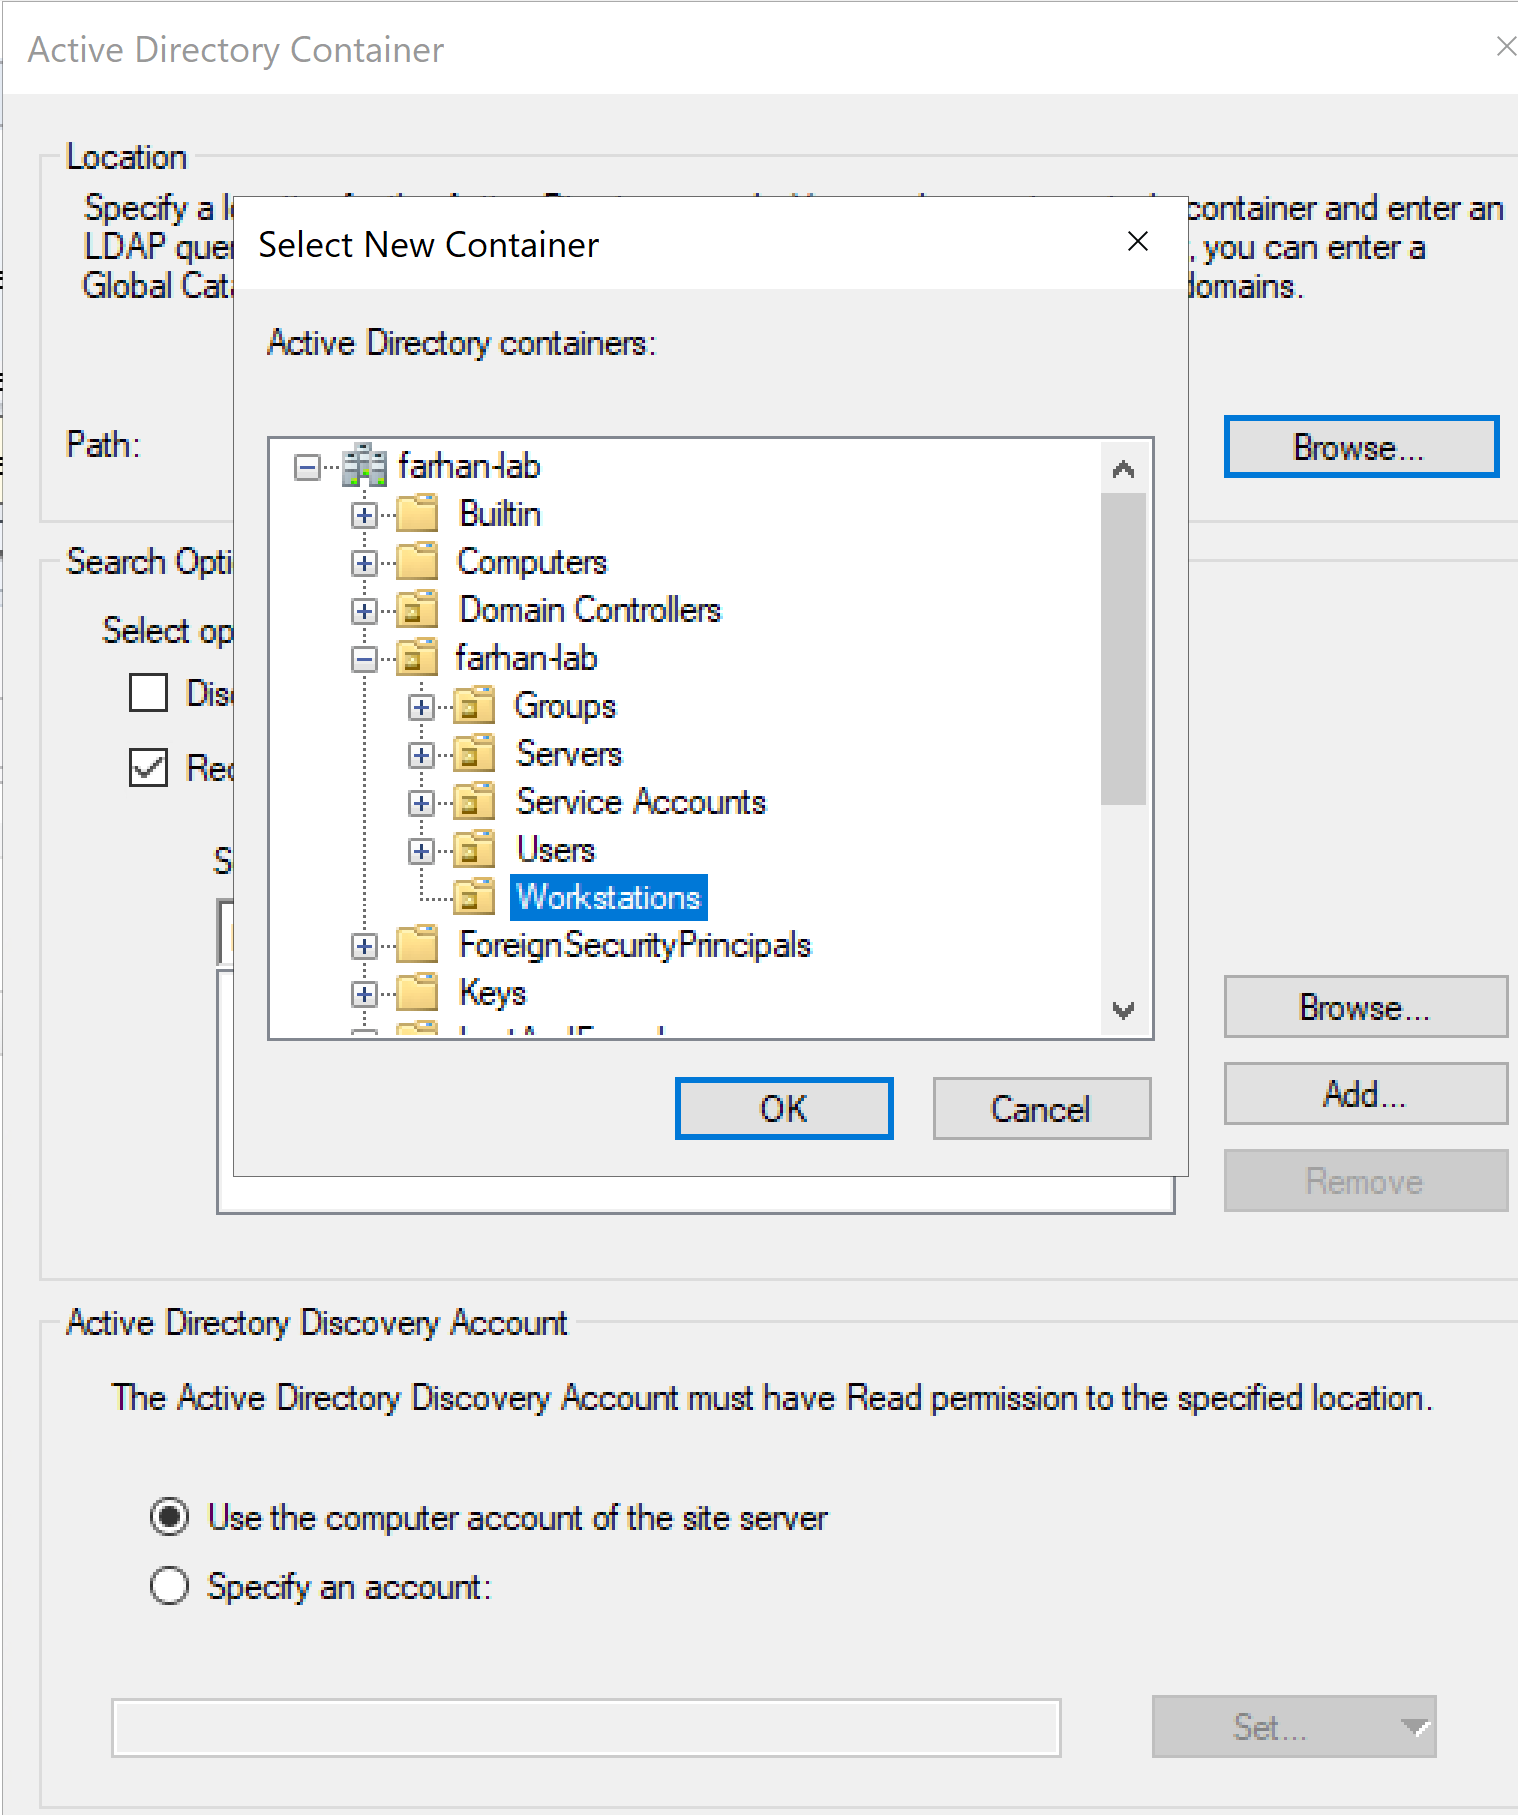
Select Workstations OU
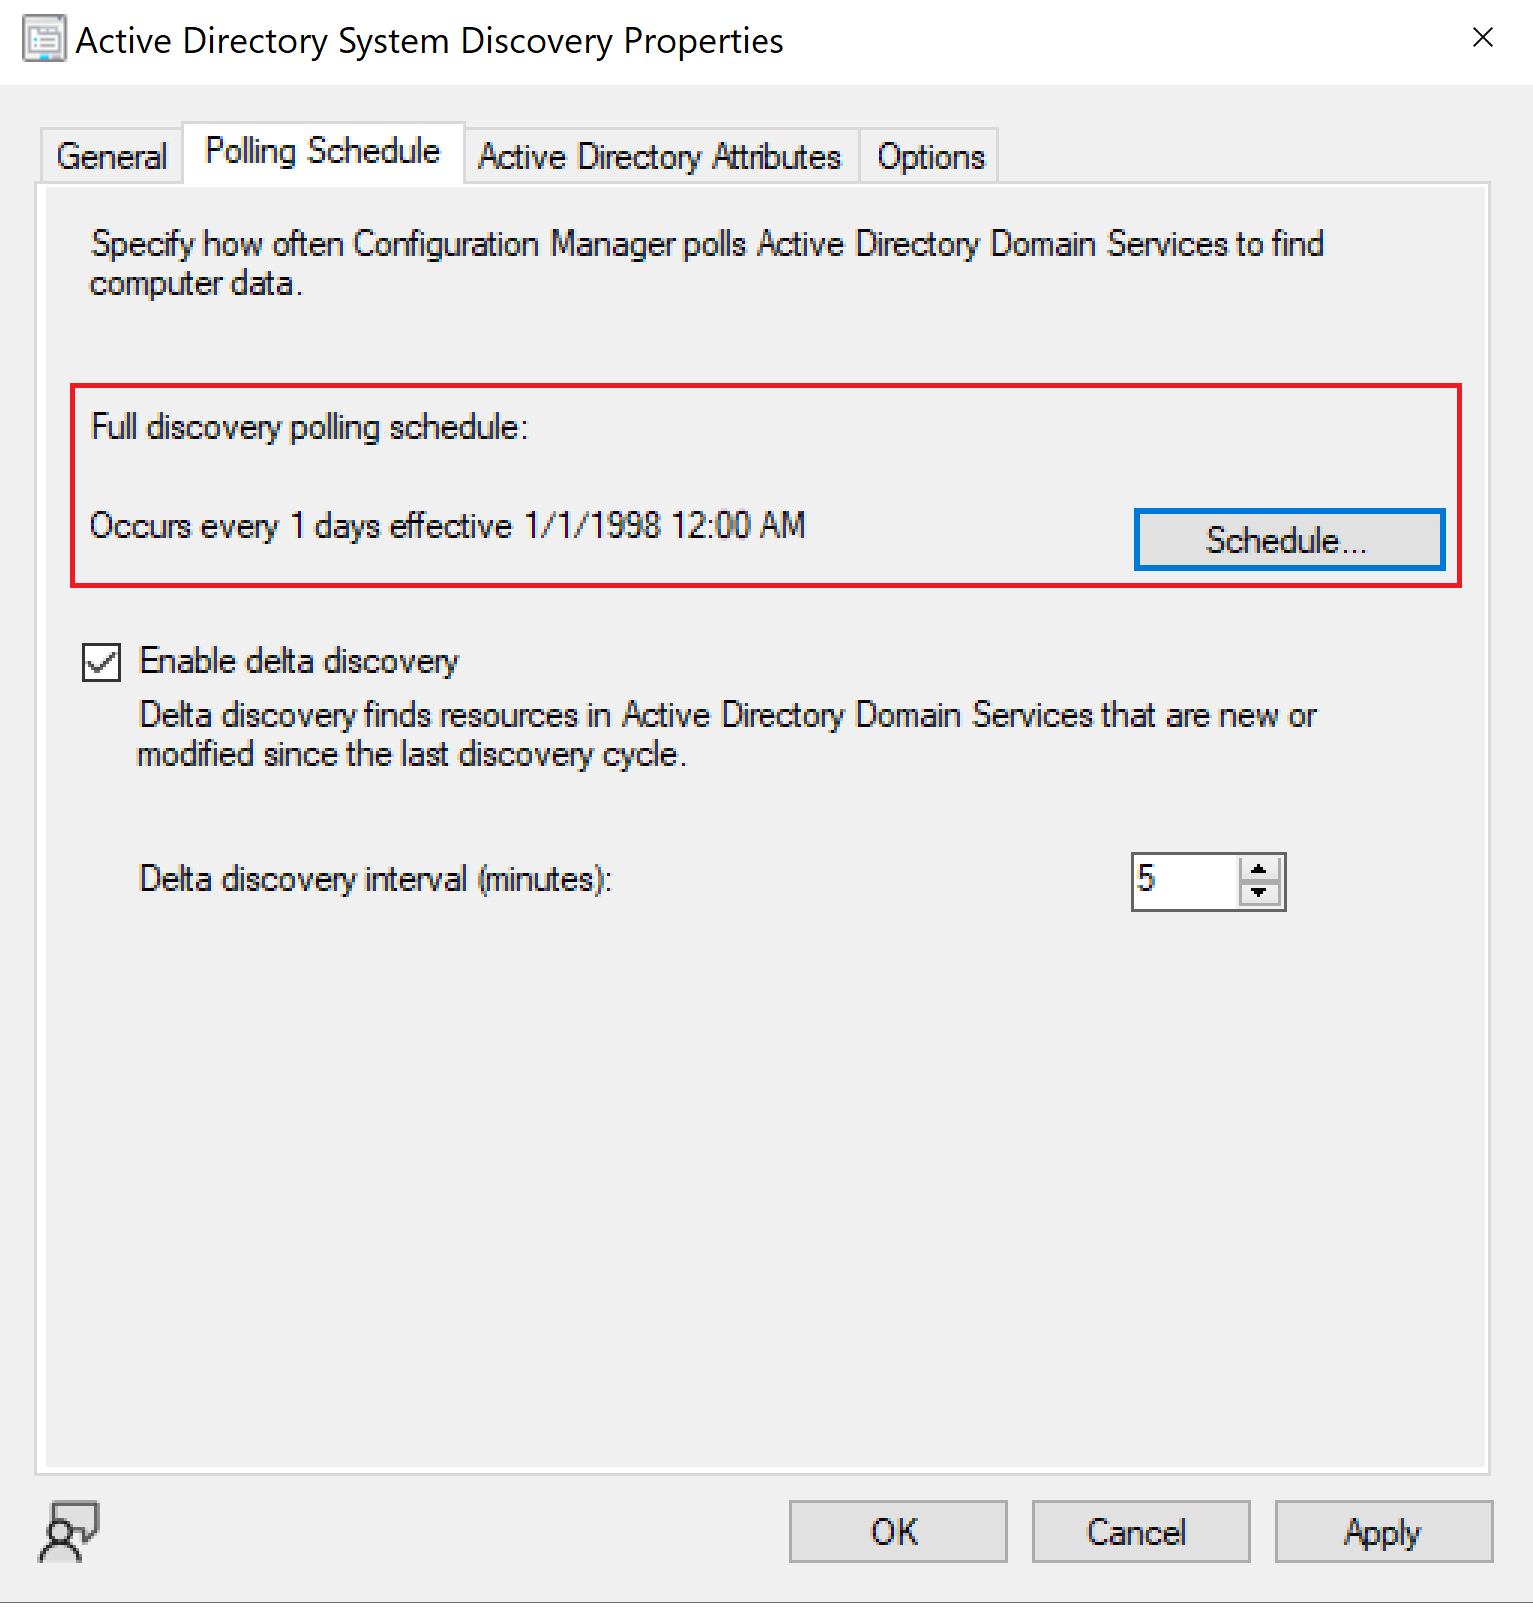
Set polling schedule to 1 day just for the lab environment
4. Configure Client Push
SCCM Client Push is a deployment method where the SCCM site server remotely initiates the installation of the Configuration Manager client agent onto Windows computers.
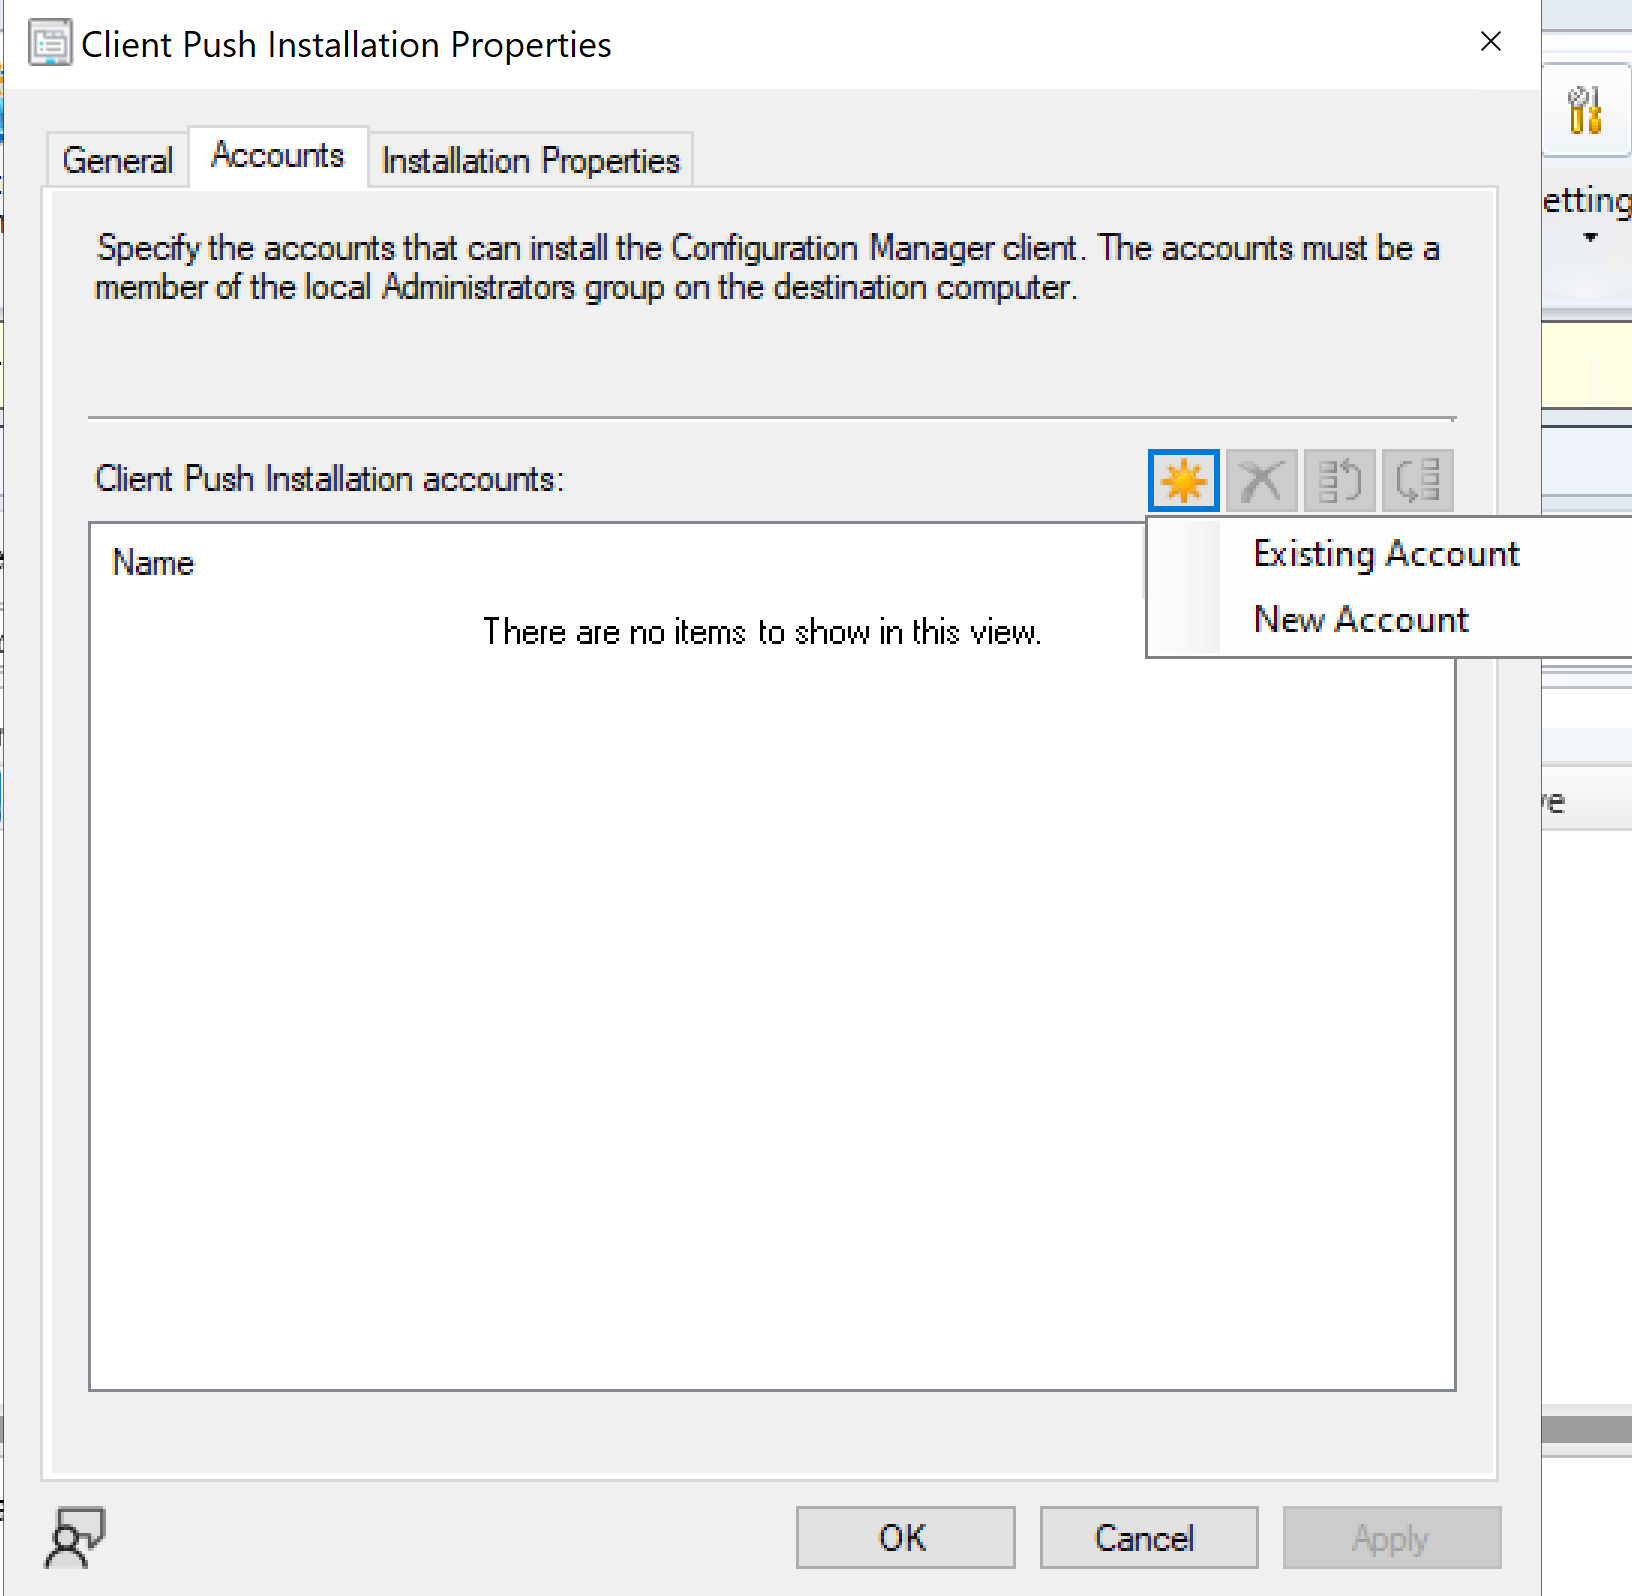
Configure Client Installation Settings
Navigate to: Administration → Sites → Primary Site -> Client Installation Settings
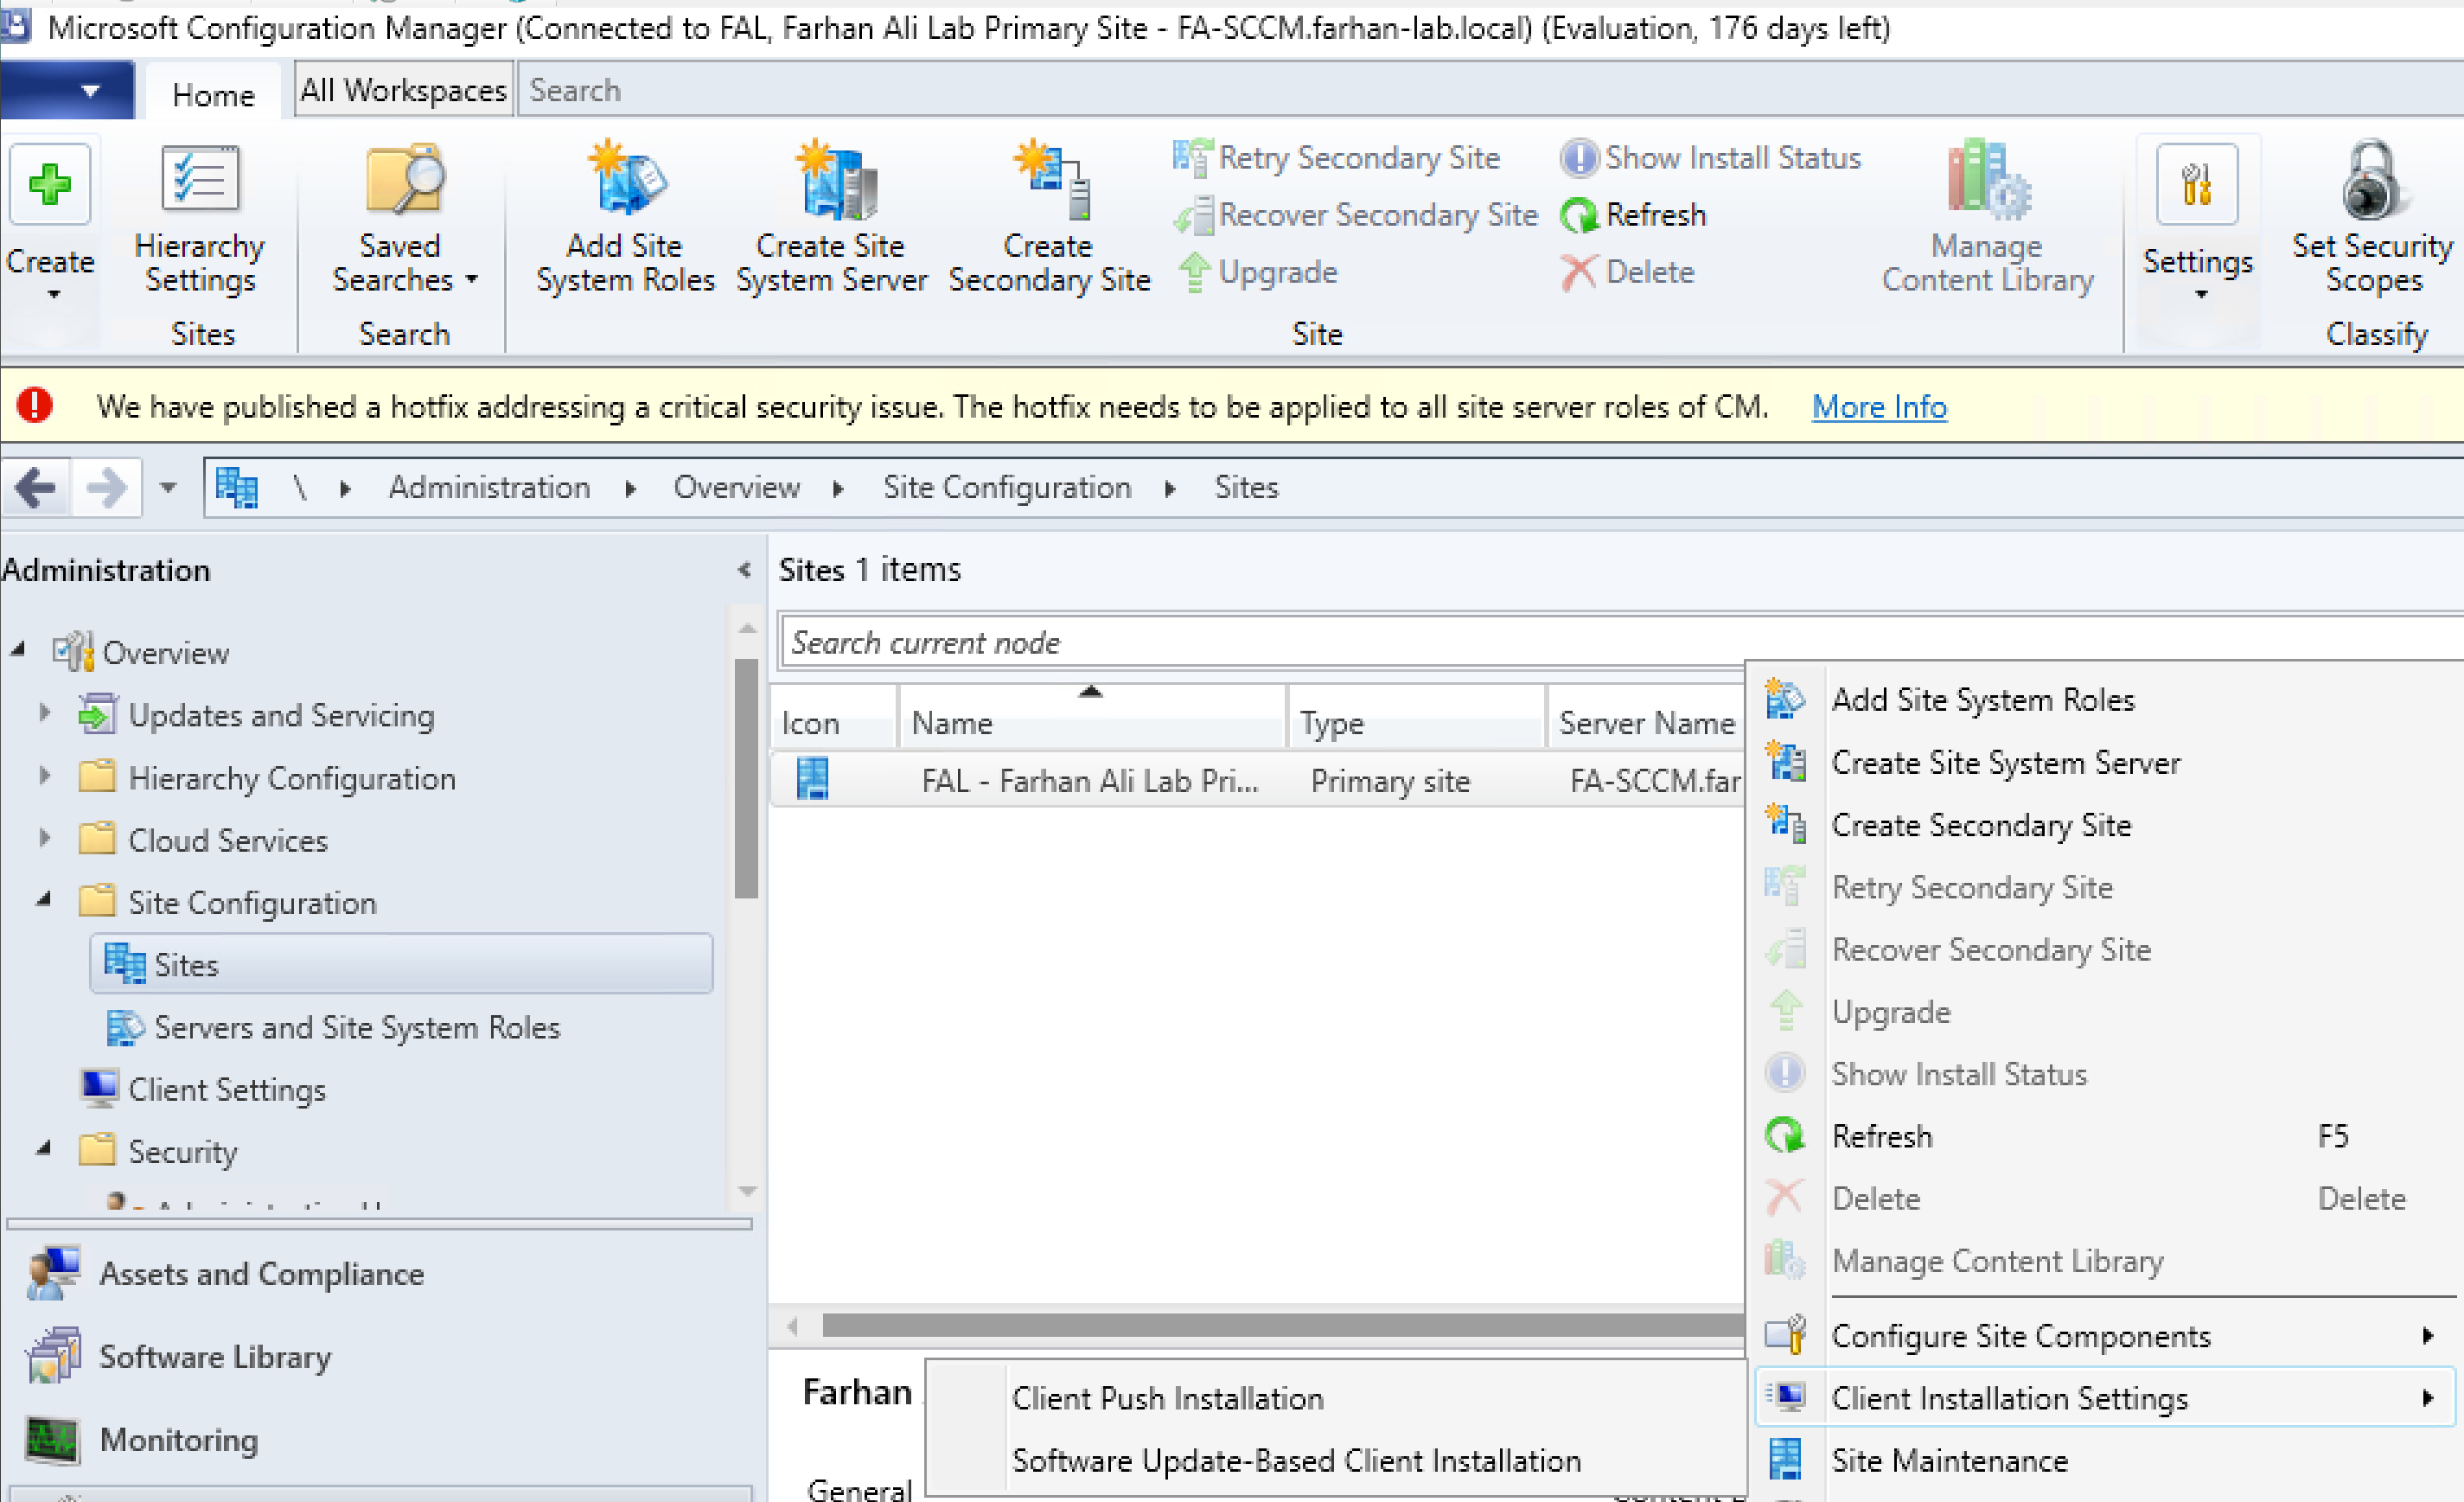
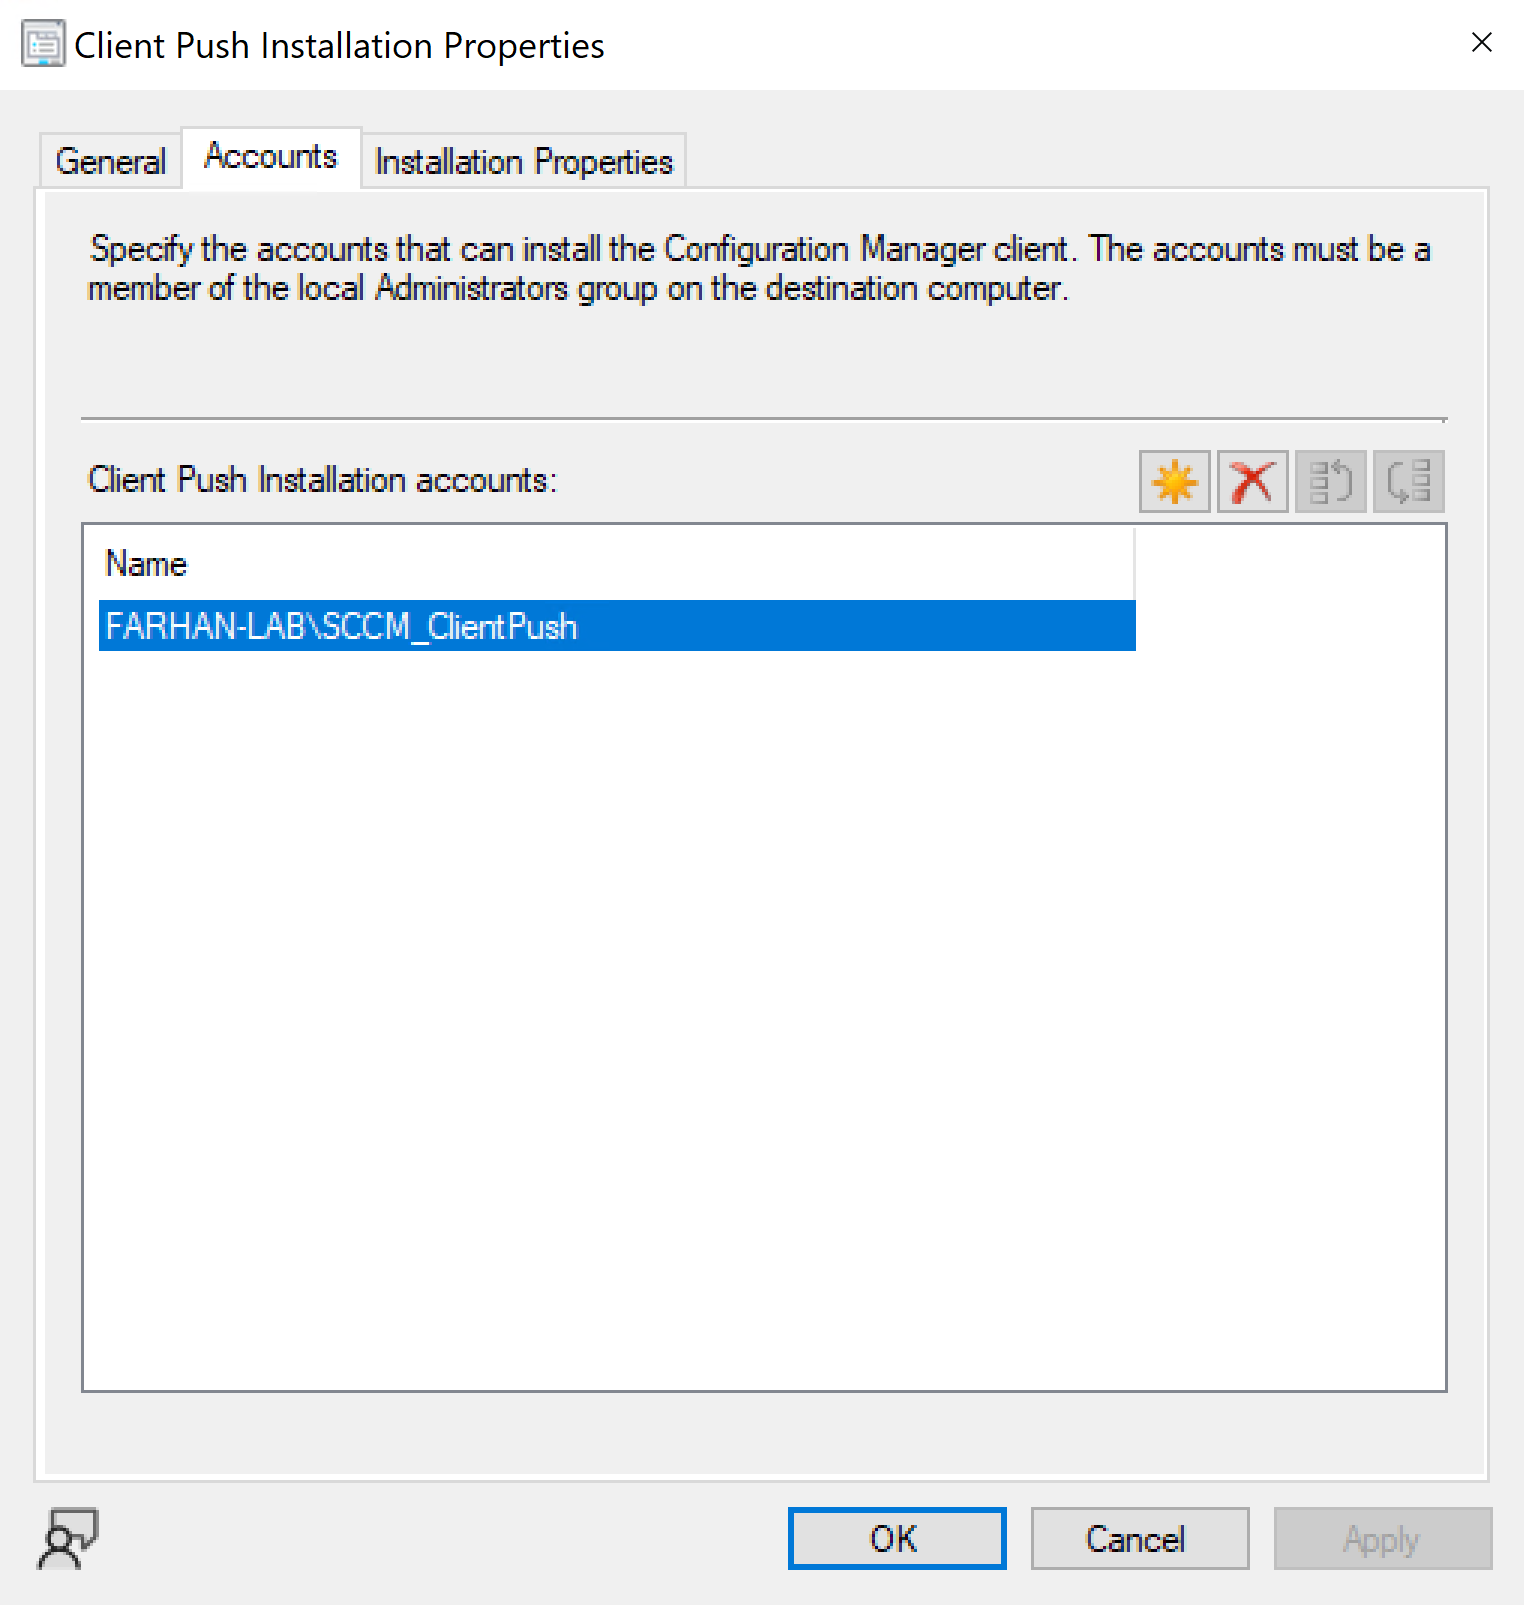
Select SCCM_ClientPush (service account) as a client push installation account.
Configure Group Policy for Client Push
Client push installation account must be a local administrator on all target clients. I will enforce this using a group policy in this lab.
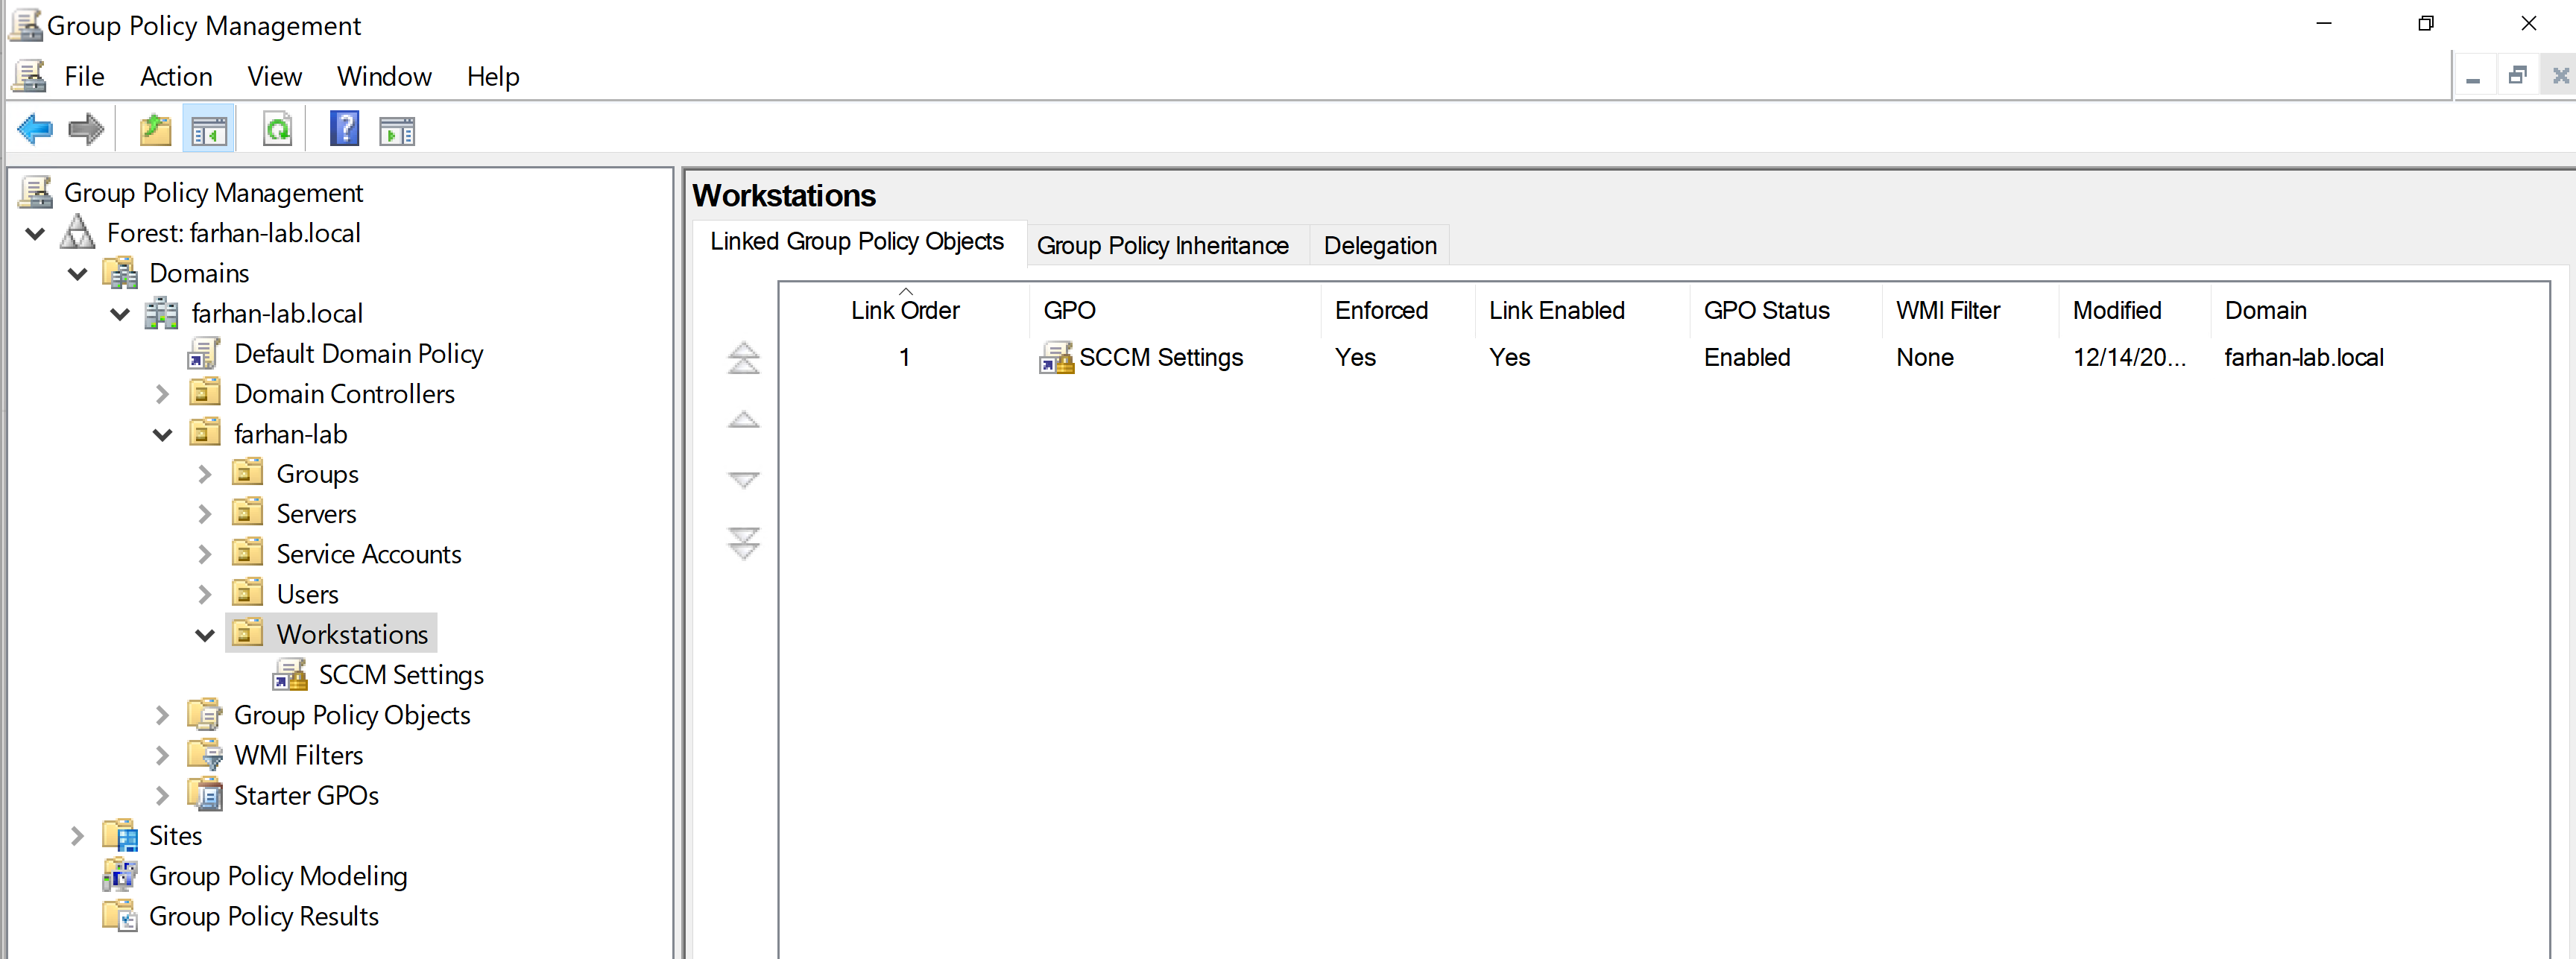
Navigate to the Group Policy Management Editor in the domain controller (FA-DC01) and create a new GPO linked to the Workstations OU called SCCM-Settings.
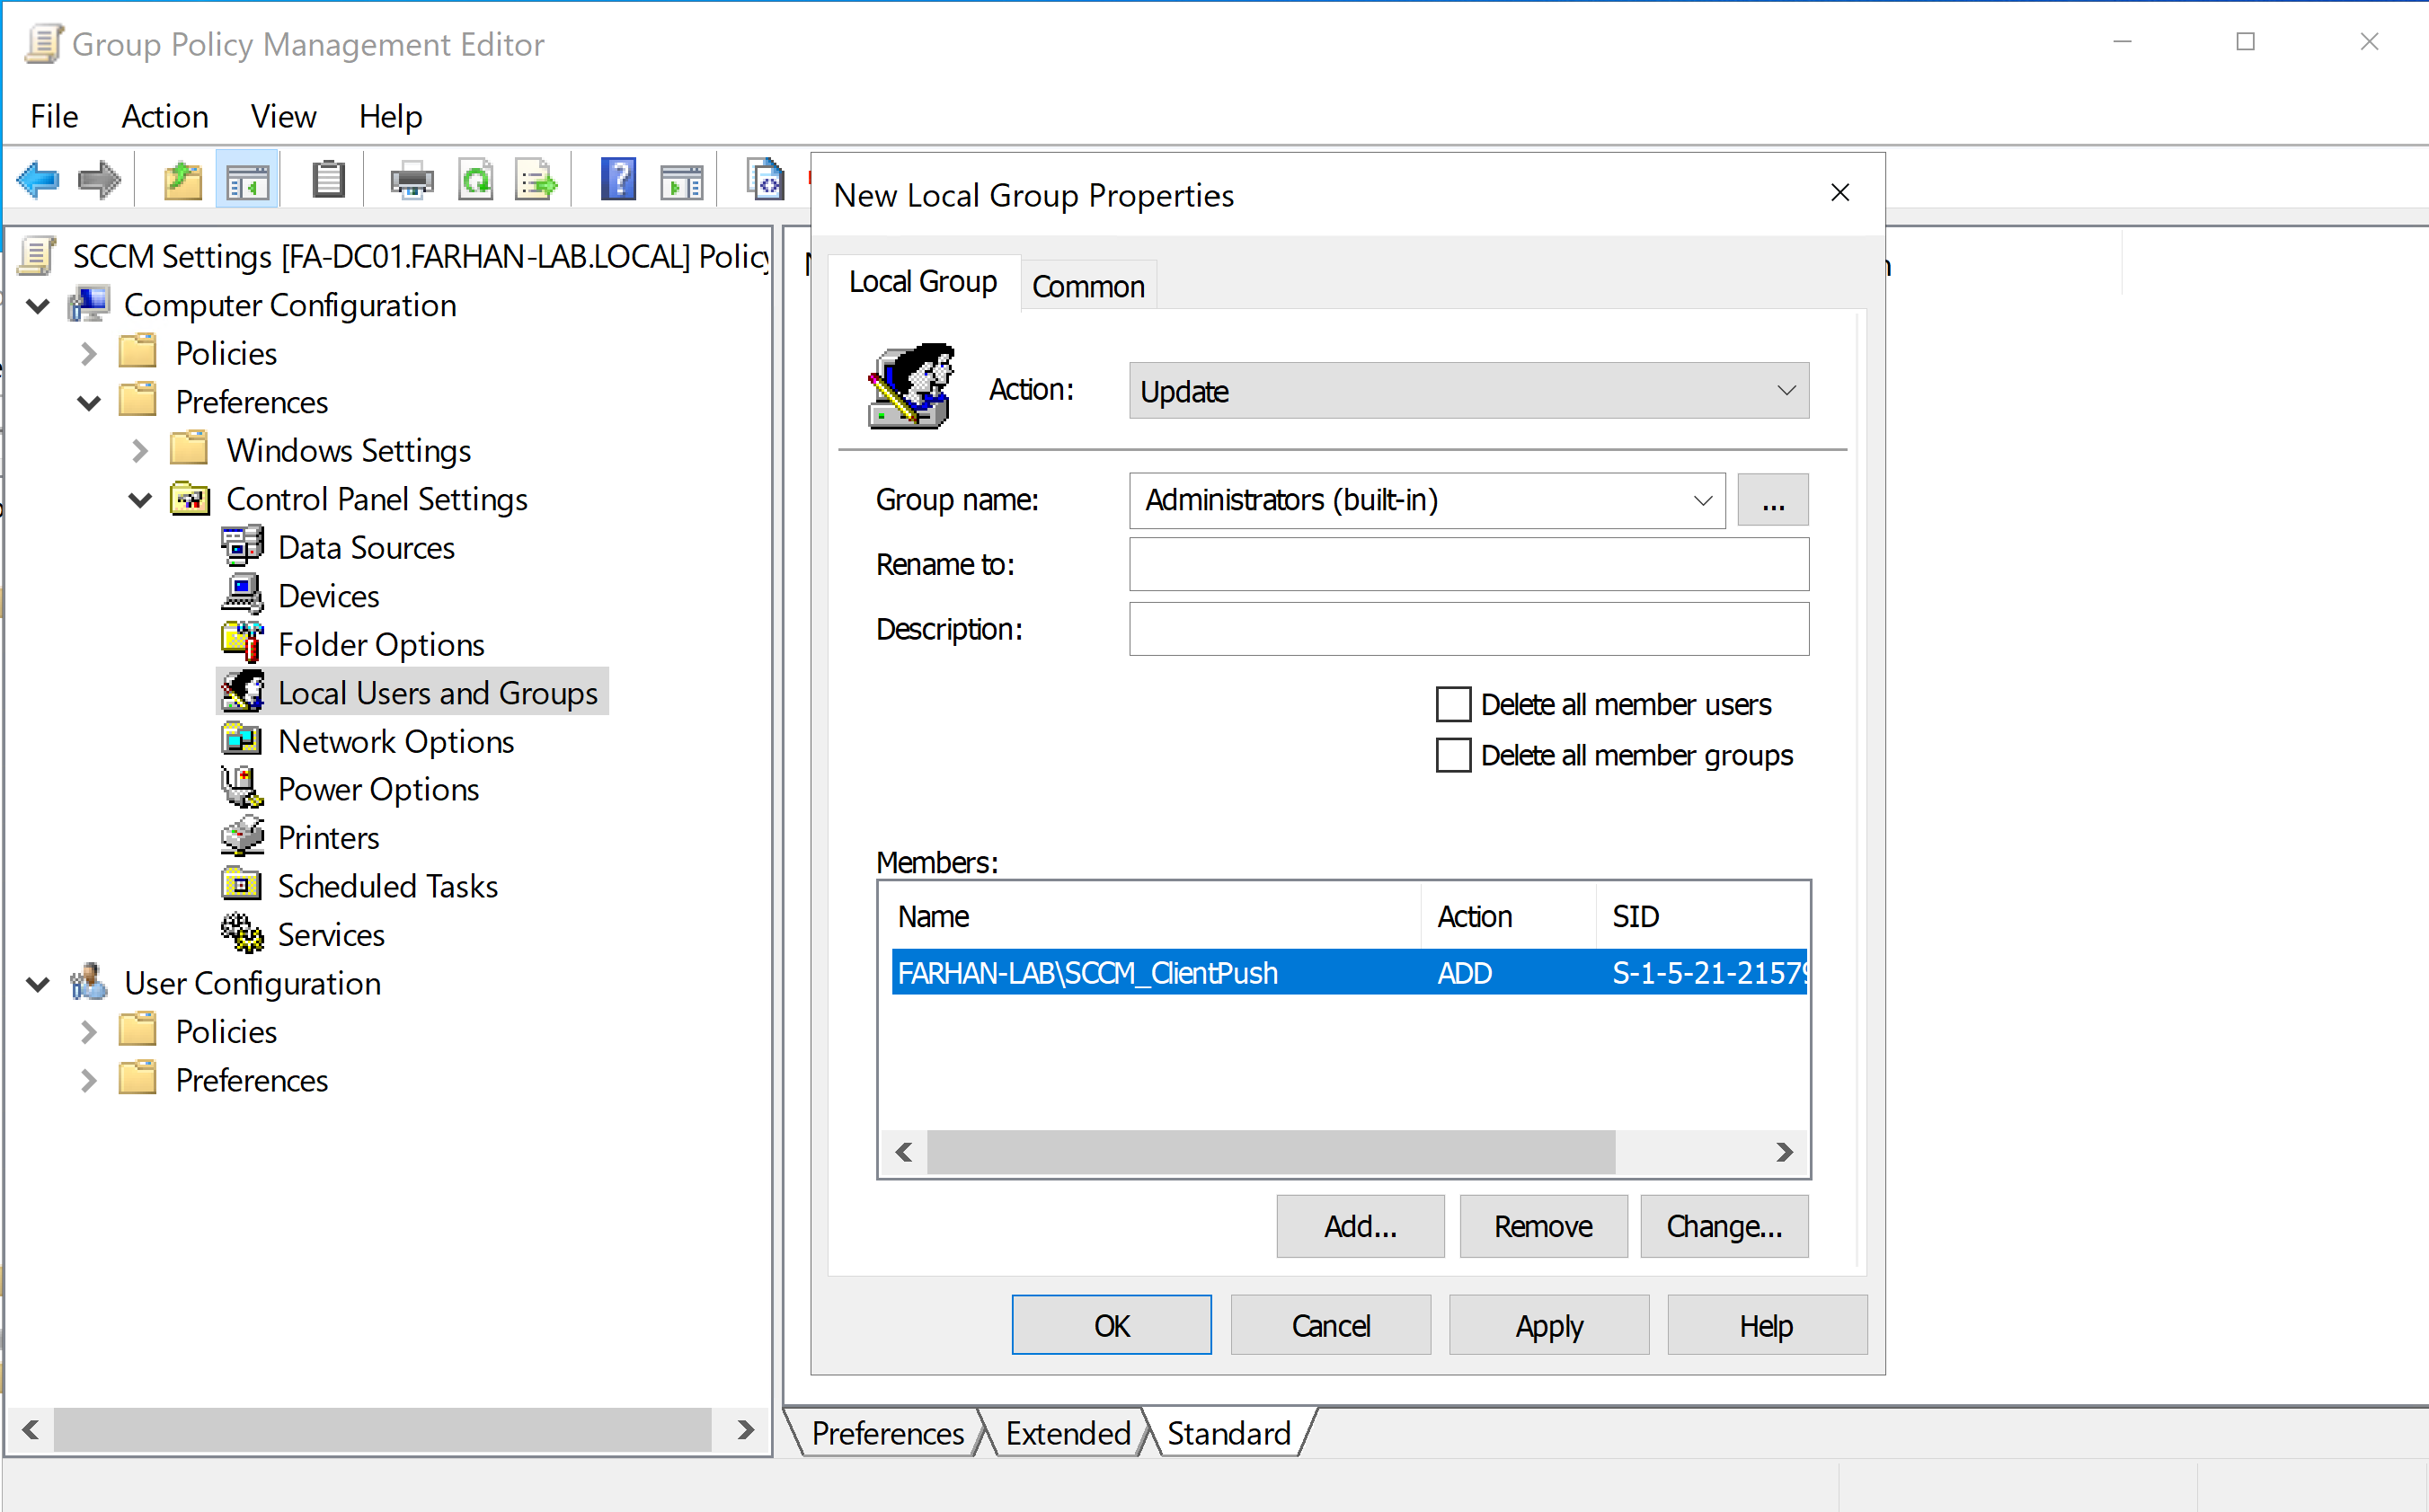
Edit SCCM Settings -> Create a new local group
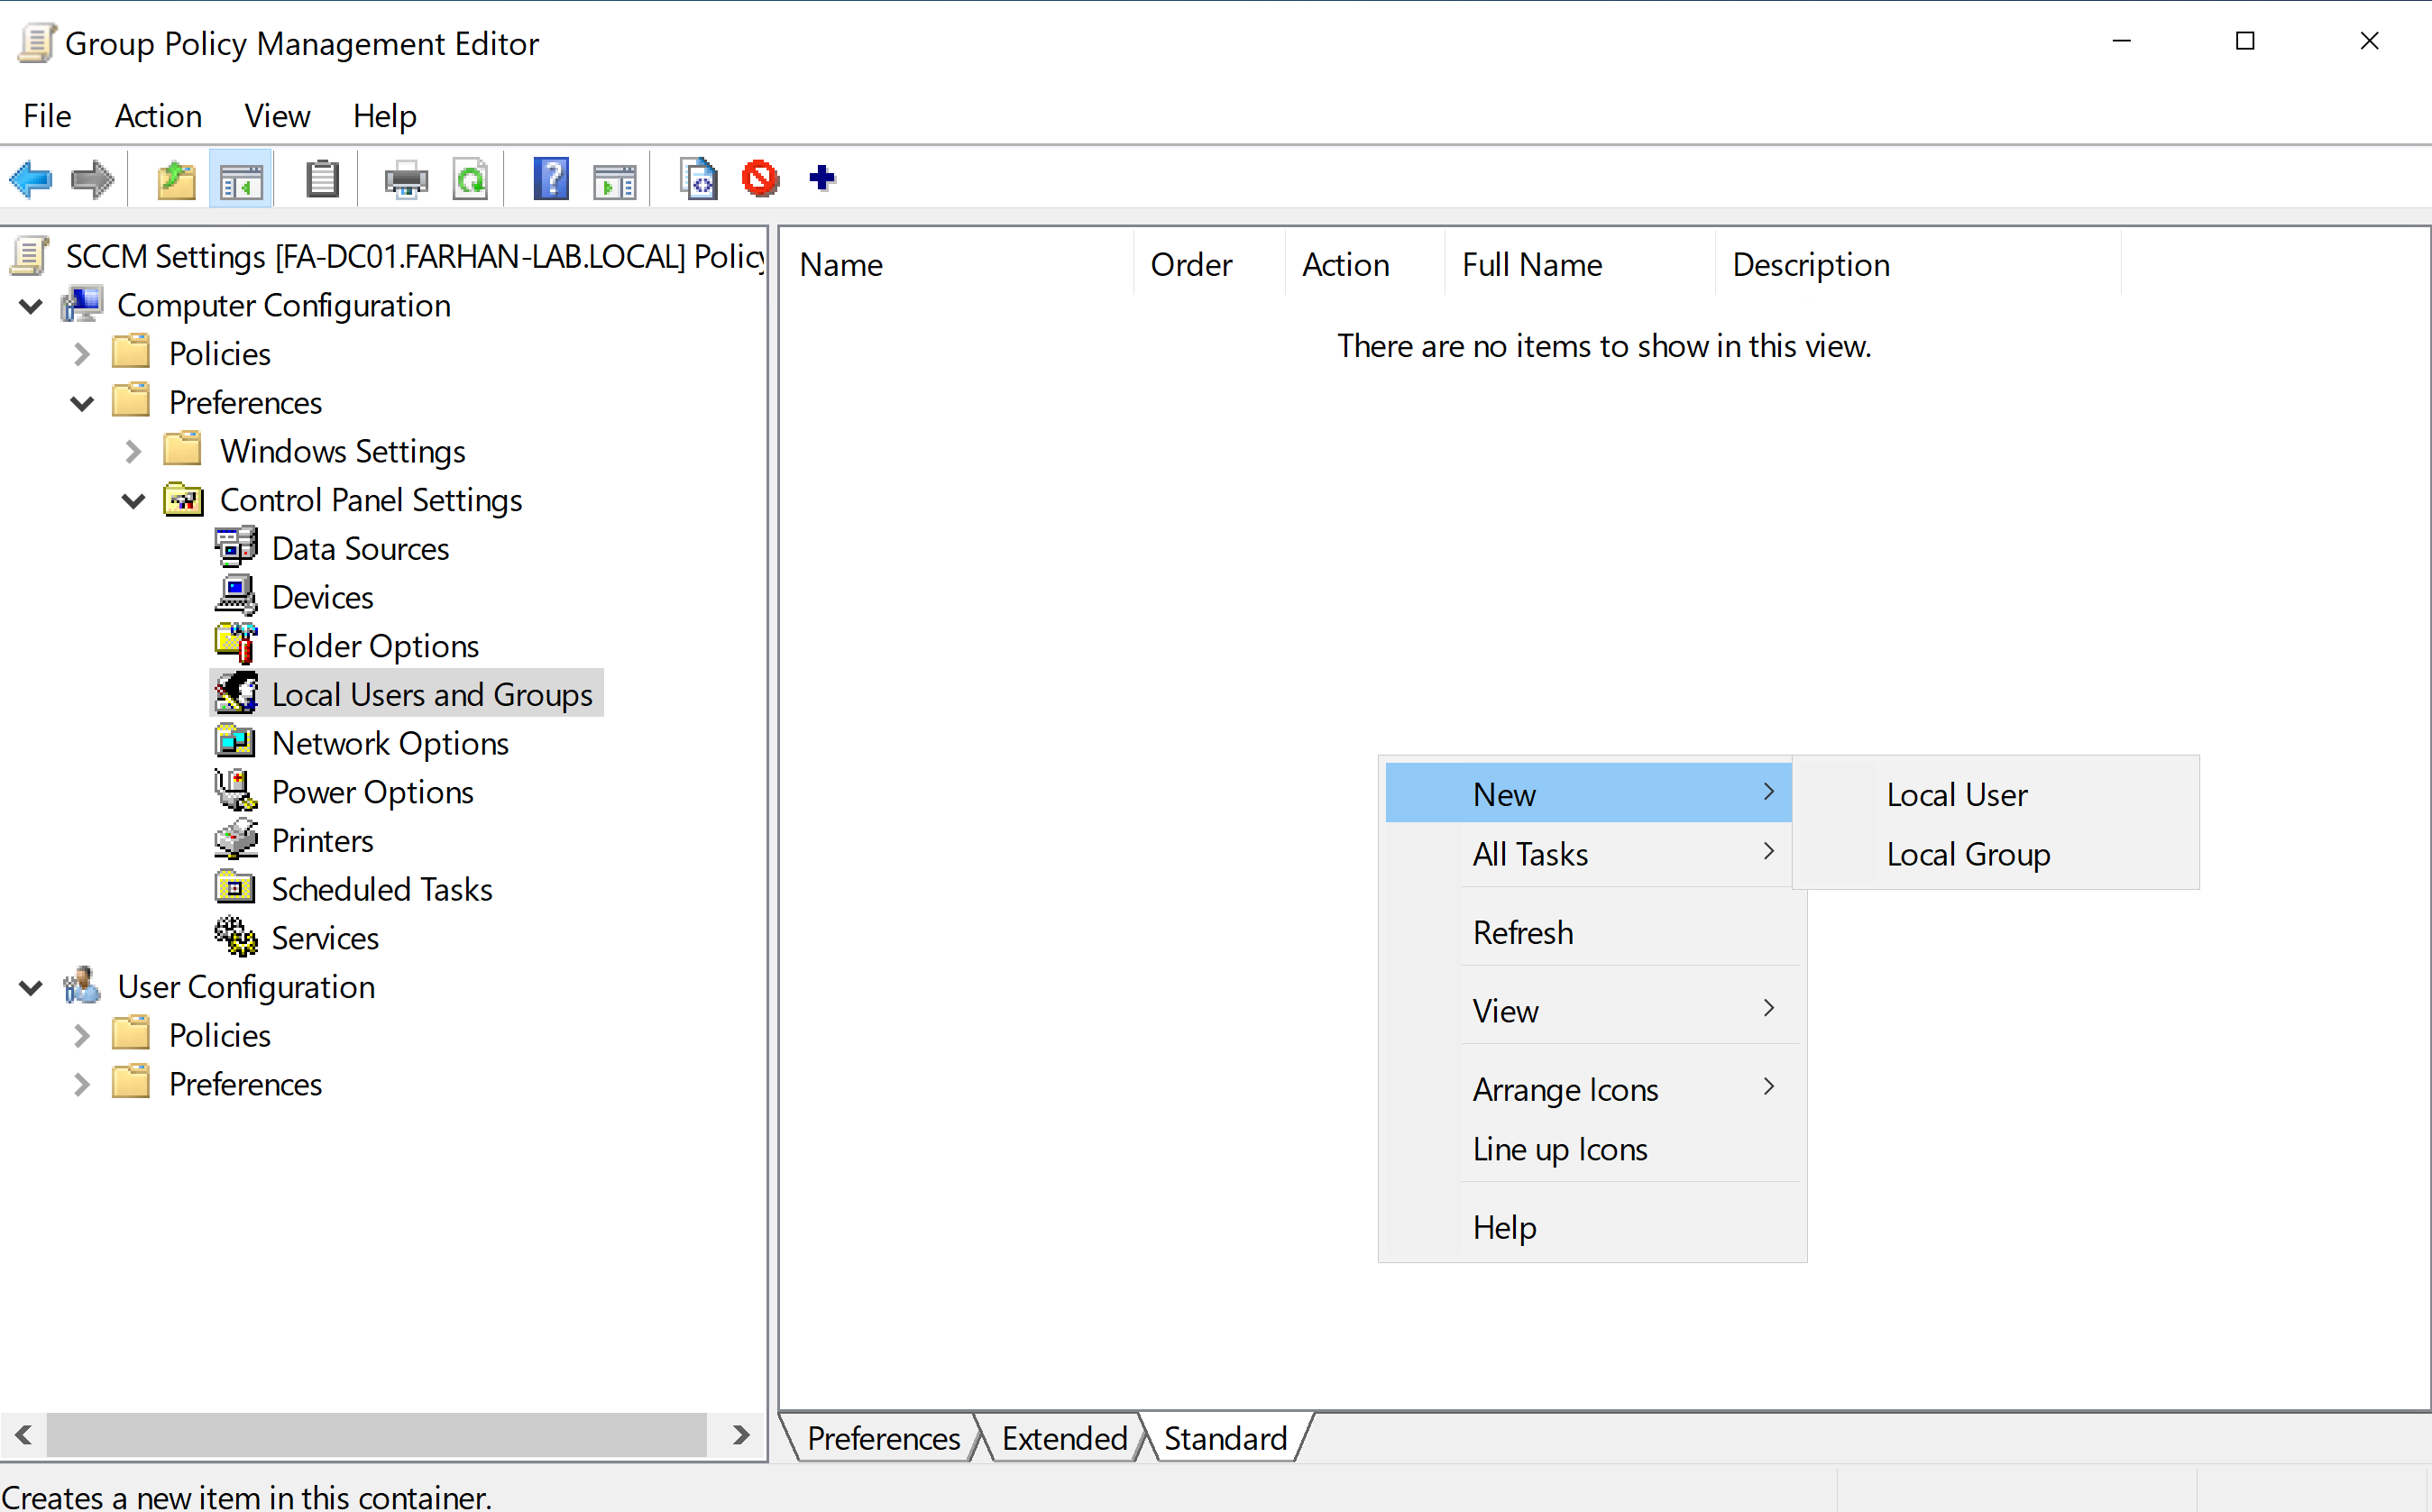
Configuration Values:
Action: Update
Group Name: Administrators (built-in)
Add Account: SCCM_ClientPush
Enforce GPO.
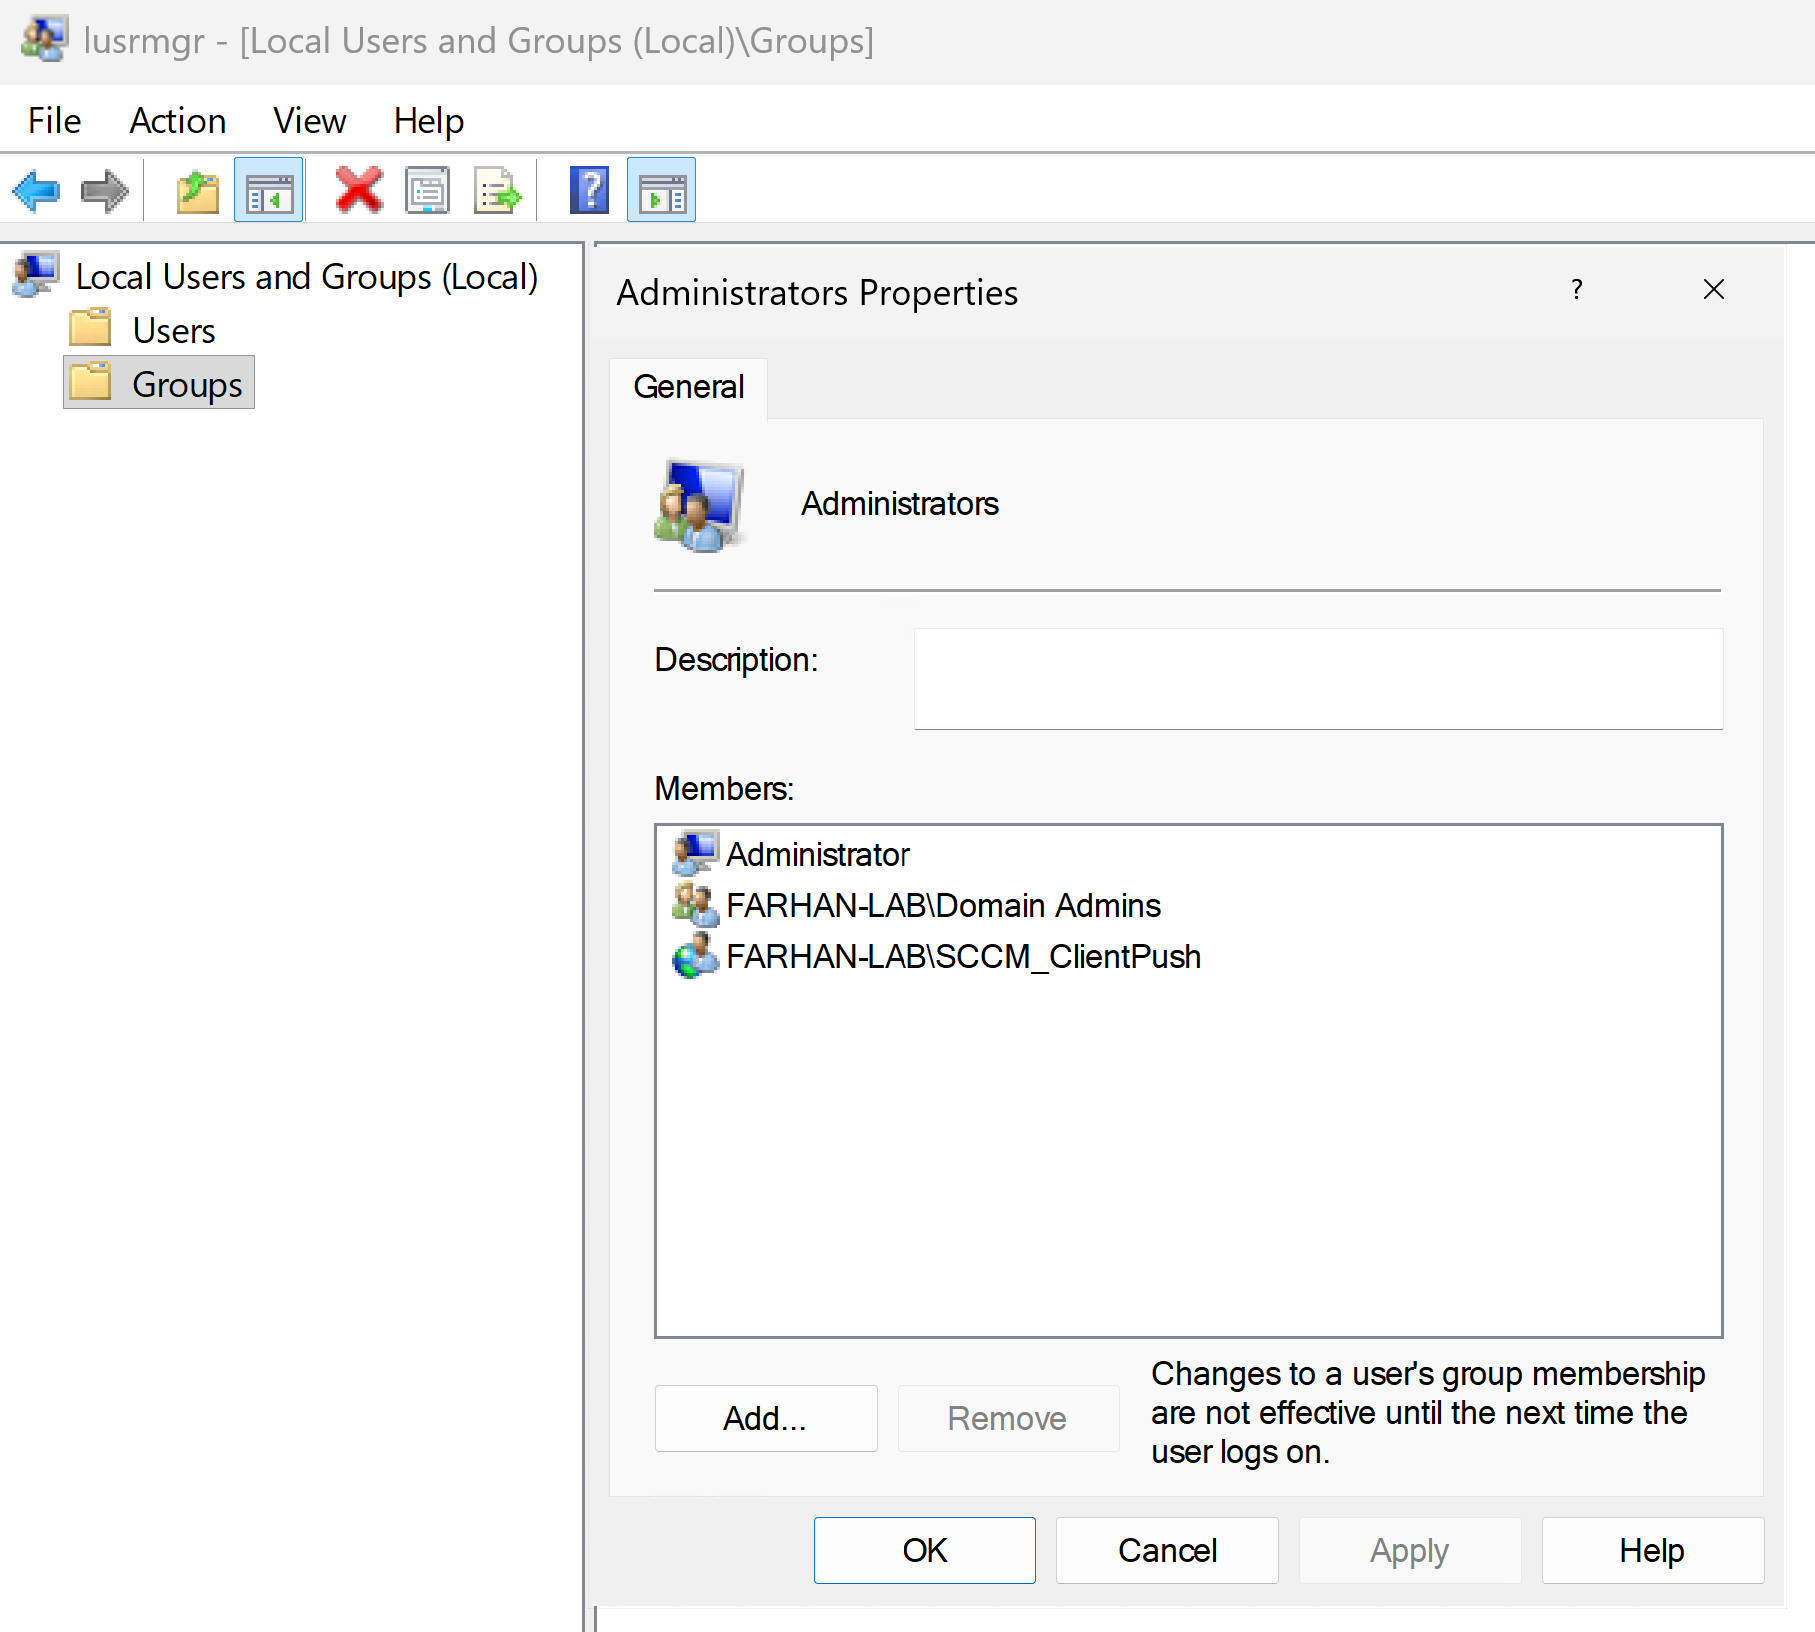
Verify that SCCM_ClientPush is added in the local Administrators account on a client machine (FA-Client01).
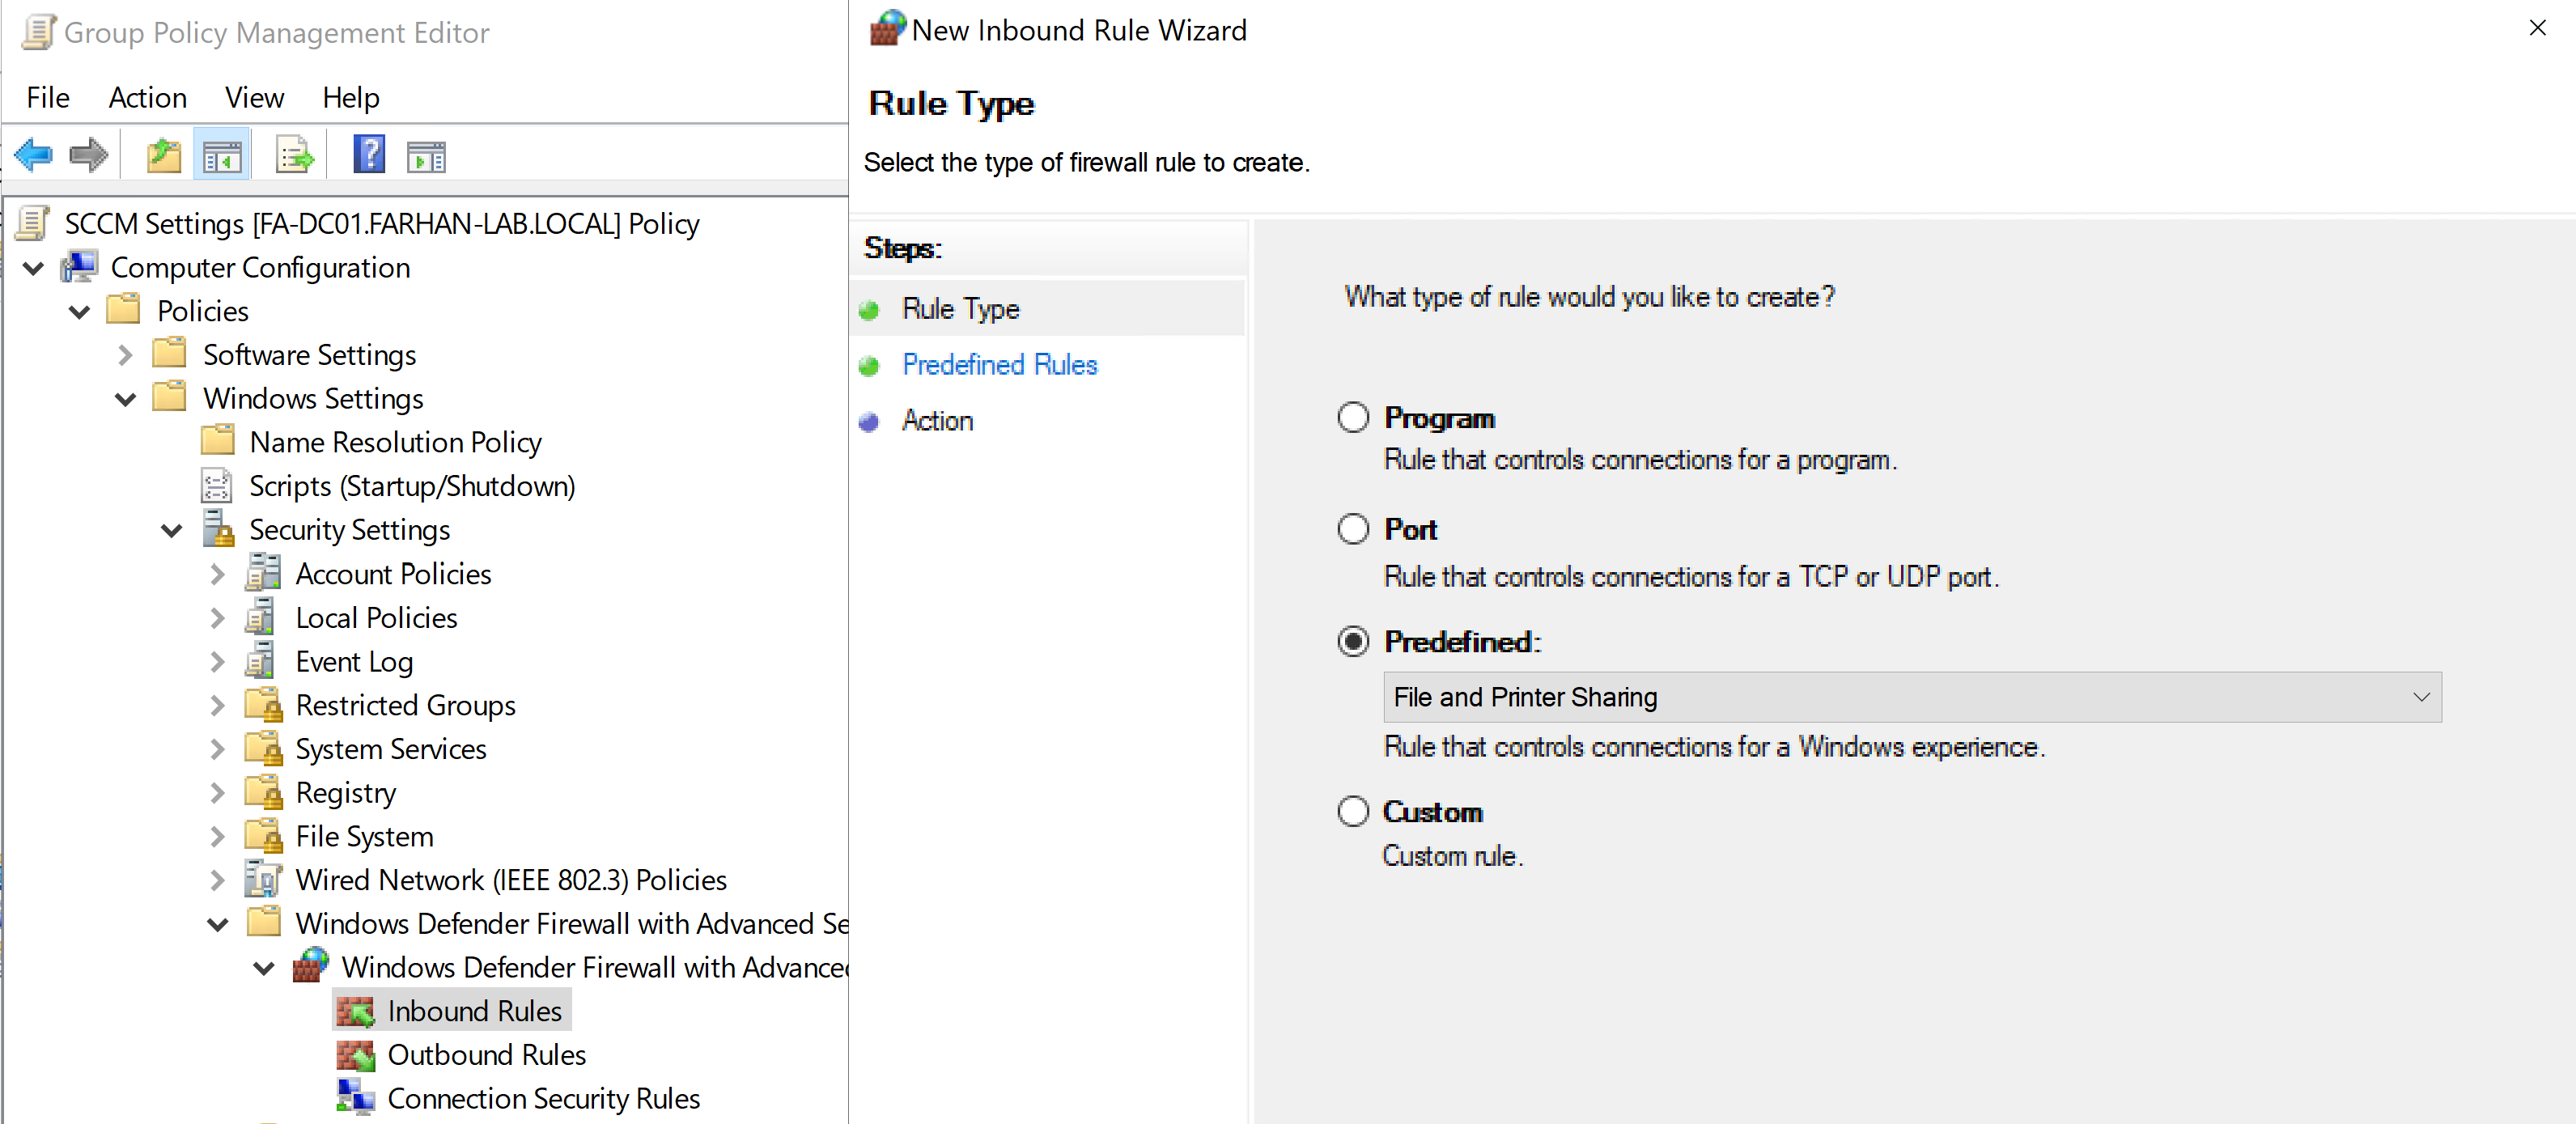
Configure Firewall Rules for Client Push
To allow SCCM to remotely install and manage clients, firewall exceptions are required on all clients.
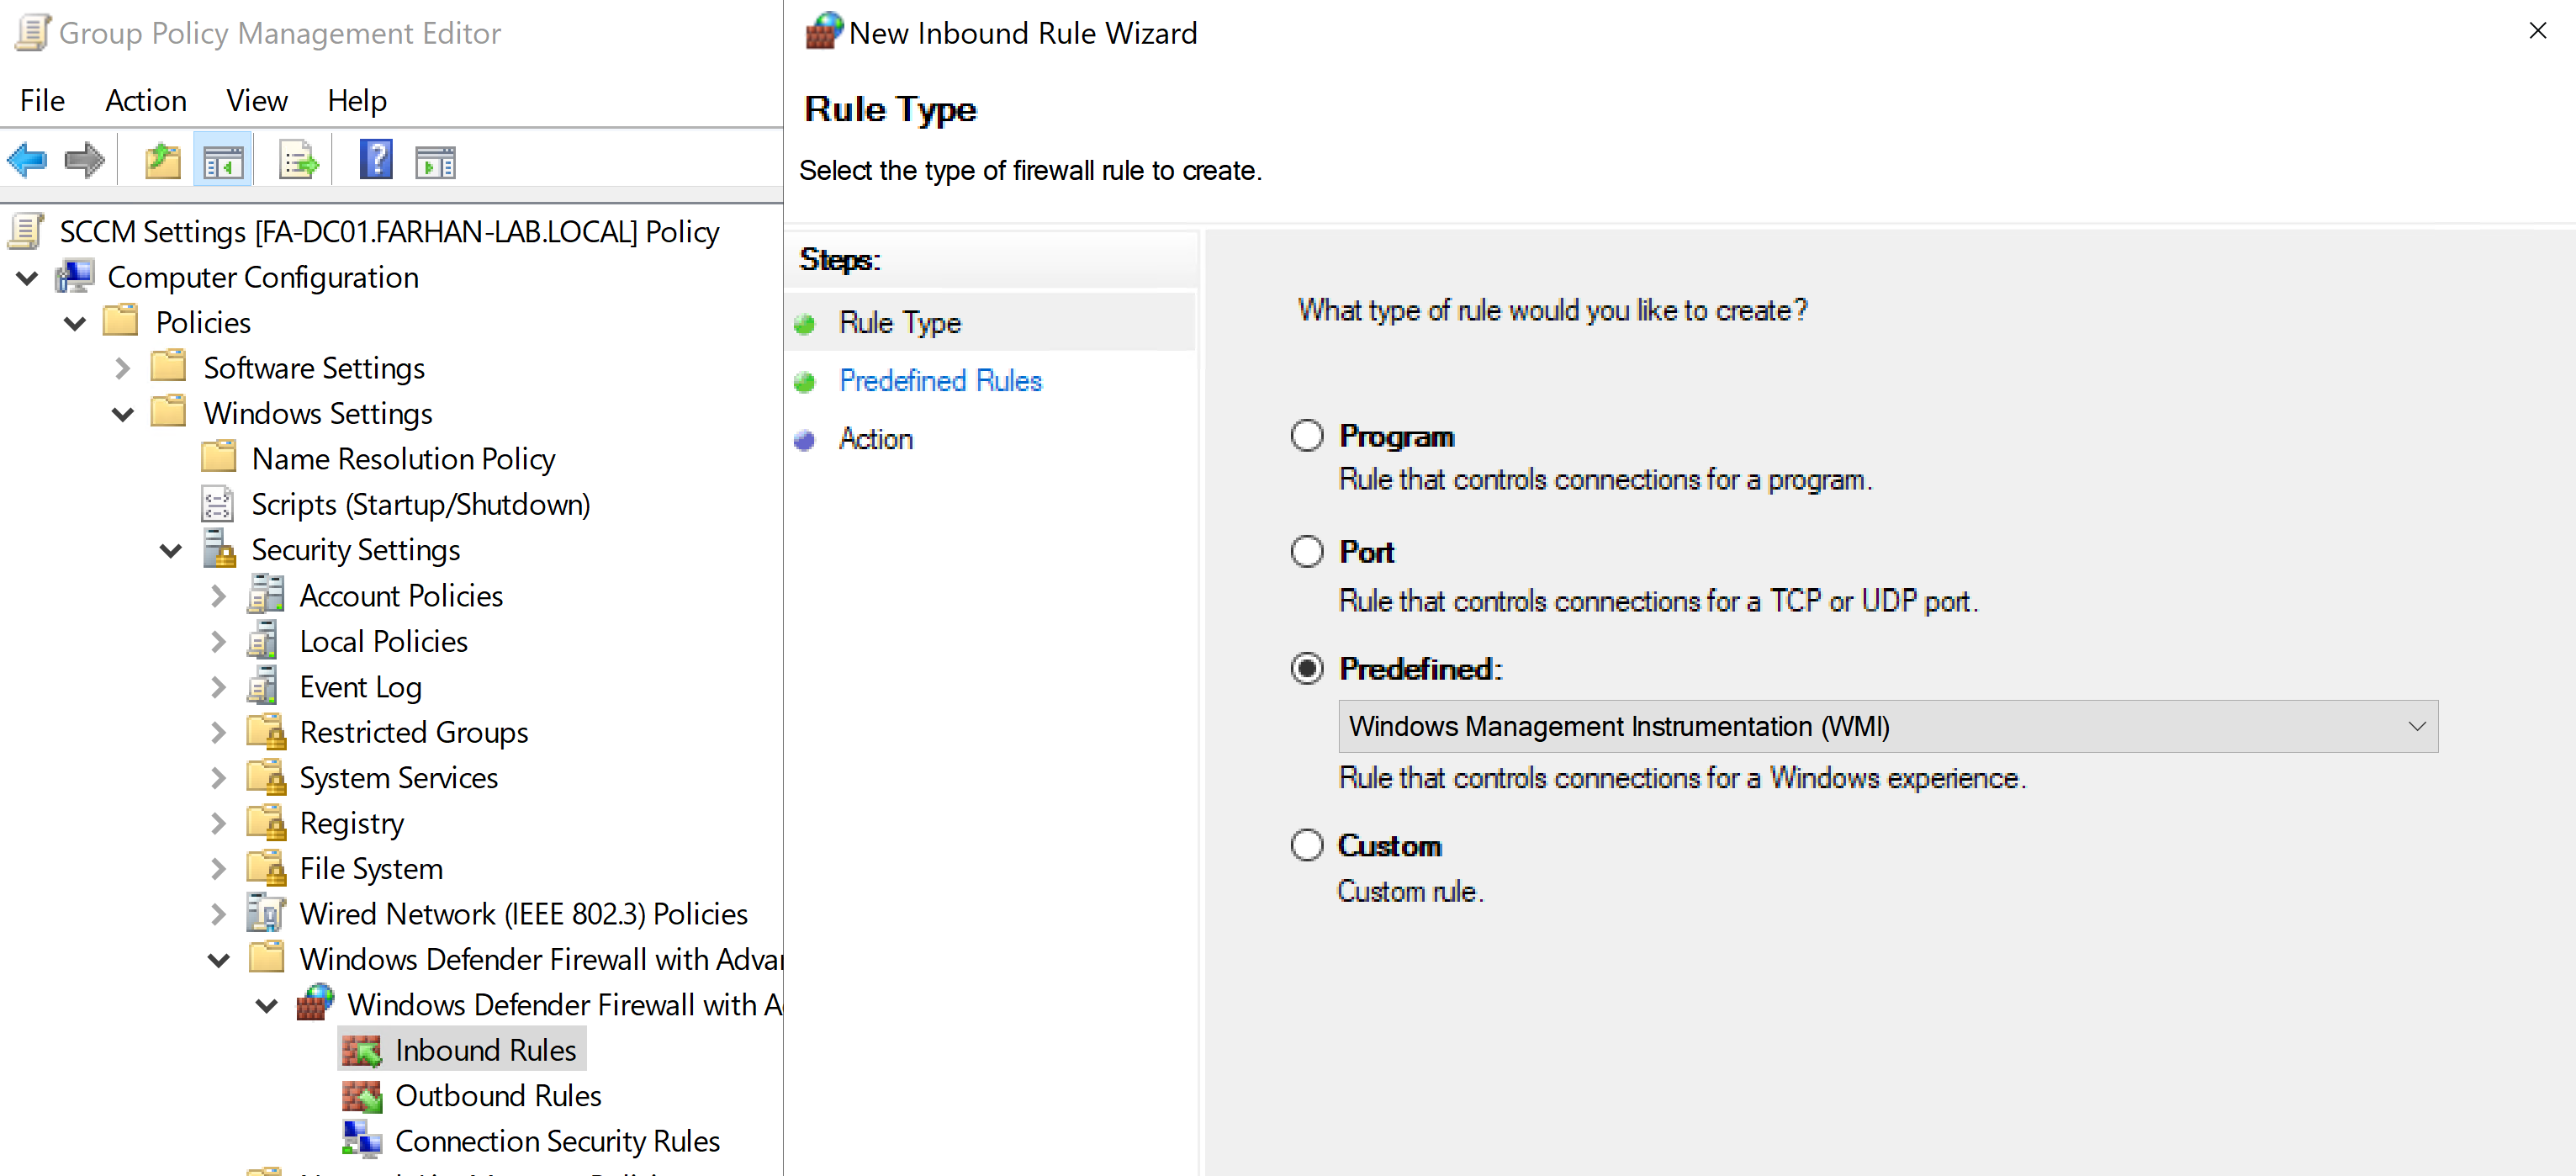
Edit SCCM-Settings GPO
Navigate to: Computer Configuration -> Policies ->Windows Settings -> Security Settings -> Windows Firewall and Advanced Security
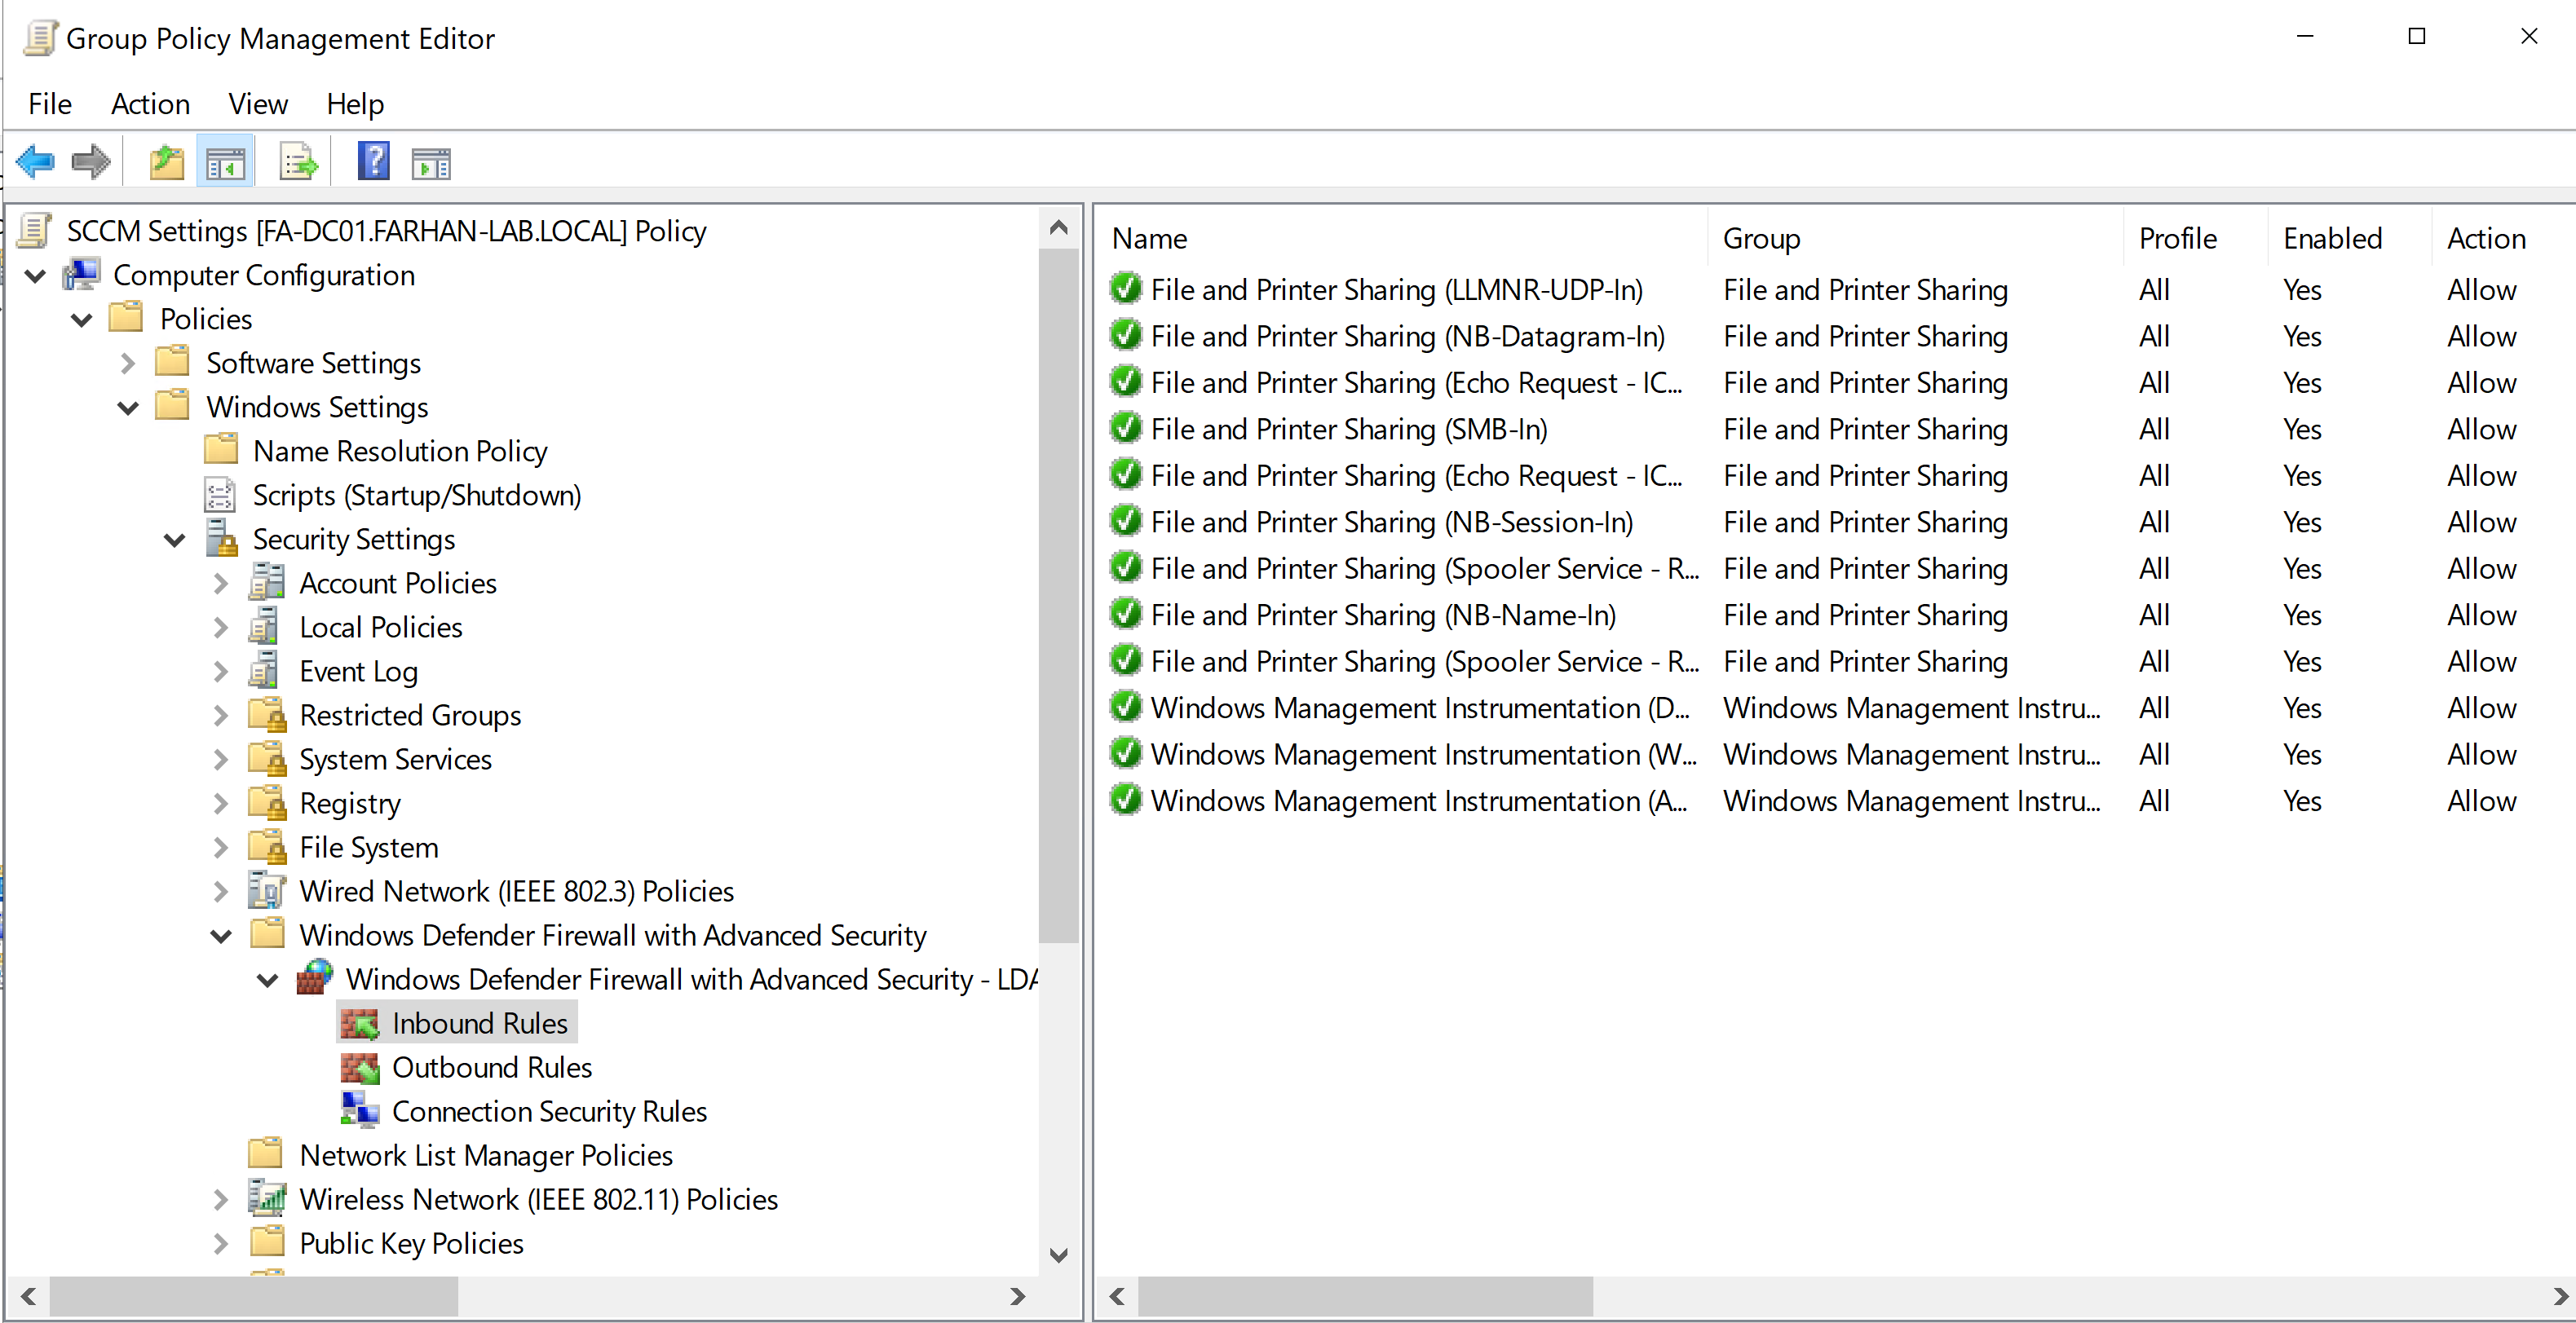
Create inbound firewall rules:
Predefined rule: Windows Management Instrumentation (WMI)
Create inbound firewall rules:
Predefined rule: File and Printer Sharing
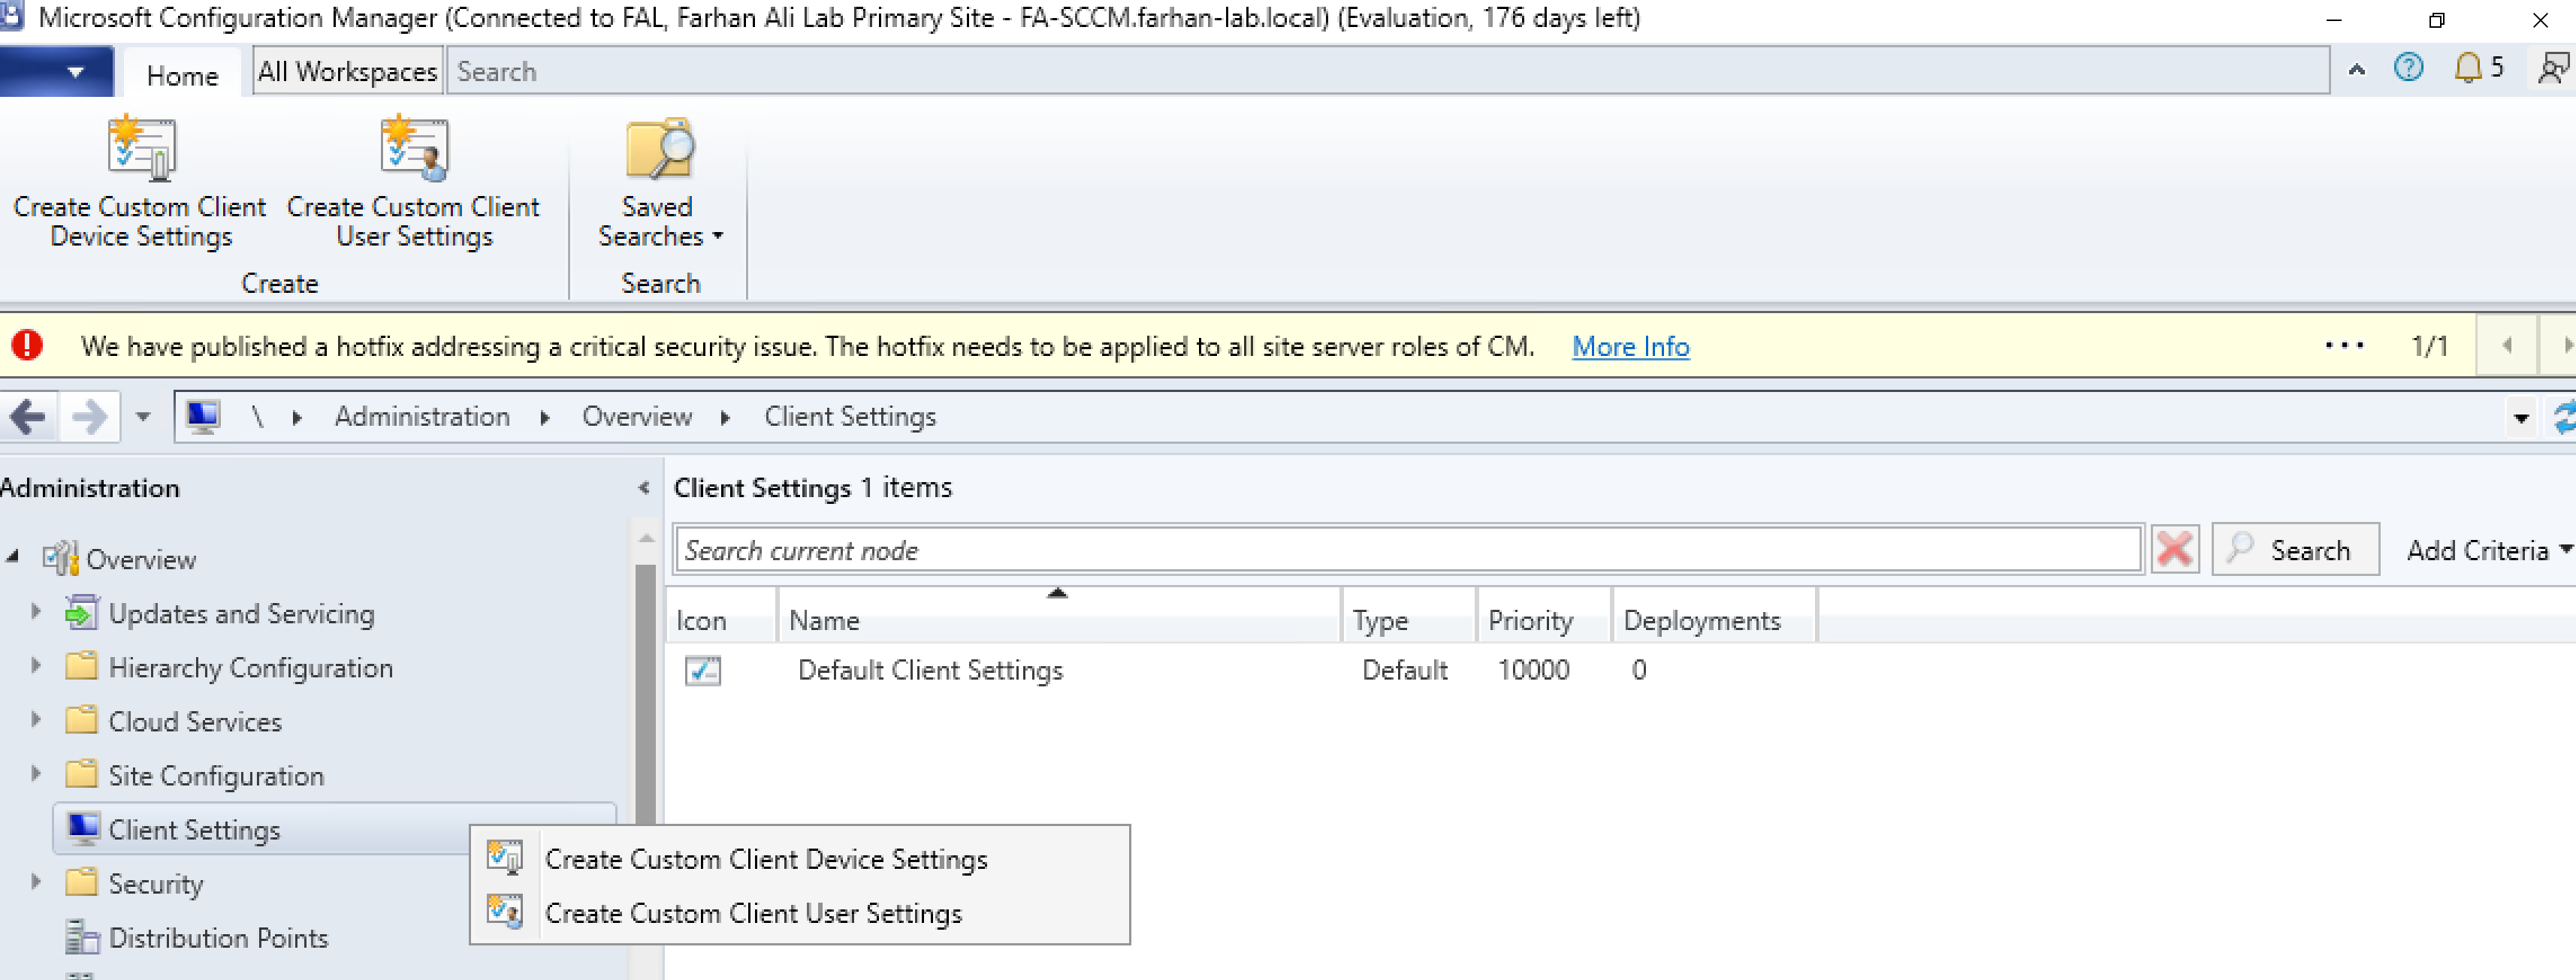
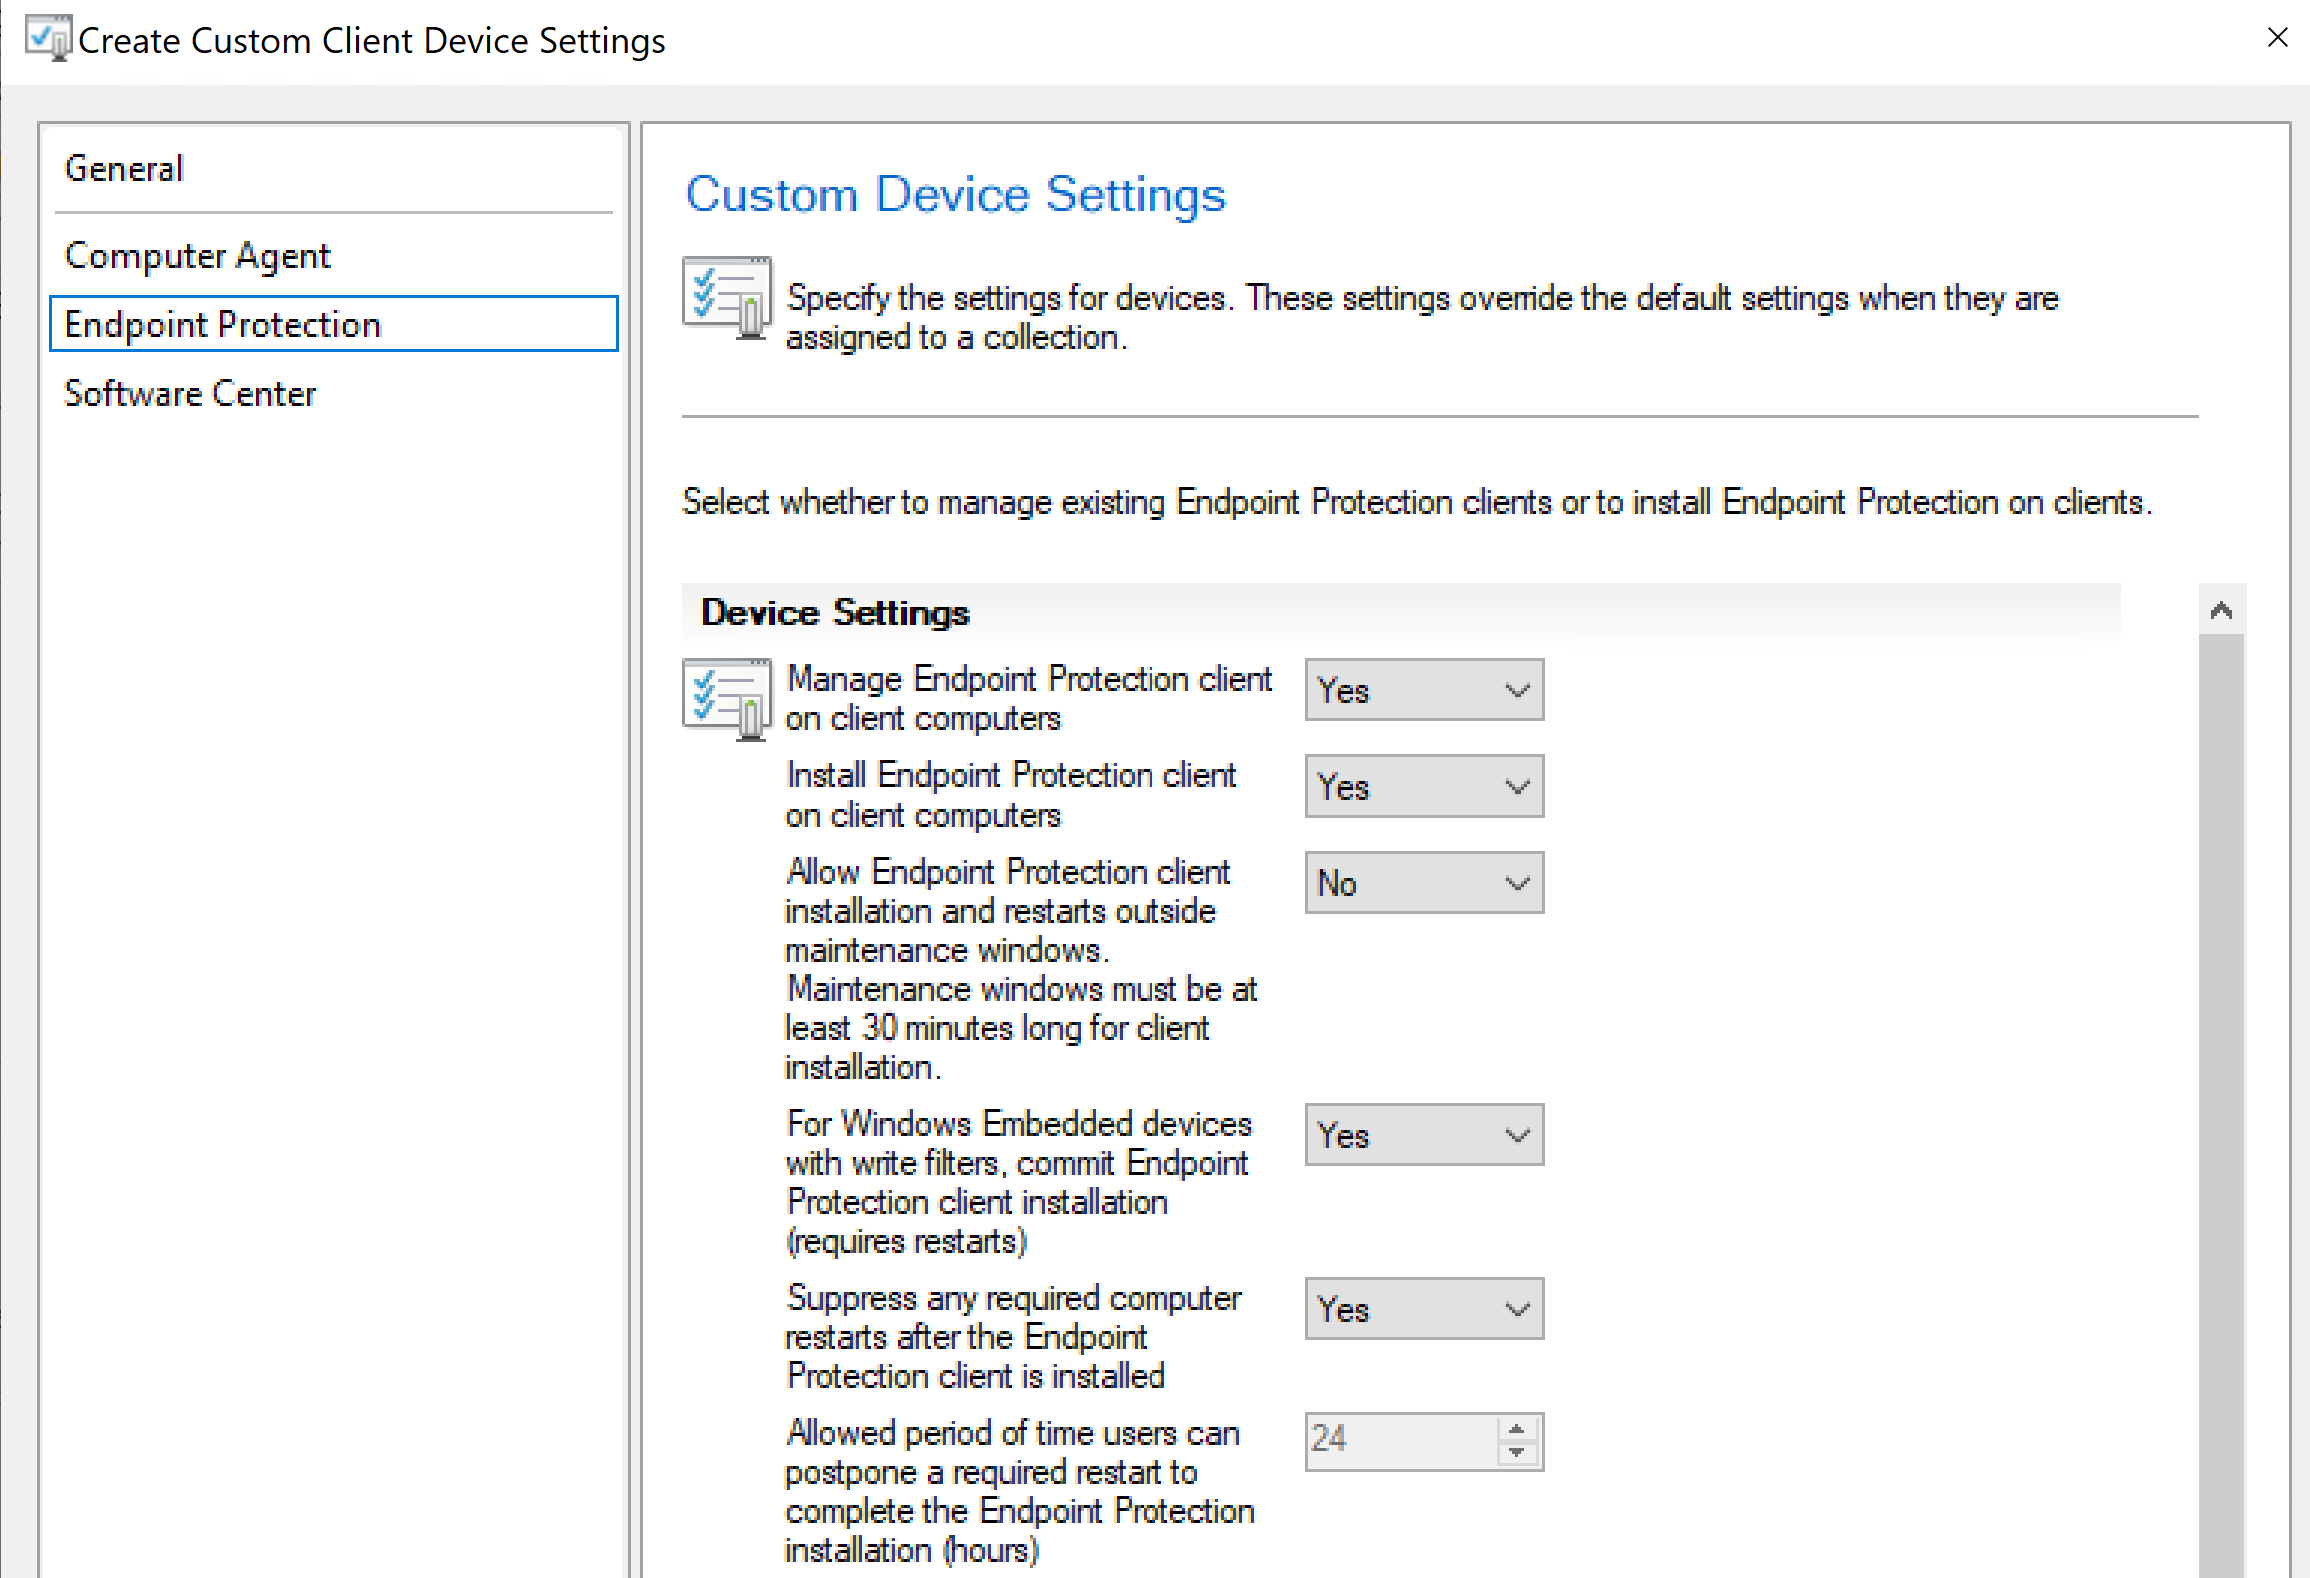
5. Deploy Custom Client Settings (optional)
I will configure custom client settings so it’s automatically applied to new clients for consistent client behavior overriding default client settings.
Navigate to Client Settings -> Create a new Custom Client Device Settings
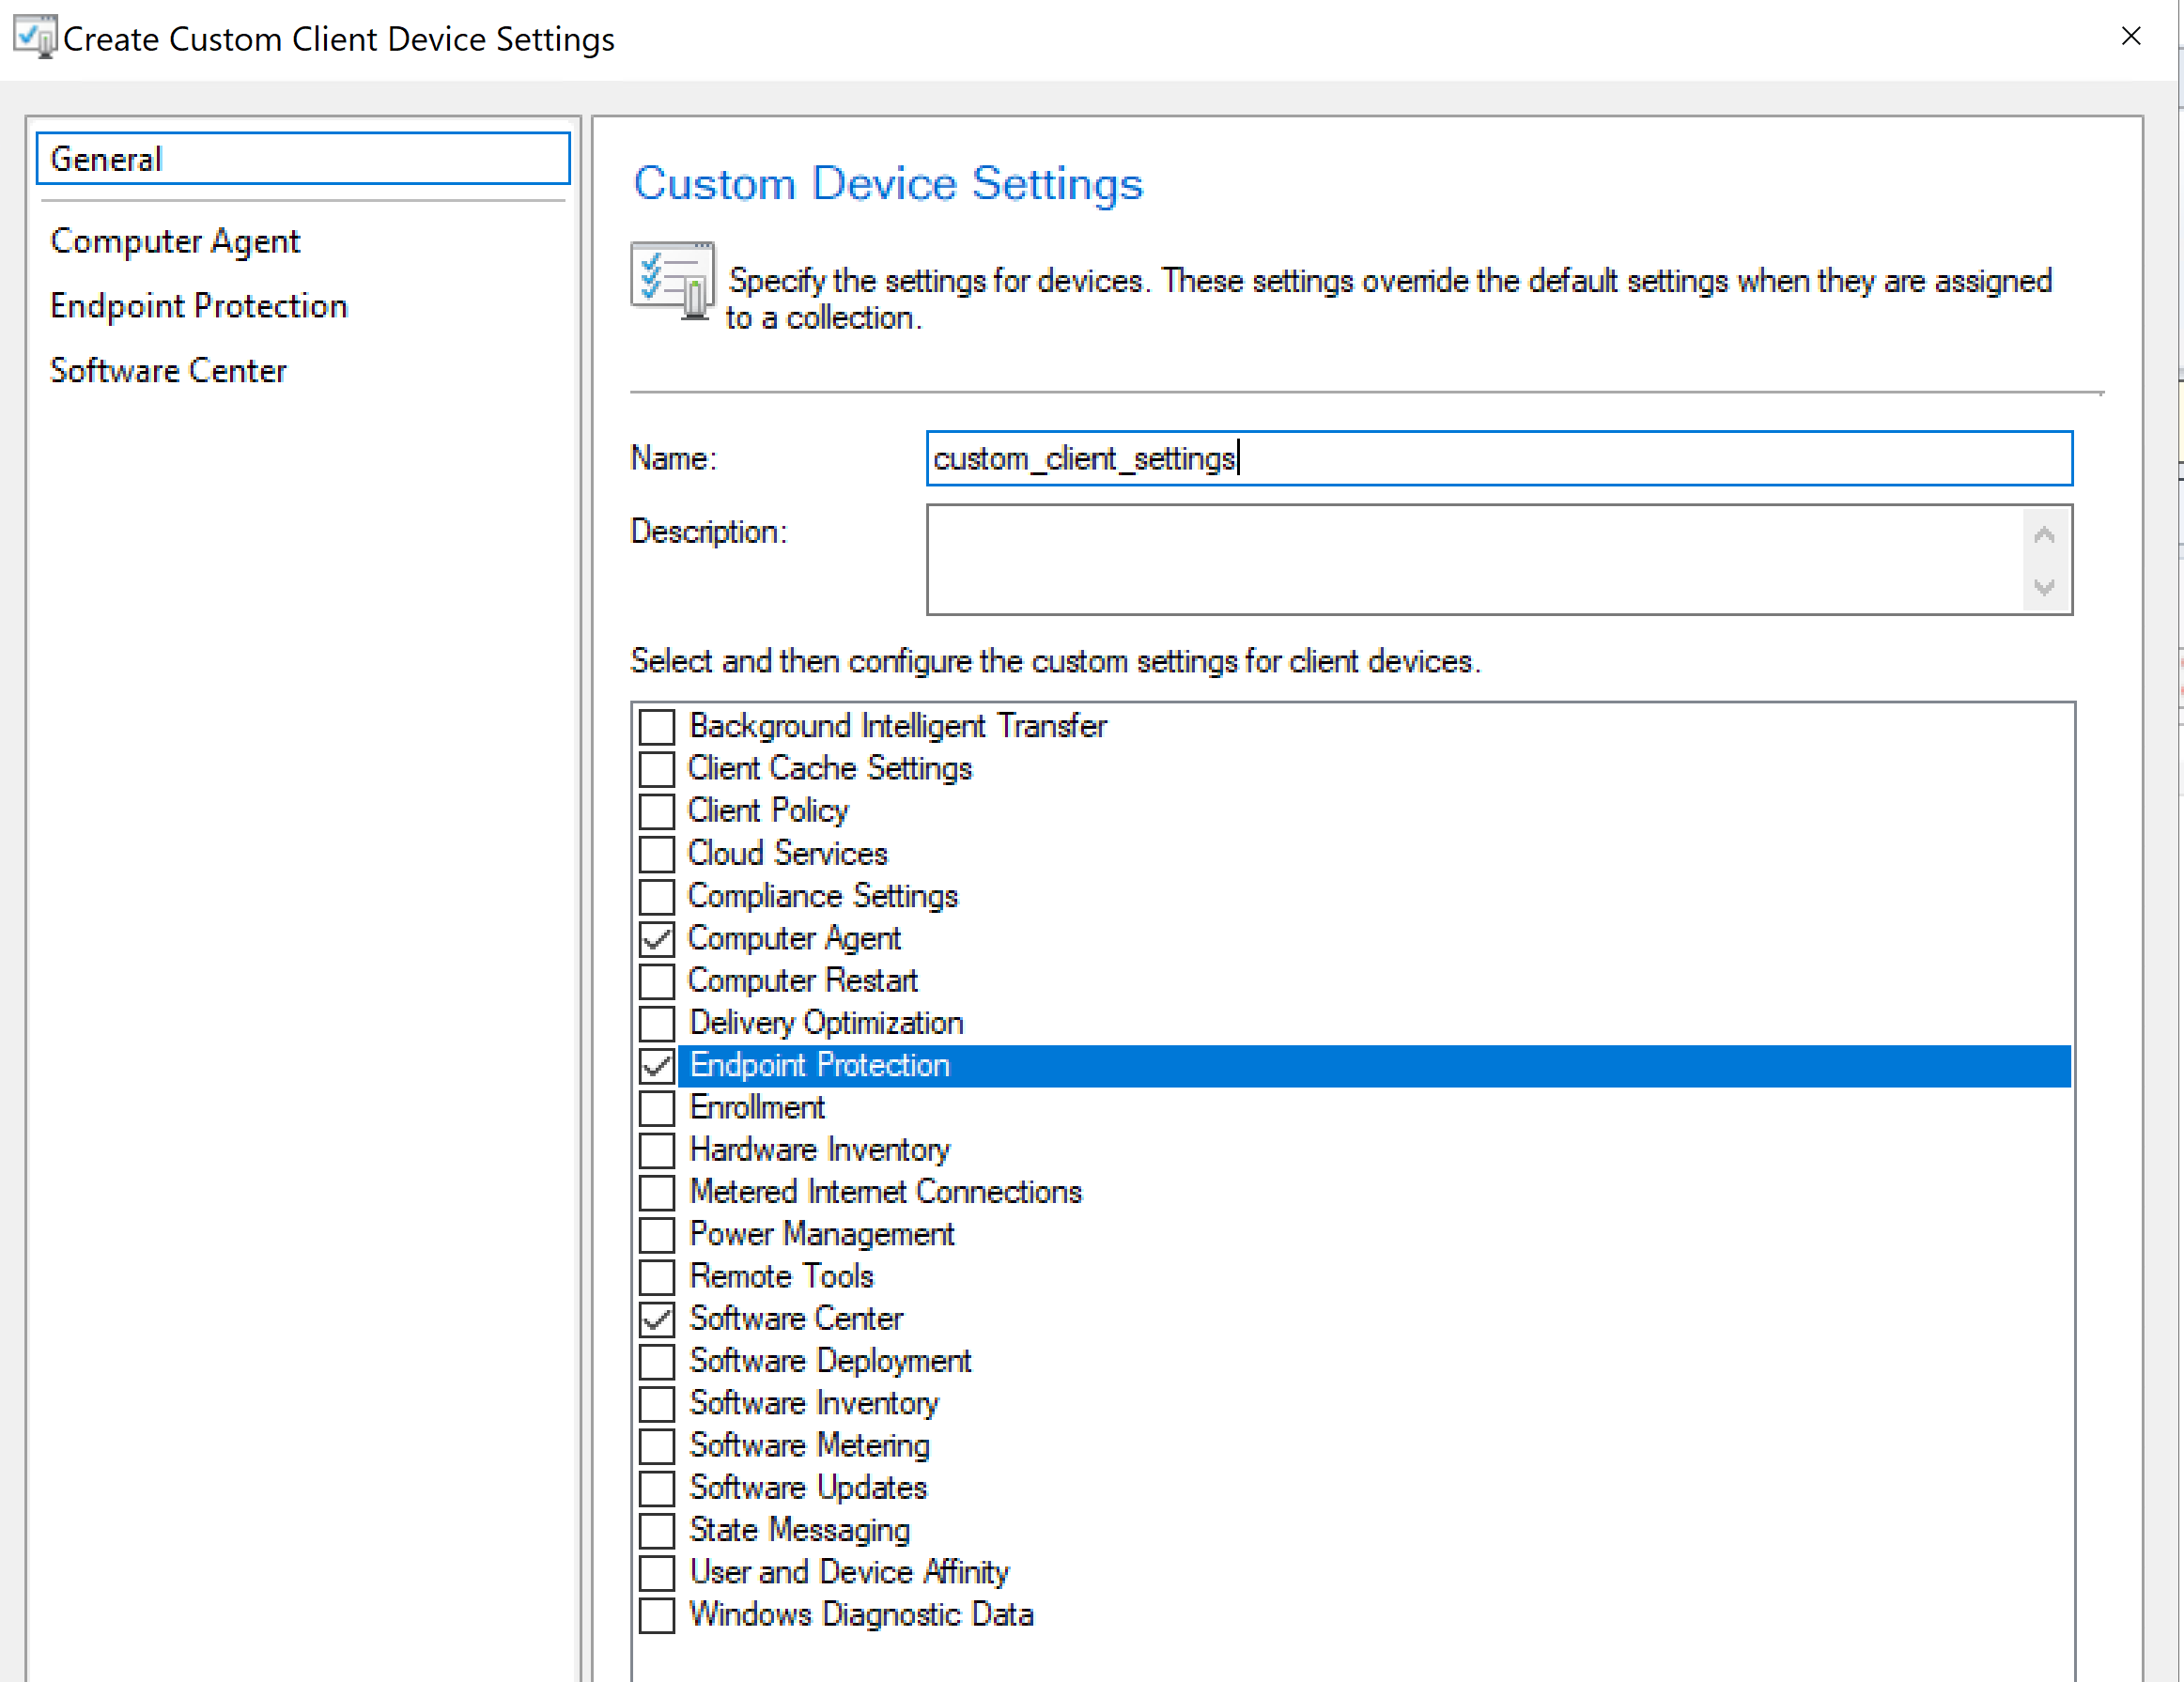
Enabled setting to Manage Endpoint Protection client on client computers.
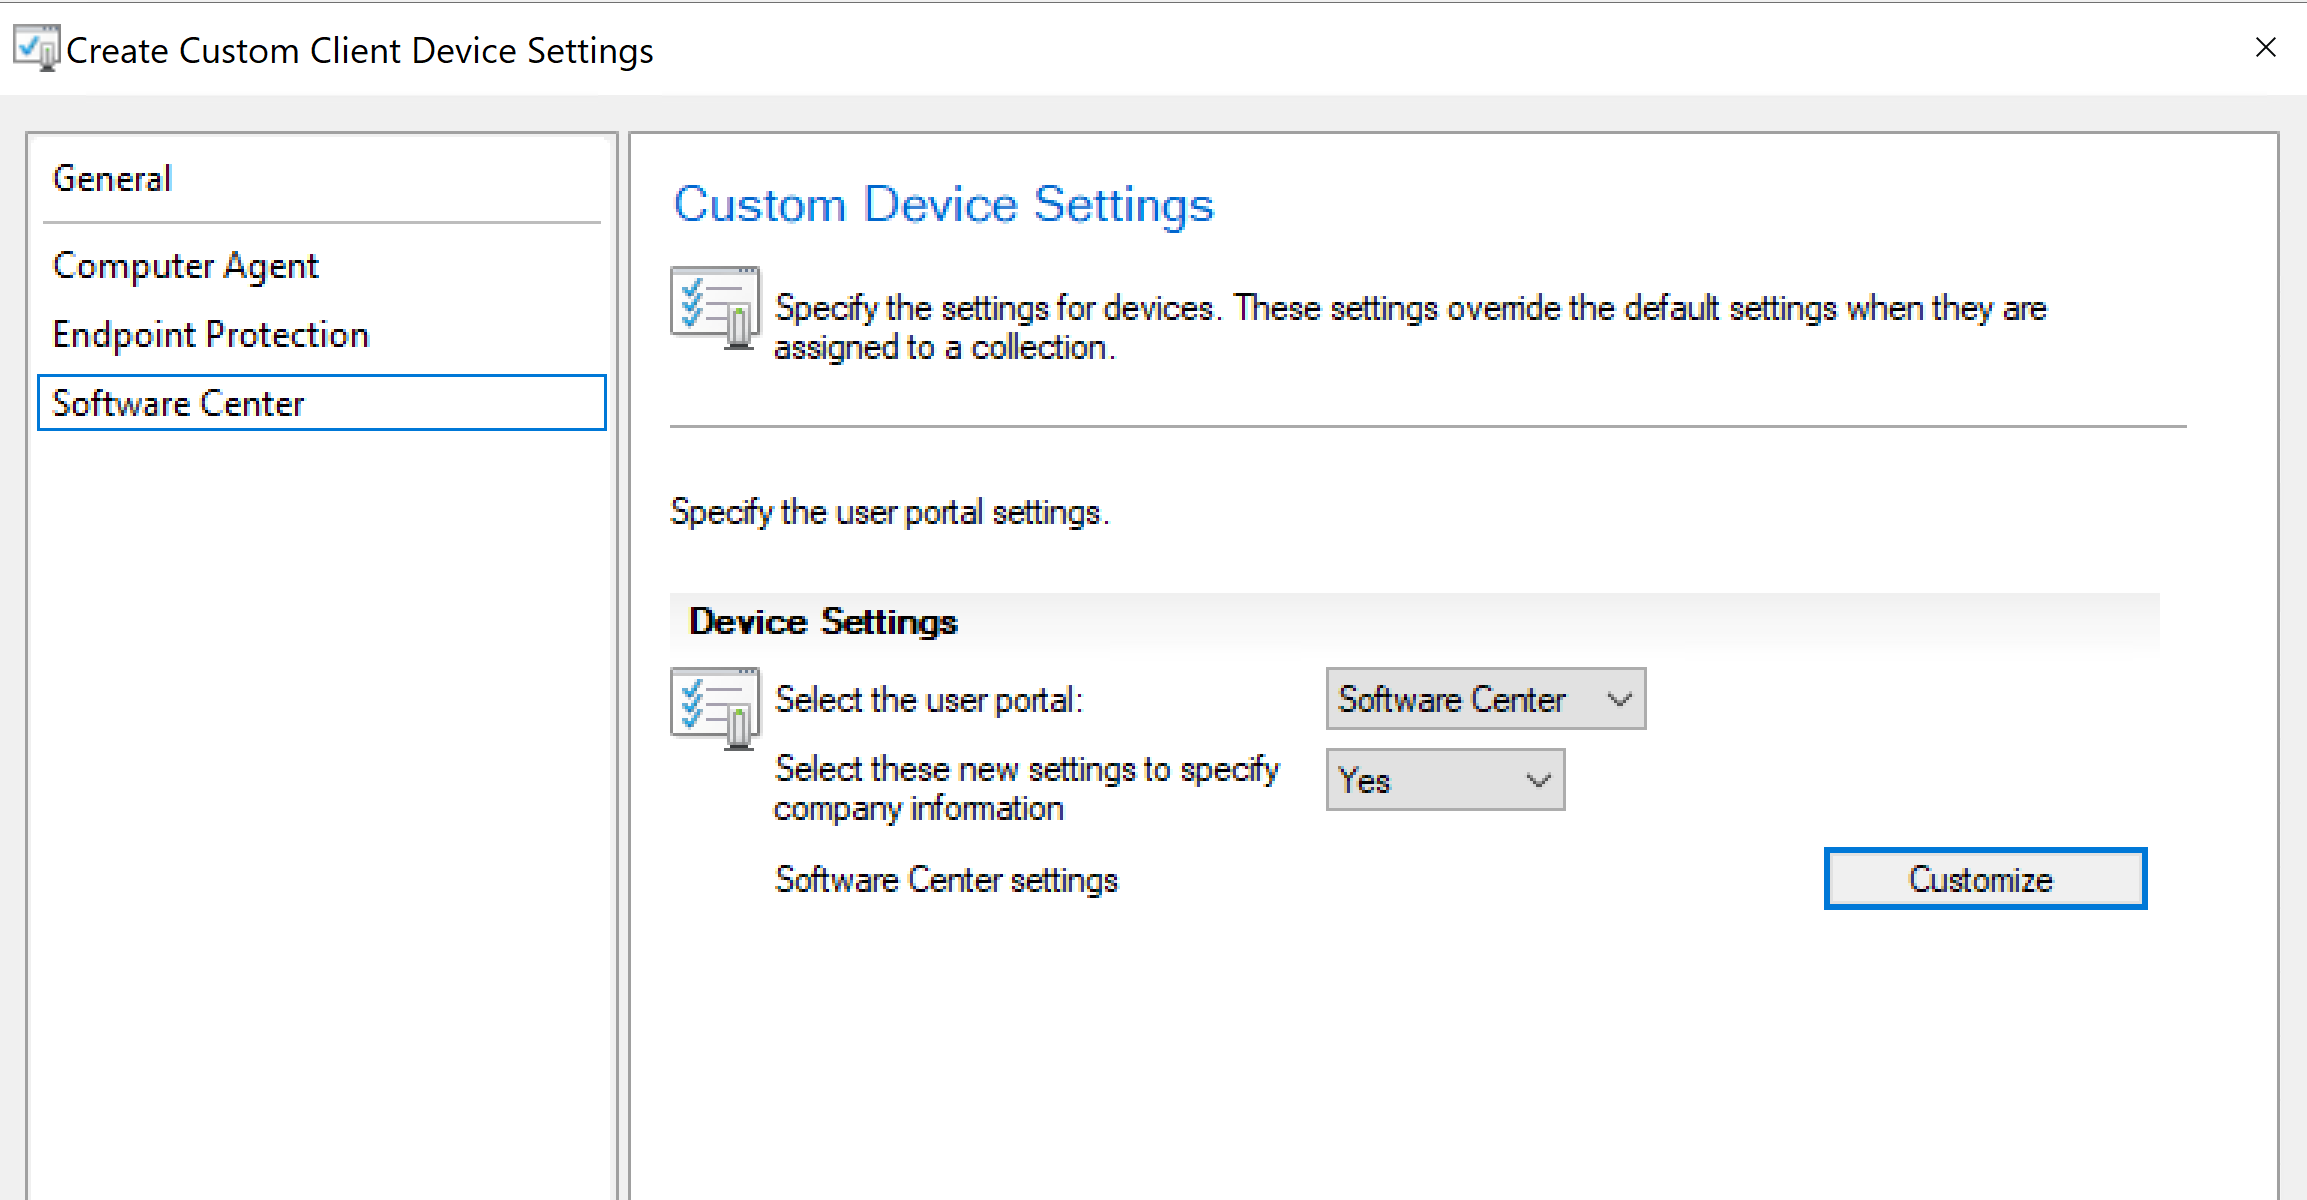
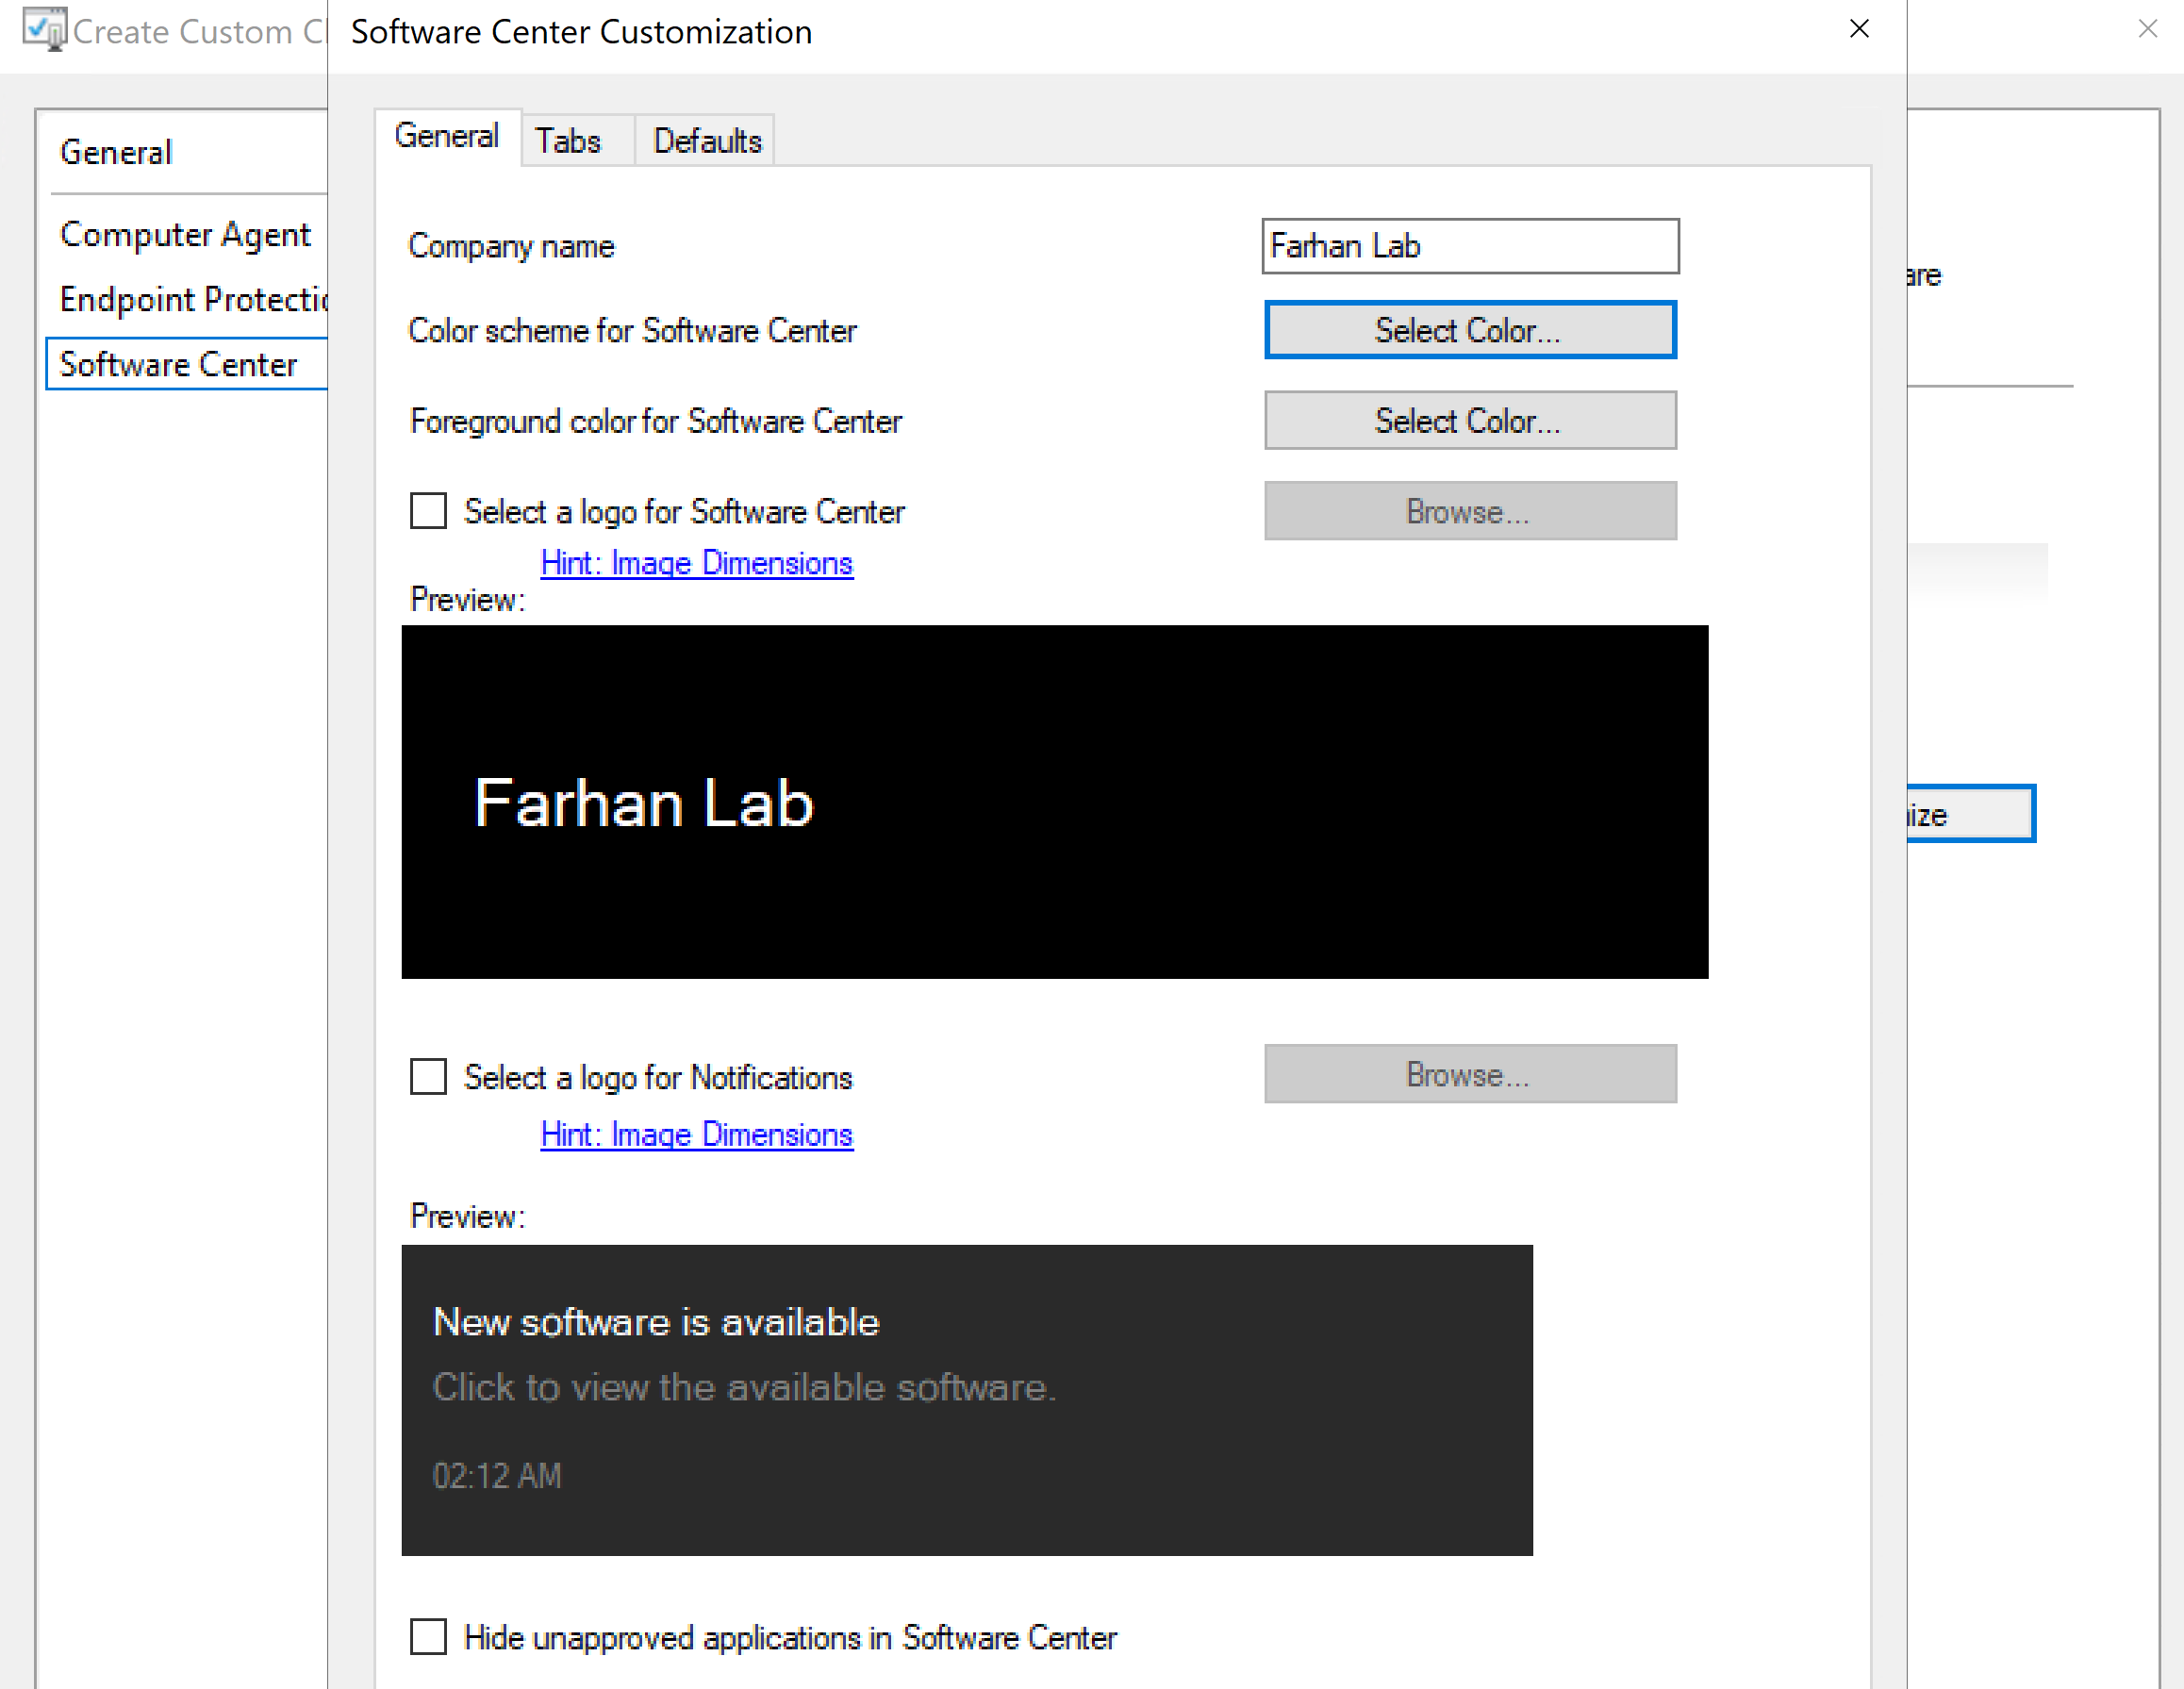
Specified company name and created a custom logo.
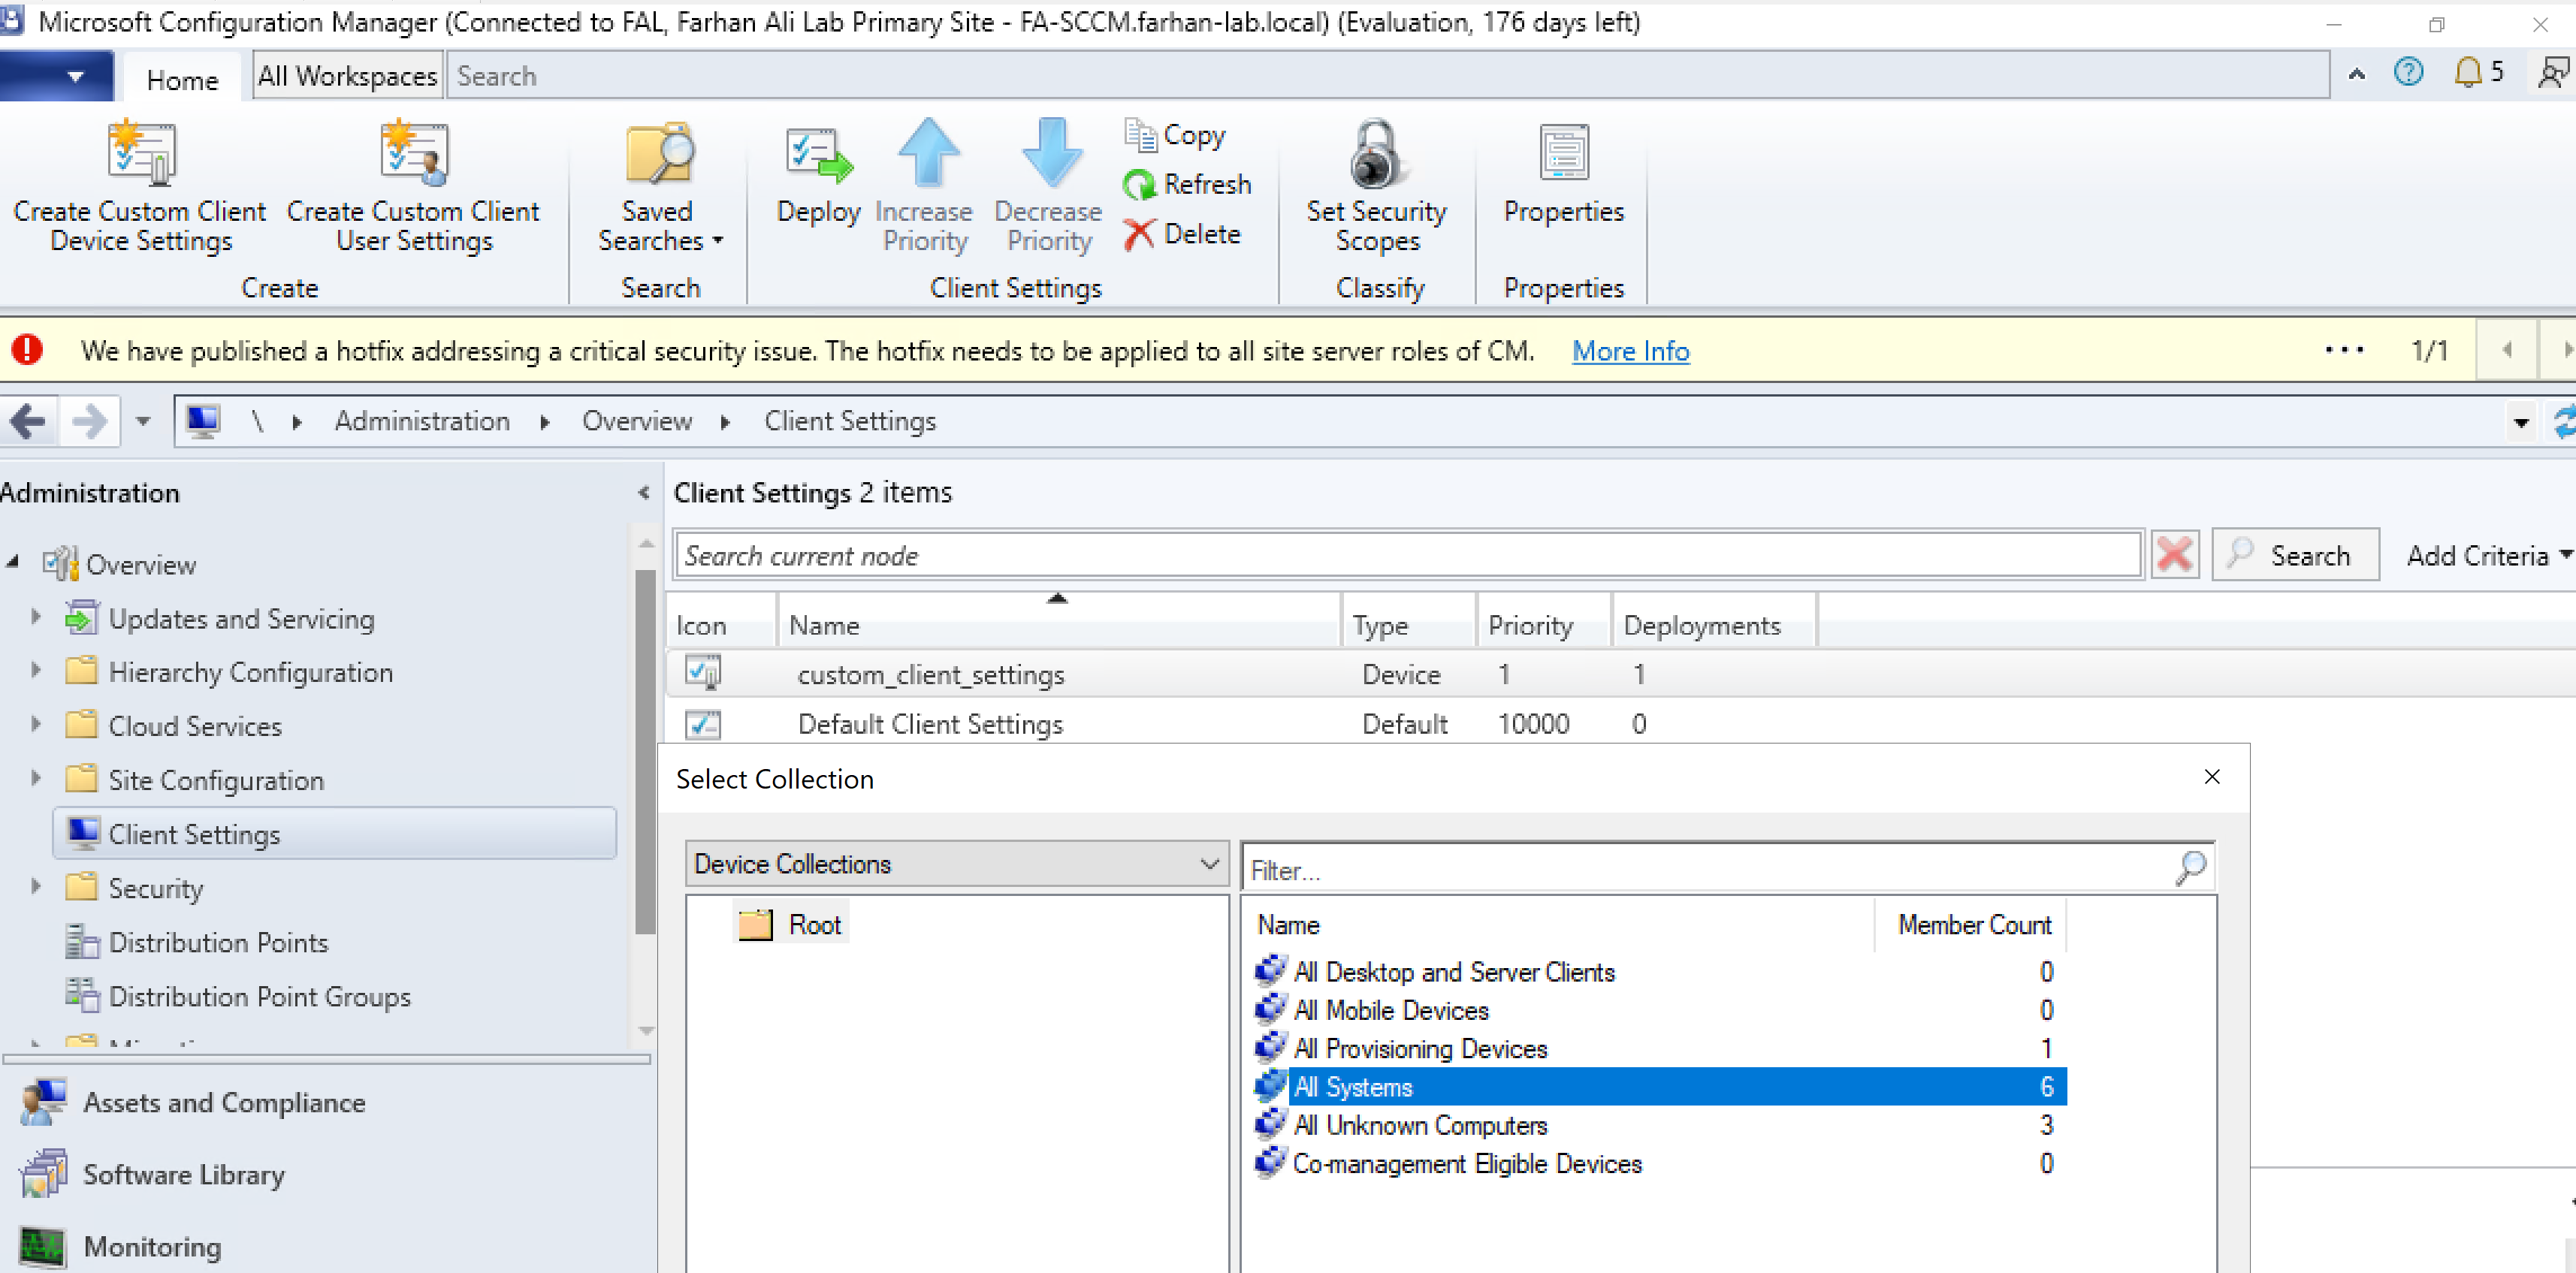
Deployed Custom Client Settings to All Systems.
6. Verify Client Installation
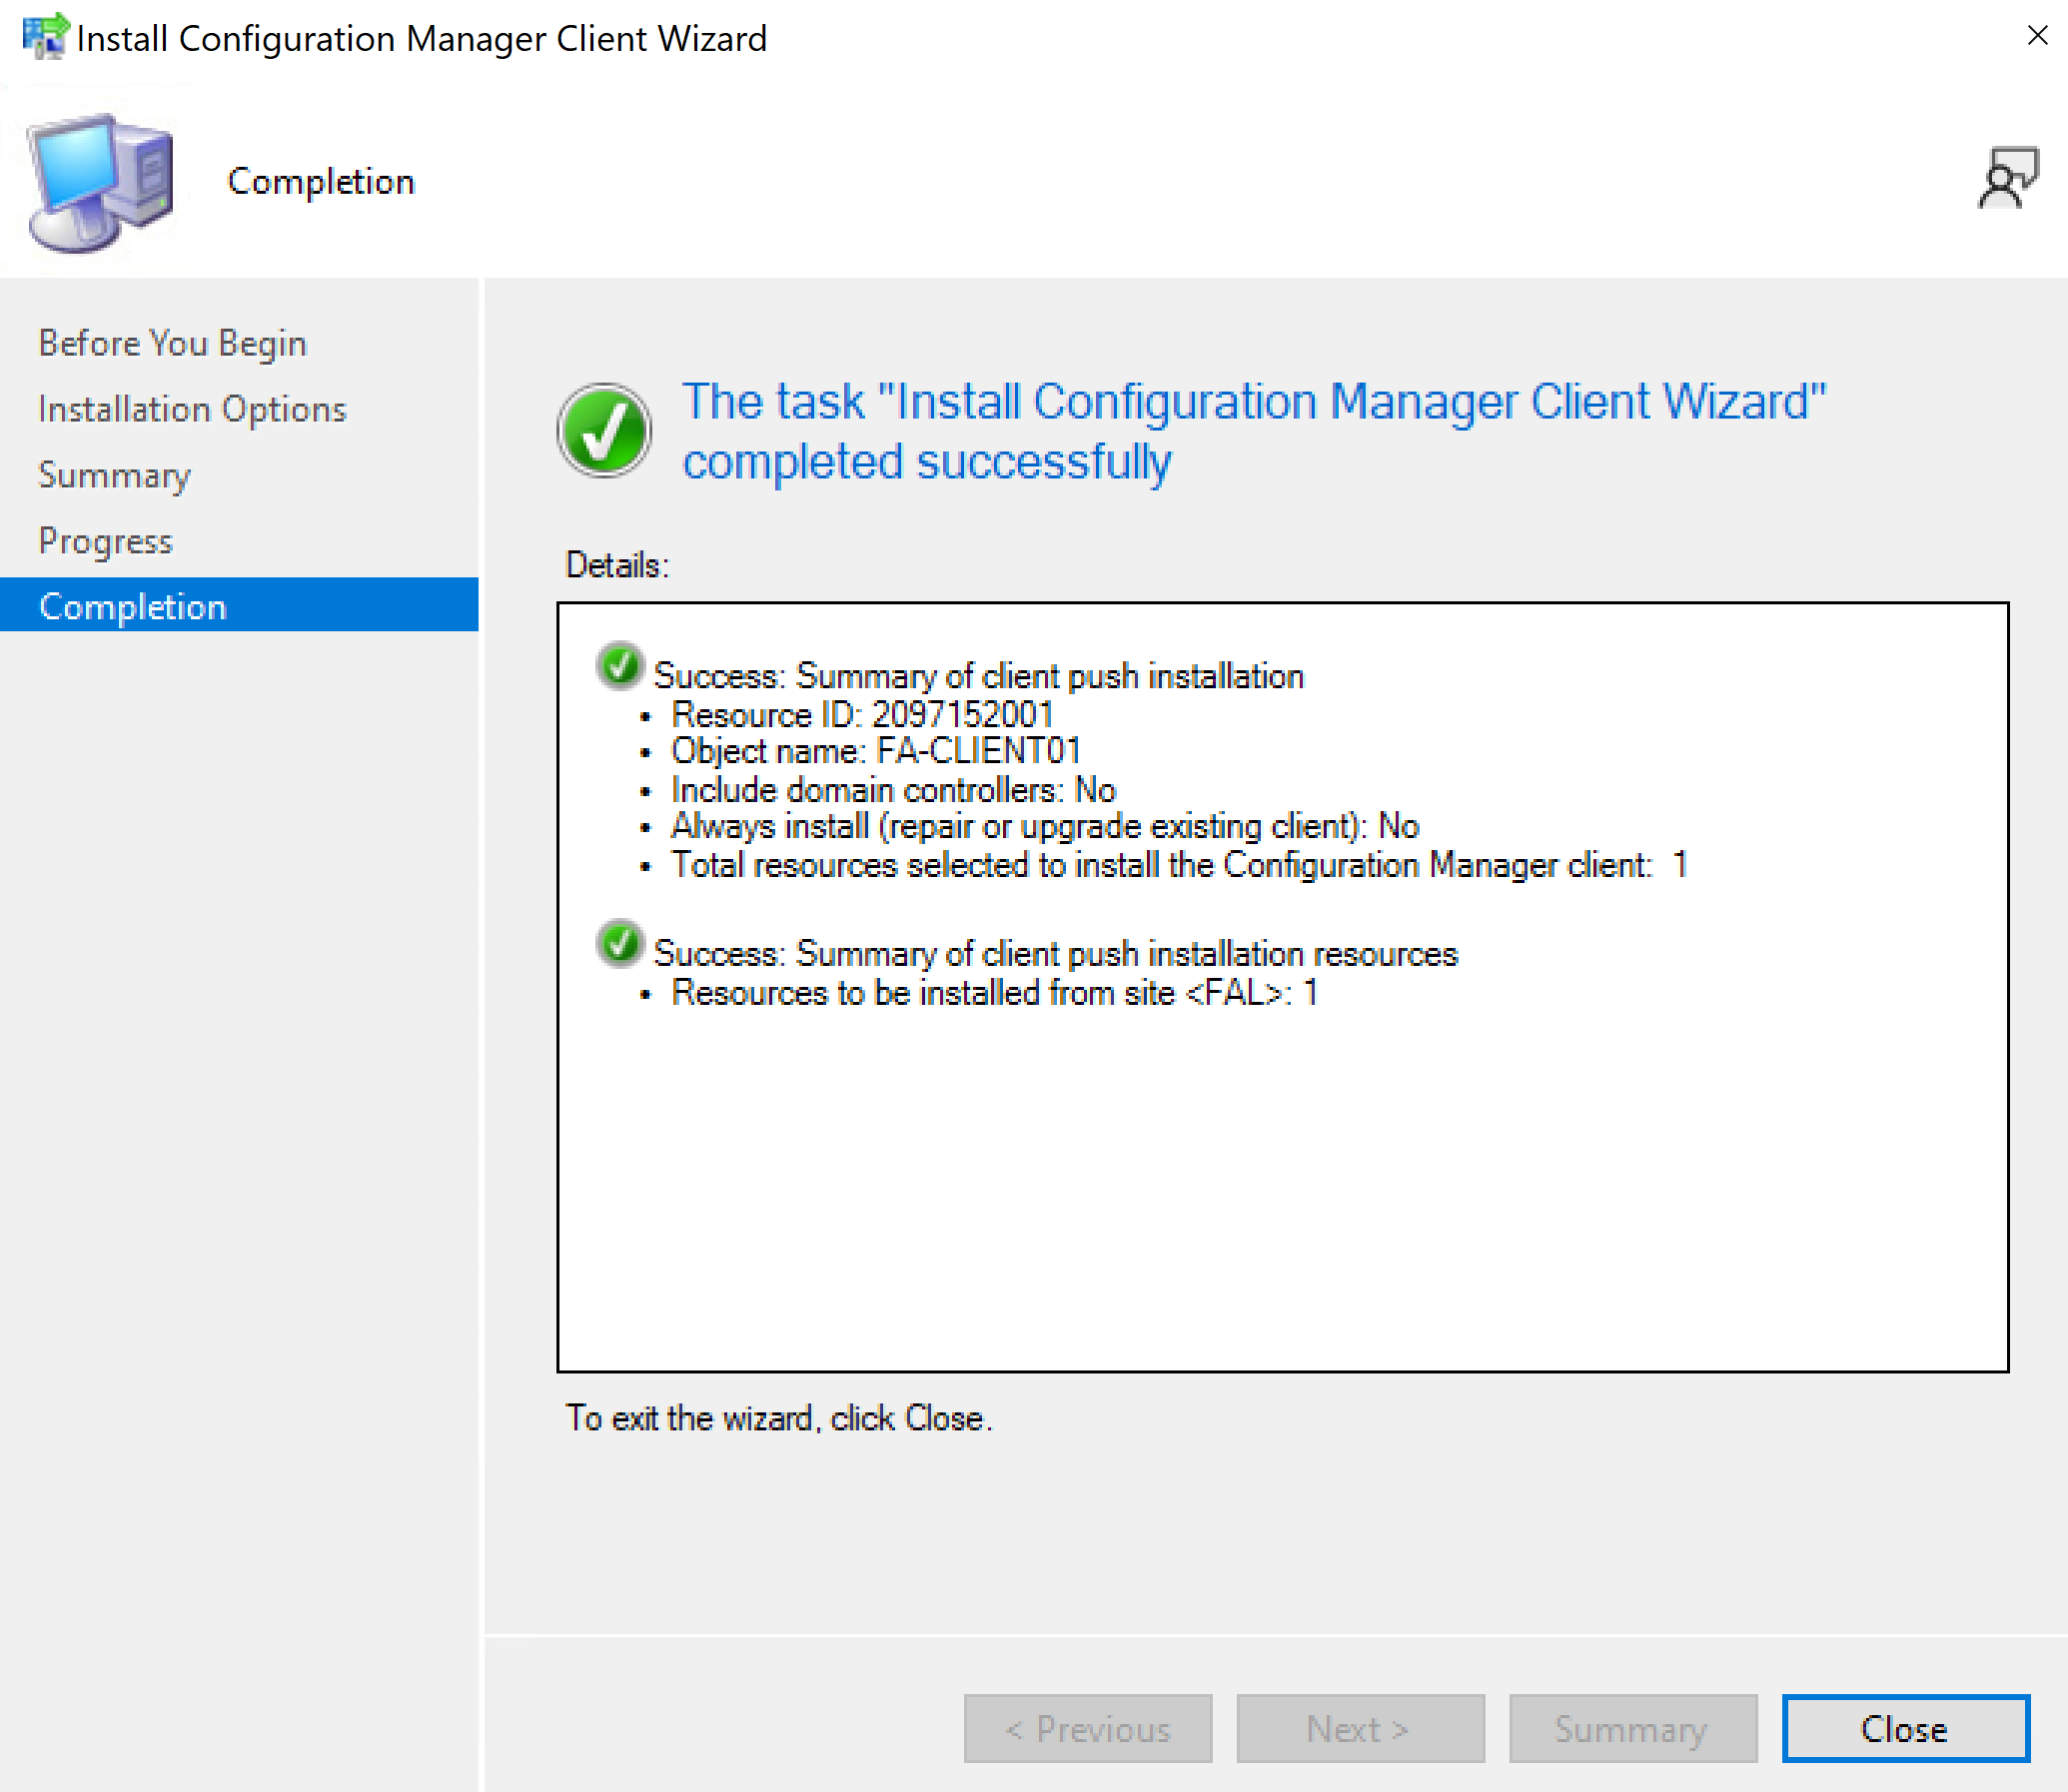
Navigate to: Assets and Compliance -> Right Click FA-Client01 -> Install Client
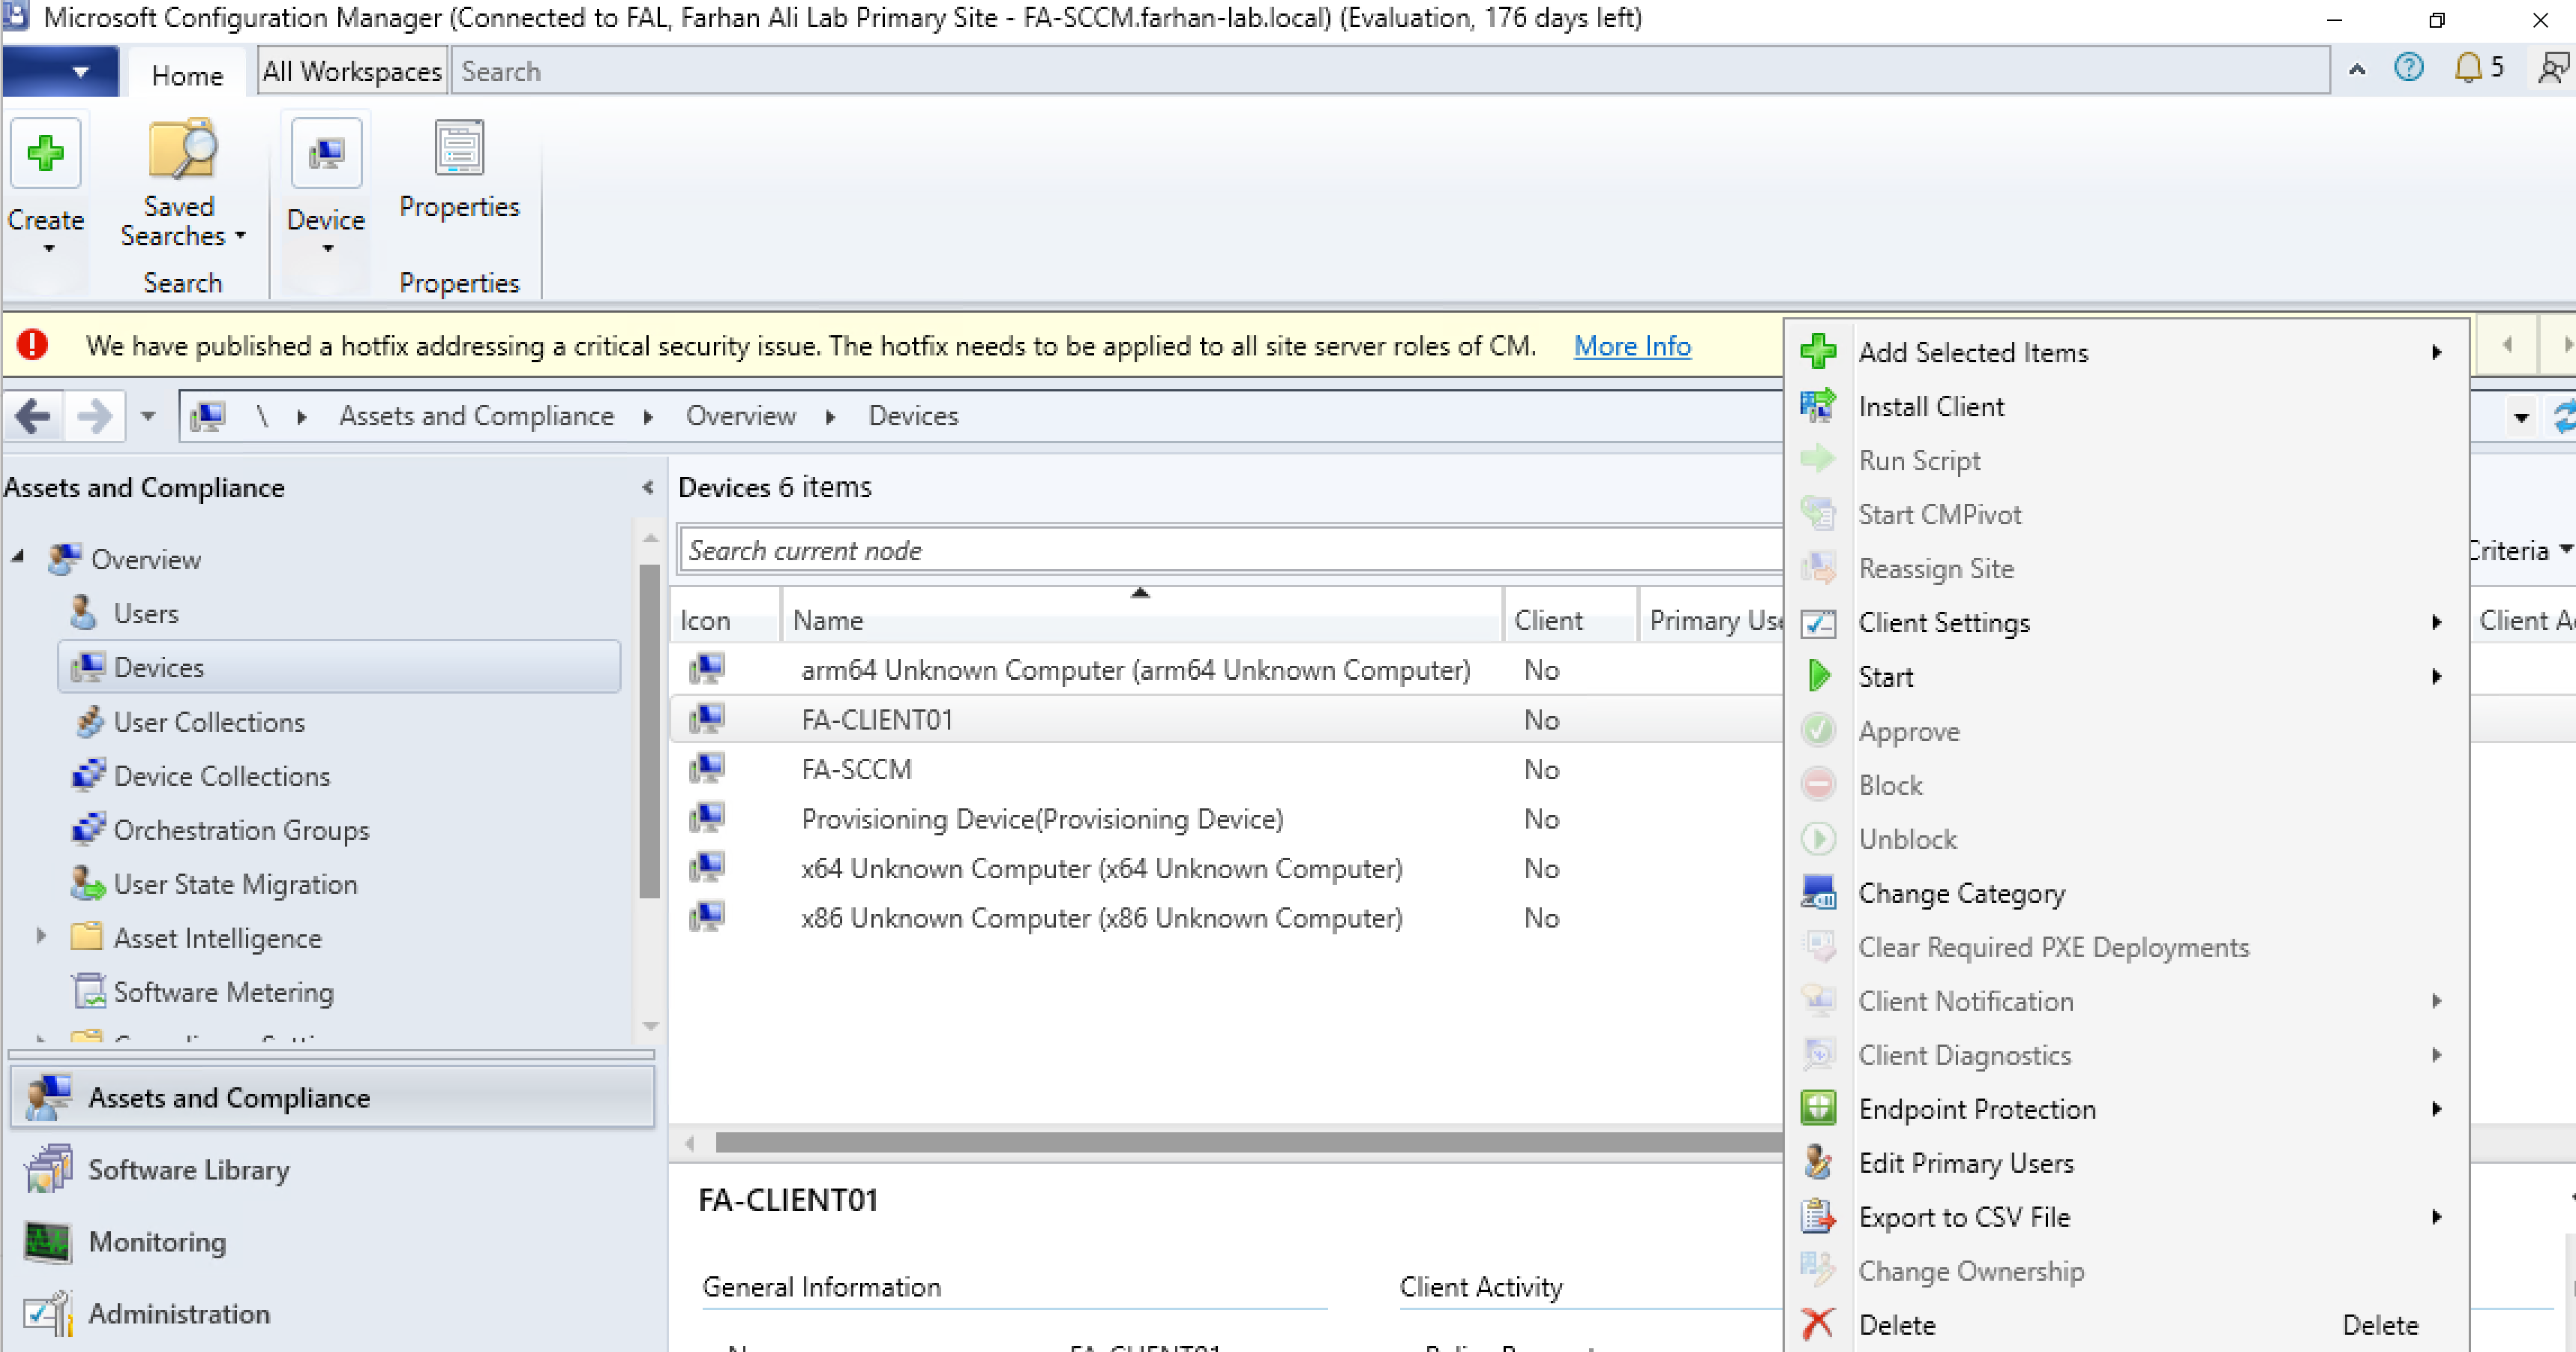
Keep the defaults while installing configuration manager client.
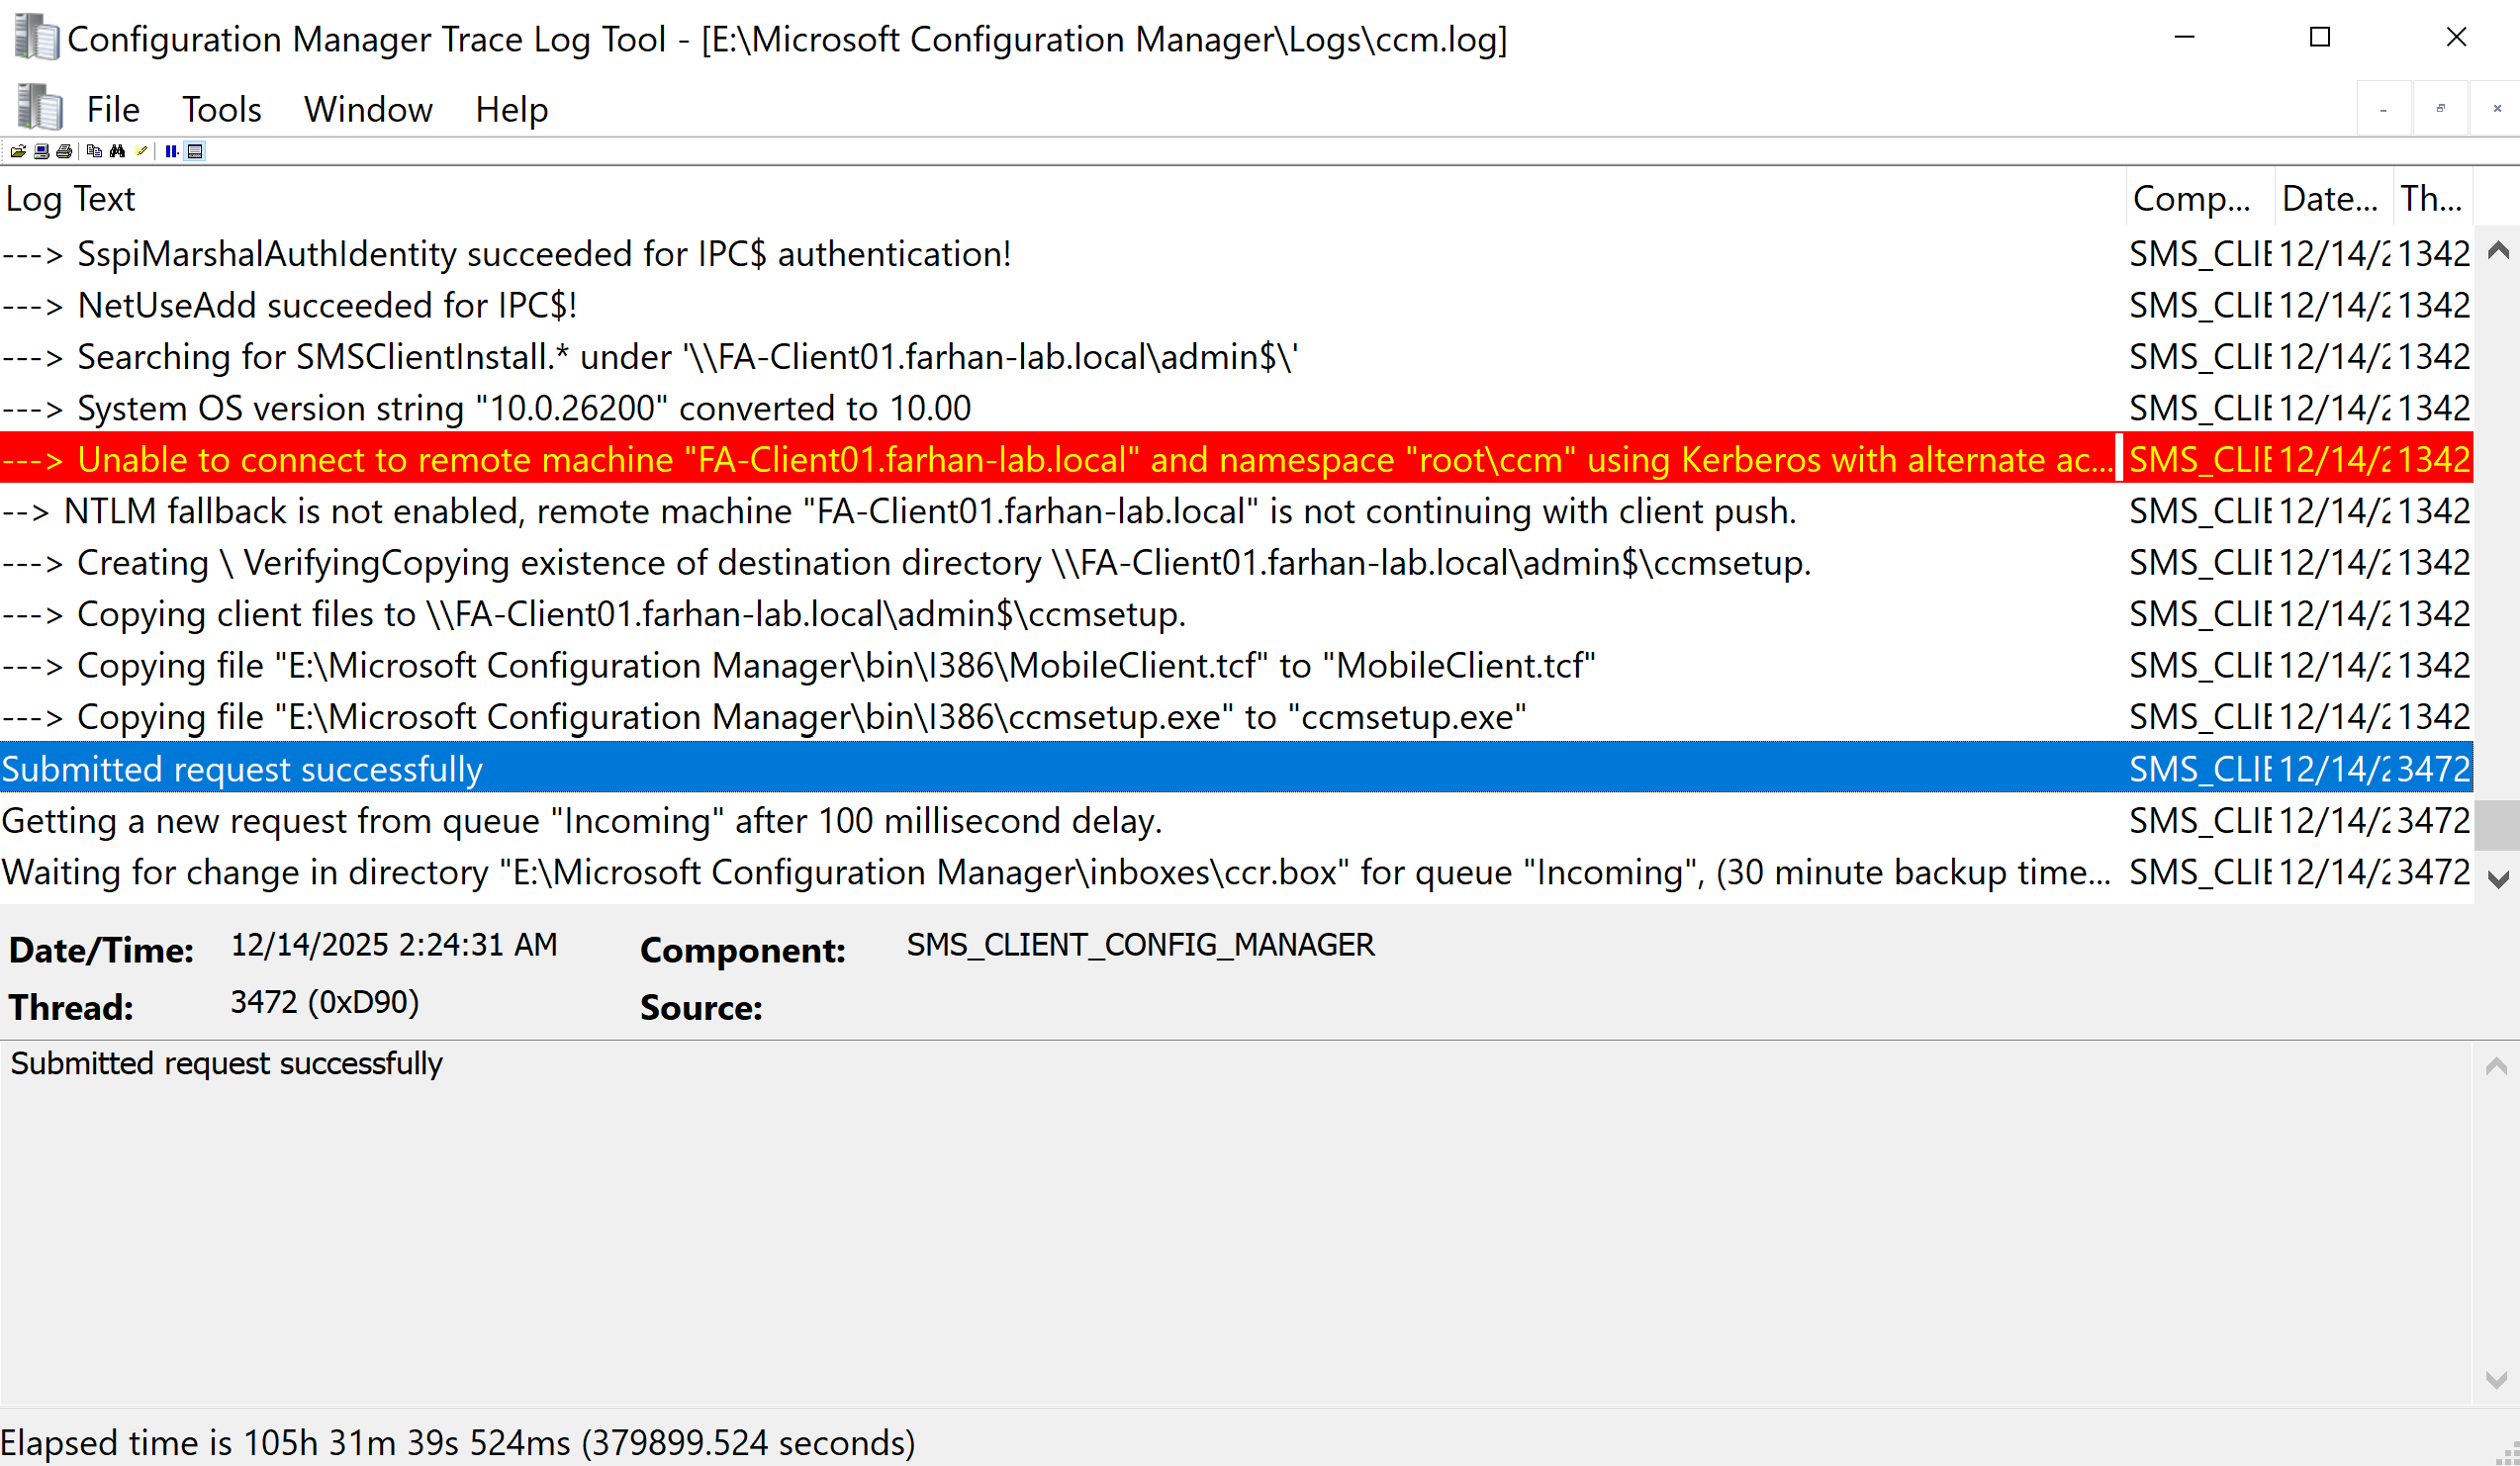
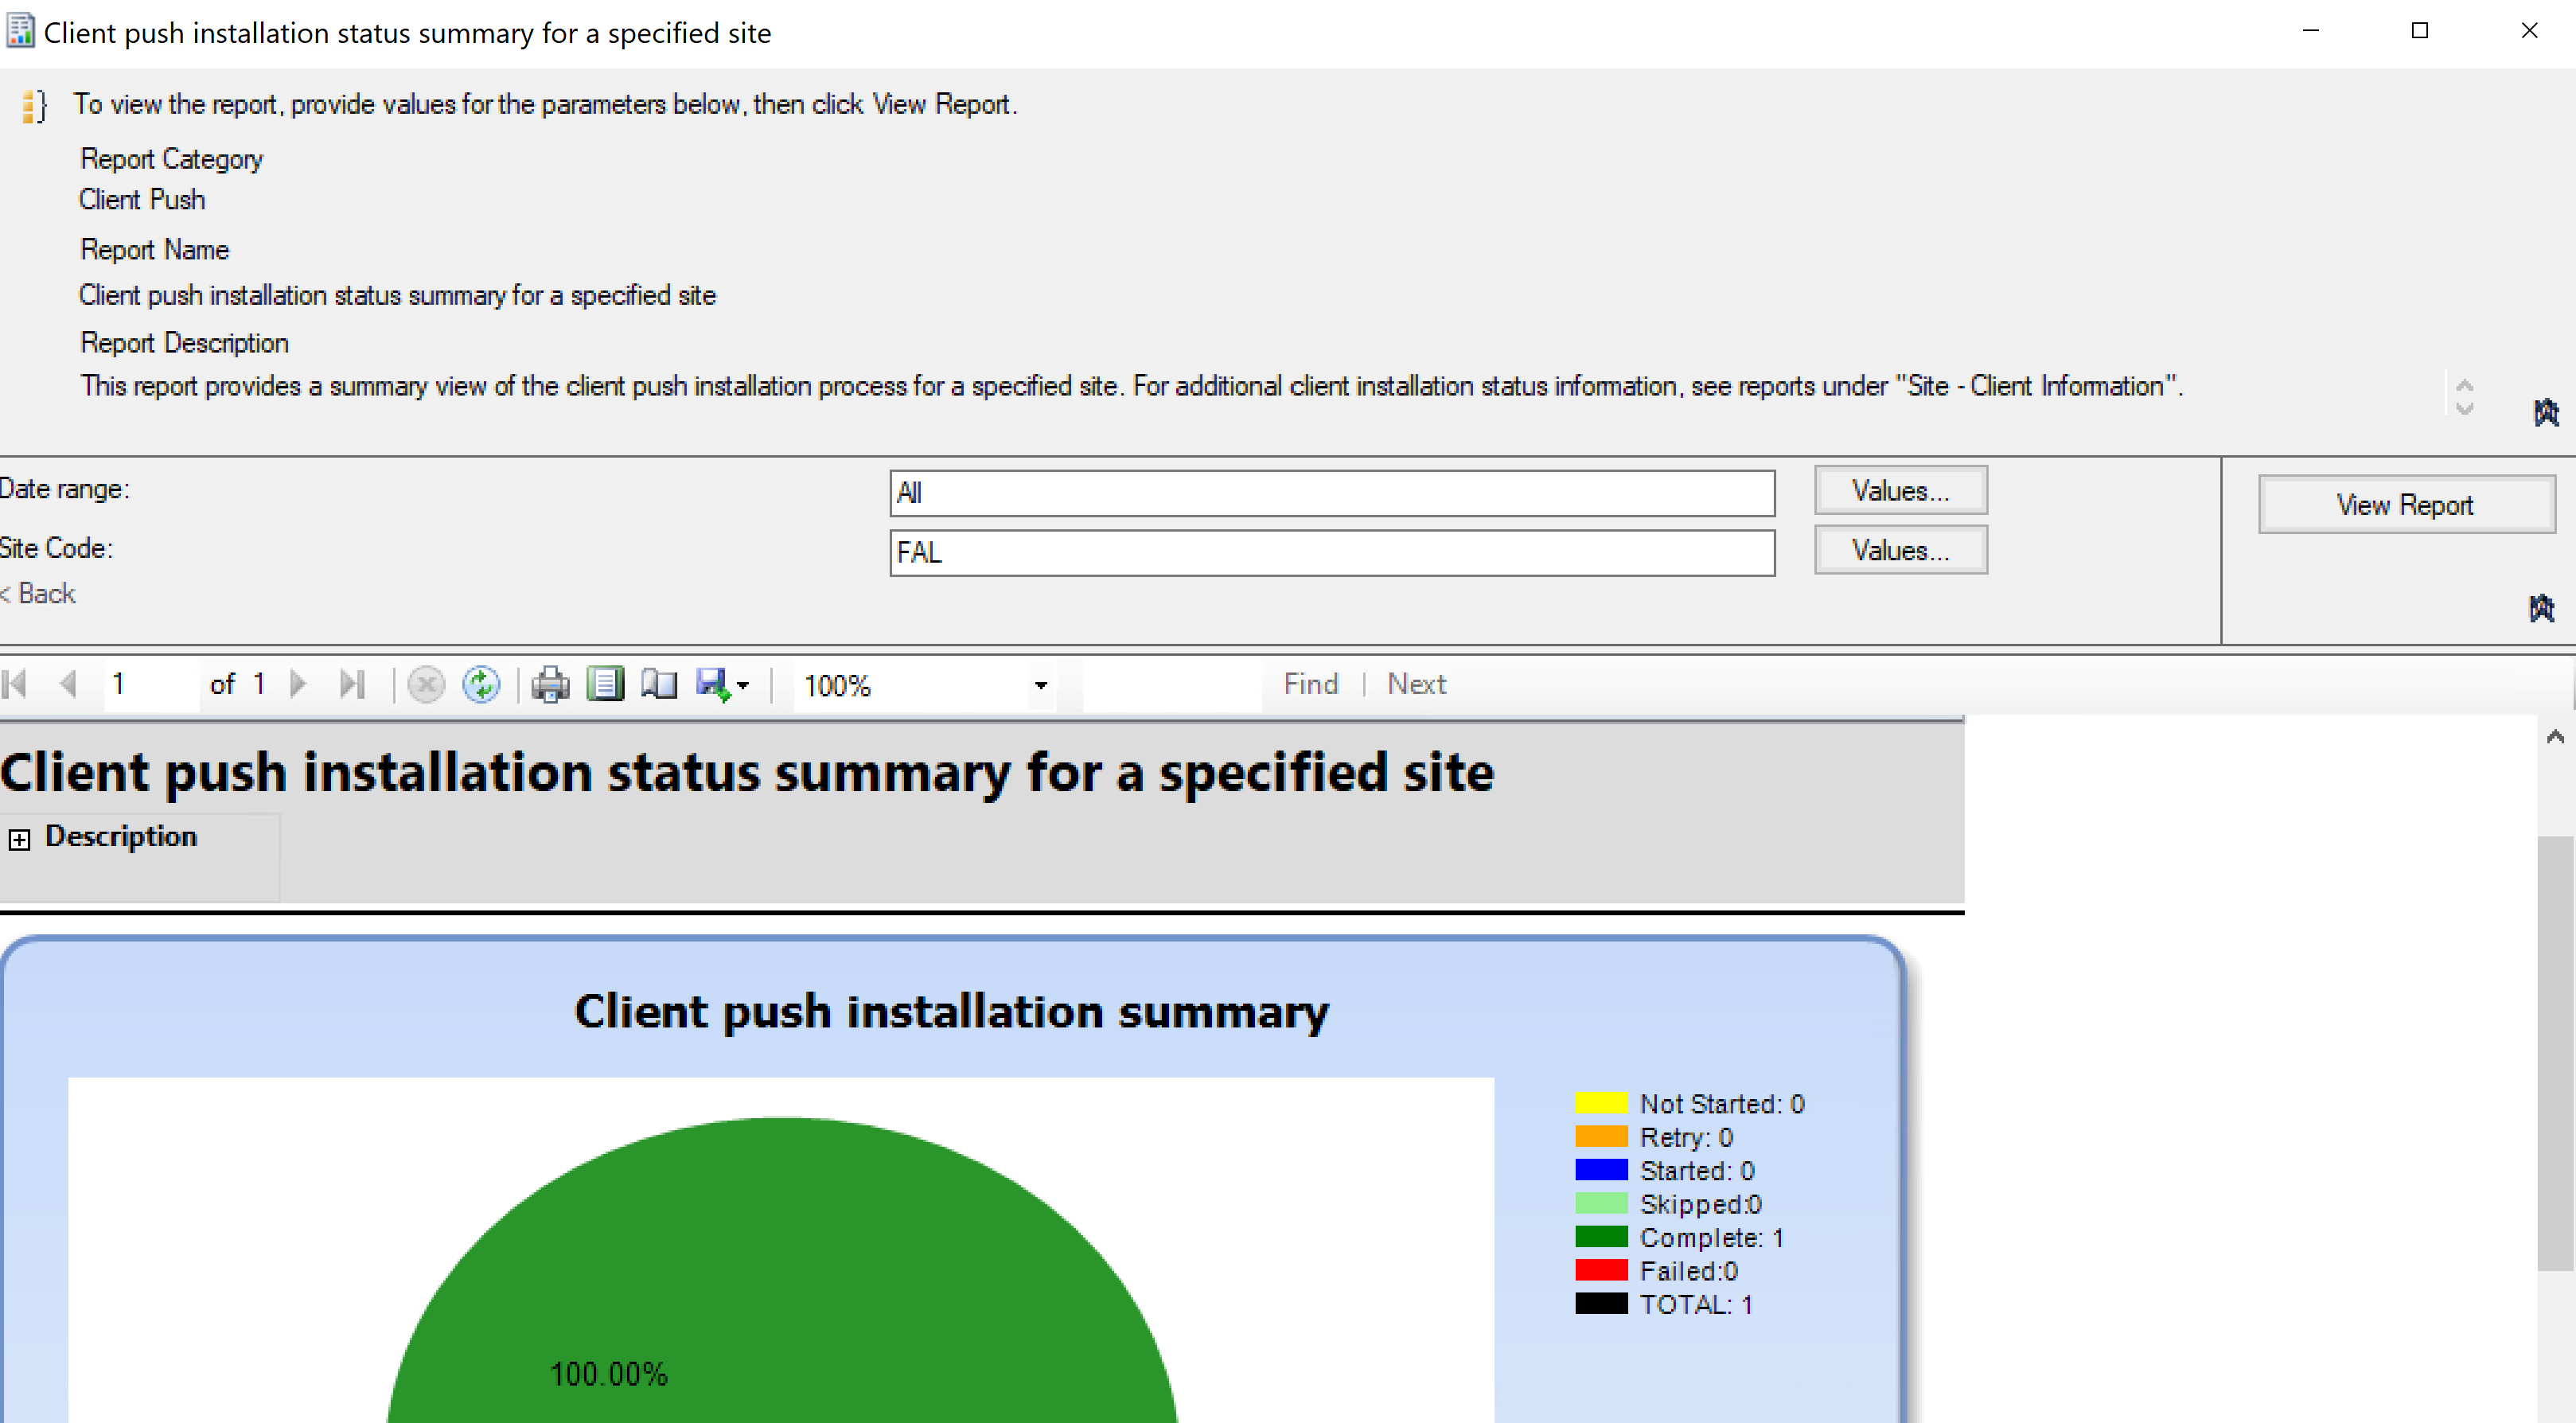
Review ccm.log file for client installation logs or review the client push report in configuration manager for detailed status.
Related Microsoft Documentation
- Client Push Installation Account: https://learn.microsoft.com/en-us/intune/configmgr/core/plan-design/hierarchy/accounts#client-push-installation-account
- Network Access Account: https://learn.microsoft.com/en-us/intune/configmgr/core/plan-design/hierarchy/accounts#client-push-installation-account
- Ports Used During Configuration Manager Client Deployment: https://learn.microsoft.com/en-us/intune/configmgr/core/clients/deploy/windows-firewall-and-port-settings-for-clients
- Learn how clients find site resources and services for System Center Configuration Manager: https://learn.microsoft.com/en-us/intune/configmgr/core/plan-design/hierarchy/understand-how-clients-find-site-resources-and-services
- Define site boundaries and boundary groups for System Center Configuration Manager: https://learn.microsoft.com/en-us/intune/configmgr/core/servers/deploy/configure/define-site-boundaries-and-boundary-groups
- About discovery methods for System Center Configuration Manager: https://learn.microsoft.com/en-us/intune/configmgr/core/servers/deploy/configure/about-discovery-methods
- Reporting Services Point Account: https://learn.microsoft.com/en-us/intune/configmgr/core/plan-design/hierarchy/accounts#client-push-installation-account
- Client installation methods in System Center Configuration Manager: https://learn.microsoft.com/en-us/intune/configmgr/core/clients/deploy/plan/client-installation-methods
- How To Install Clients With Client Push: https://learn.microsoft.com/en-us/intune/configmgr/core/clients/deploy/deploy-clients-to-windows-computers#BKMK_ClientPush
Other References
Shout out to my guy Justin Chalfant at Patch My PC, couldn’t have done it without his detailed guide: https://youtu.be/amrg_mlFvuk?si=KSHFS0FwOEqUkIzP